How to Backup Single or Multiple Mailboxes?
Backing up Office 365 is essential for every individual and company. The MailsDaddy Office 365 backup solution helps companies download emails and save them in various file formats such as PST, EML, MSG, and MBOX. Follow this guide to learn how to back up Office 365 mailboxes using MailsDaddy software.
How to Backup Single or Multiple Mailboxes? (12 Steps)
Click on any screenshot to view full resolution.
Download, Install, and Launch
Download, install, and launch the application. The software features a clean interface that is easy for both technical and non-technical users to navigate.
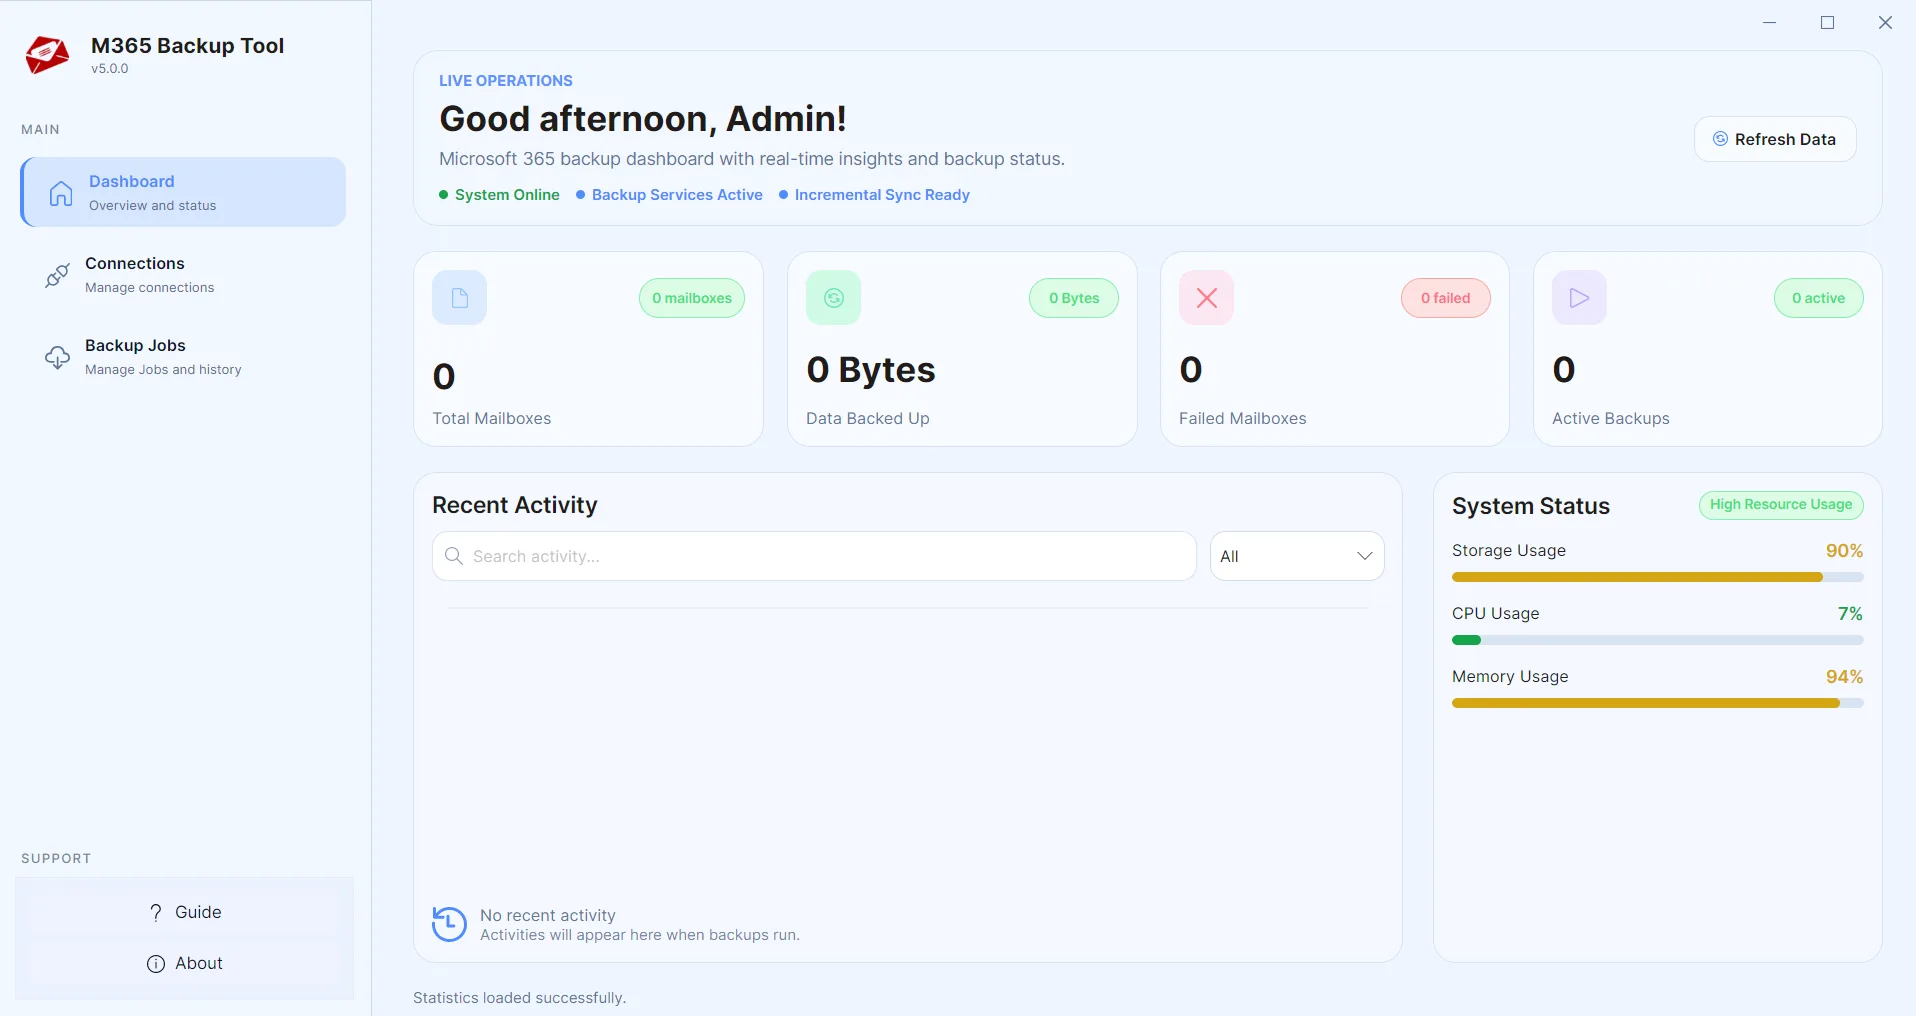
Establish Connection with Office 365
The first step is to establish a connection with Office 365. The application offers both manual and automated methods to complete the connection. Go to Connection tab and Click on Create Connection button.
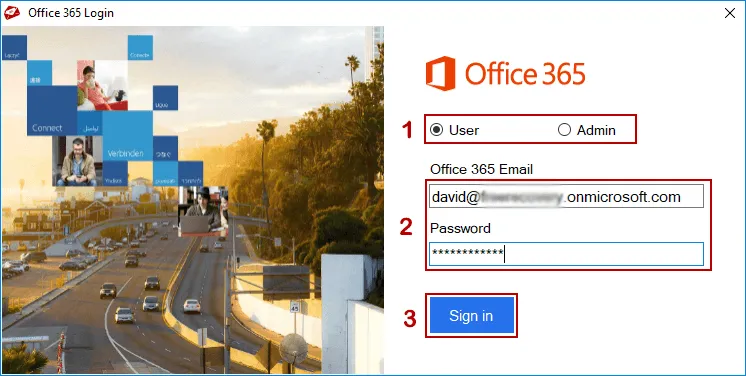
Administrator Login & Automated Setup
For both authentication methods, administrator login details are required to verify the account. Give a connection name and choose Automate setup.
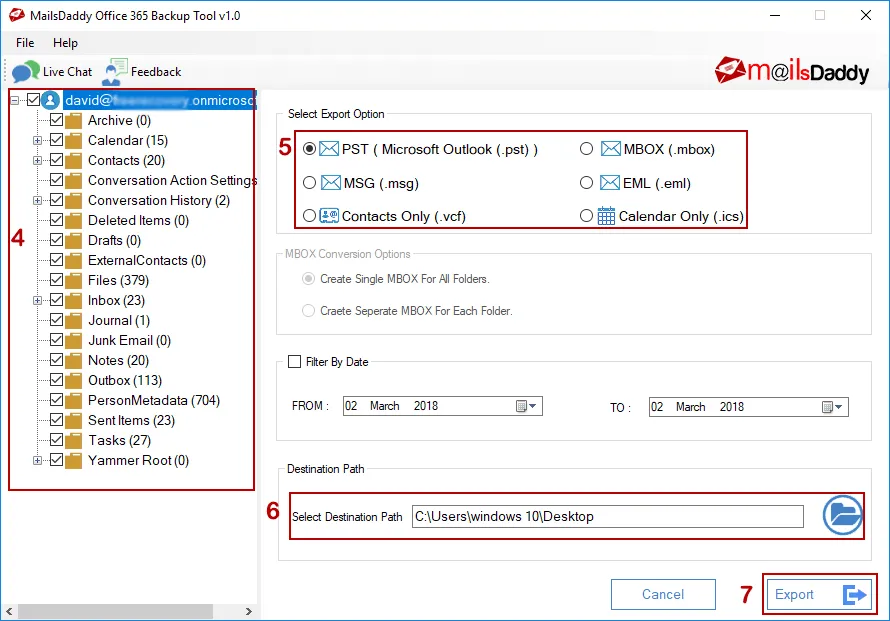
Manual Authentication (Azure App Registration)
For manual authentication, the user needs the following details to verify the Microsoft 365 account: Tenant ID, Client ID, Secret Value, and the Global admin email.
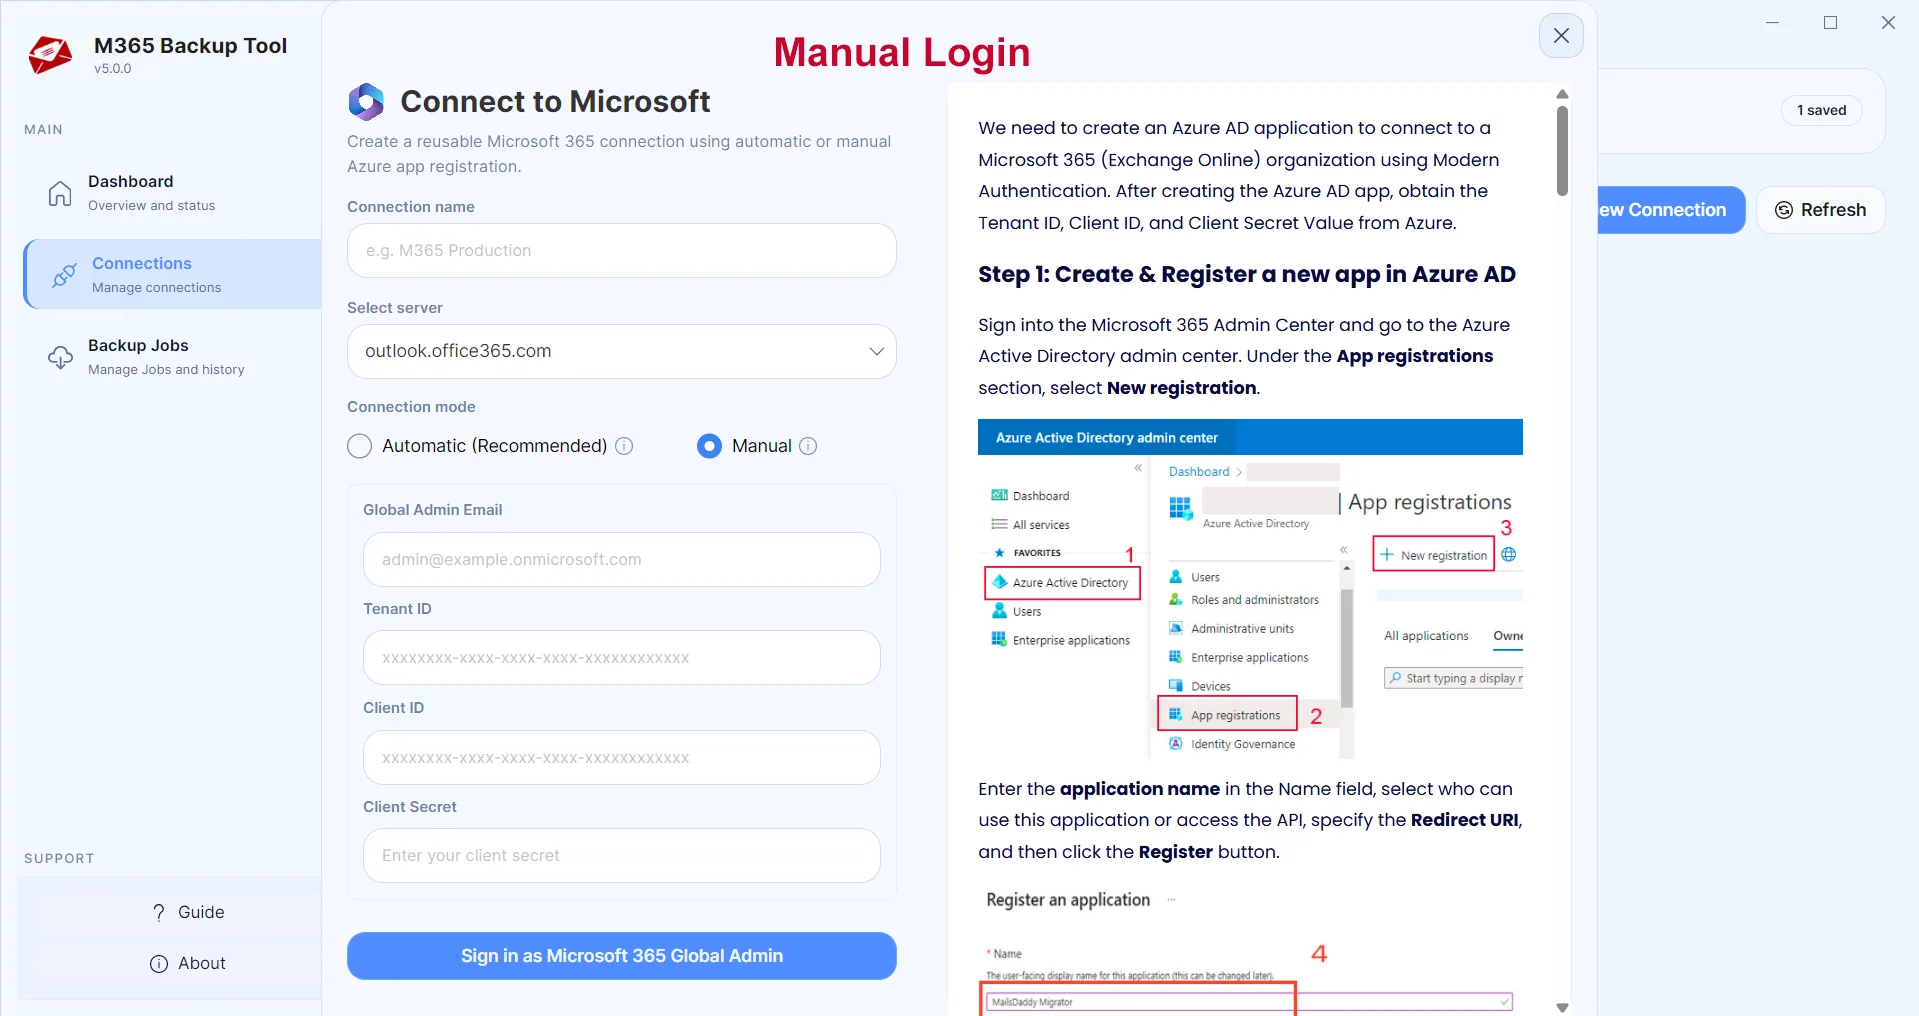
Authenticate Your Microsoft 365 Account
Authenticate your Microsoft 365 account with administrator credentials and click the Continue button to complete authentication.

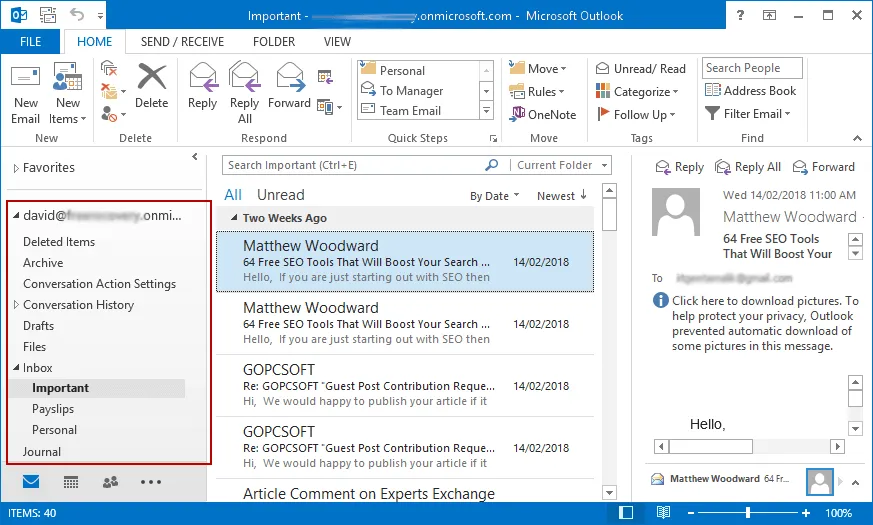
Create Backup Job
The next step is to create a job. Go to the Backup Job section and click on Create Backup Job.
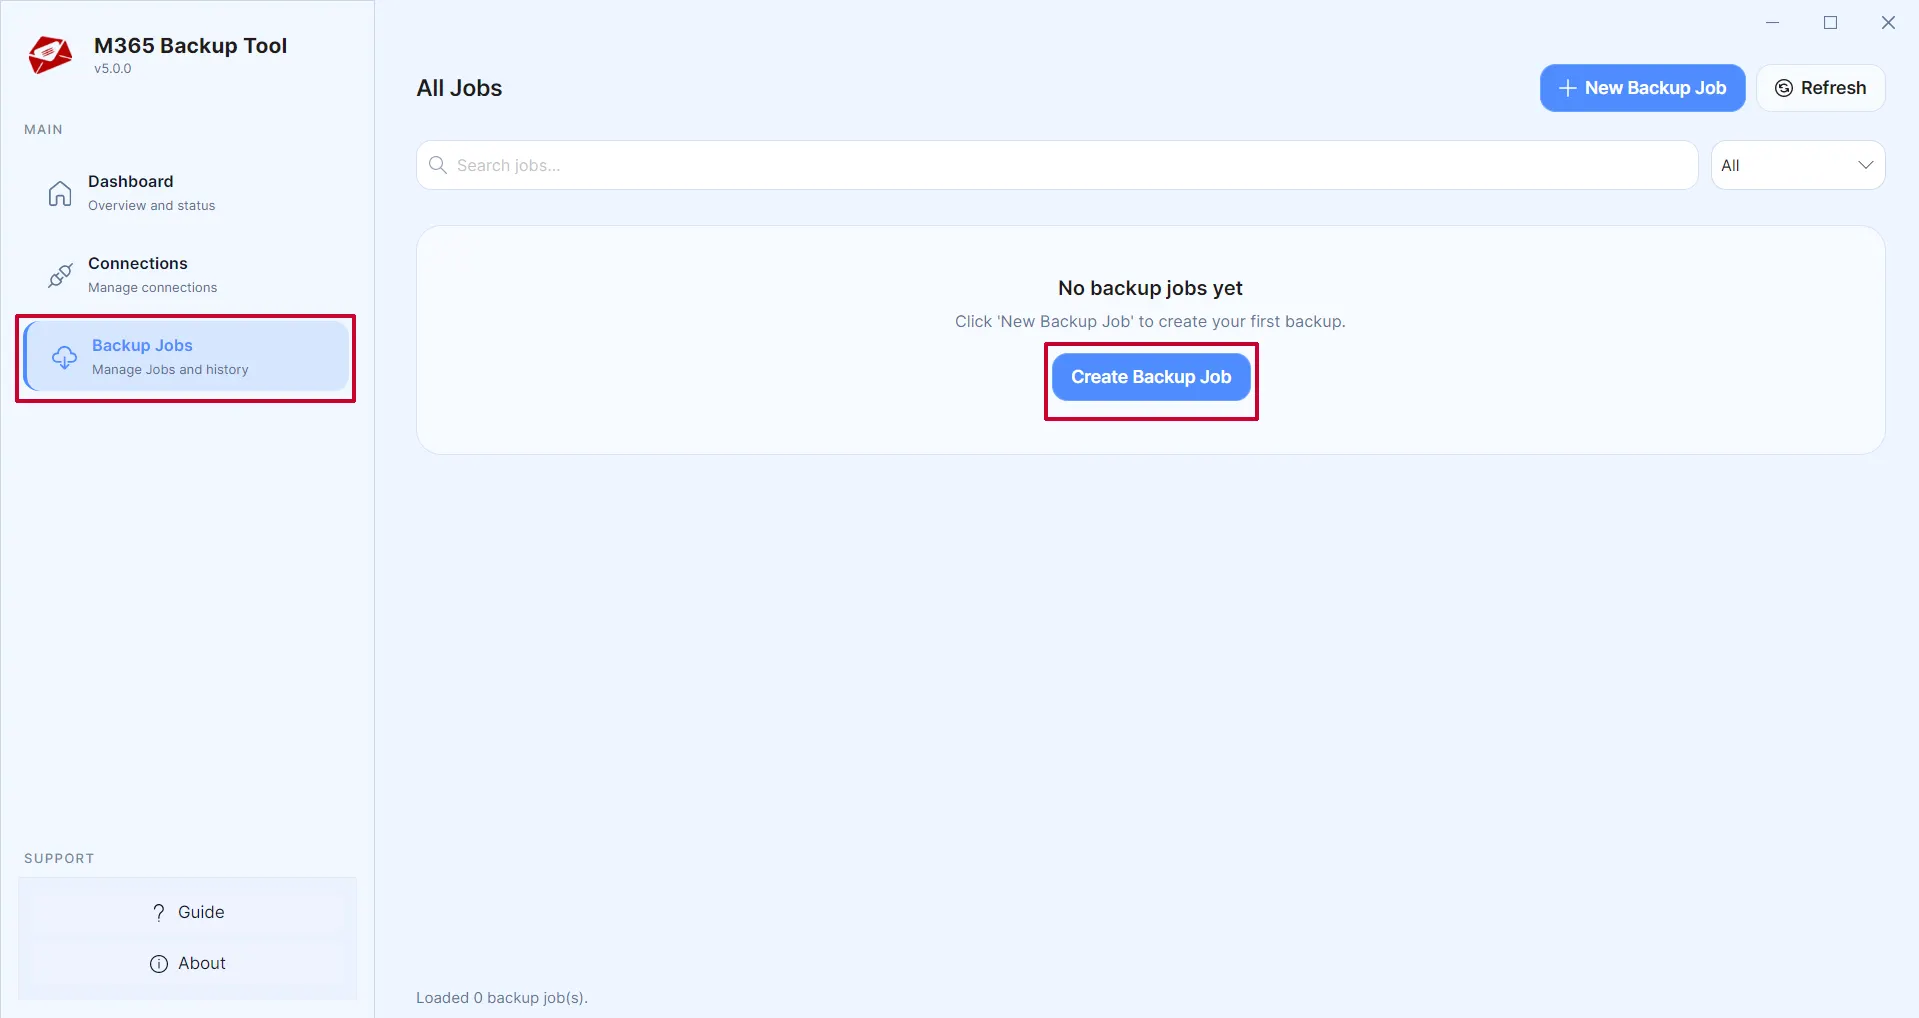
Select Connection and Mailbox Type
Select the Connection and choose the mailbox type from the drop-down menu: Primary, In-place archive, or Group mailbox, then click Next.
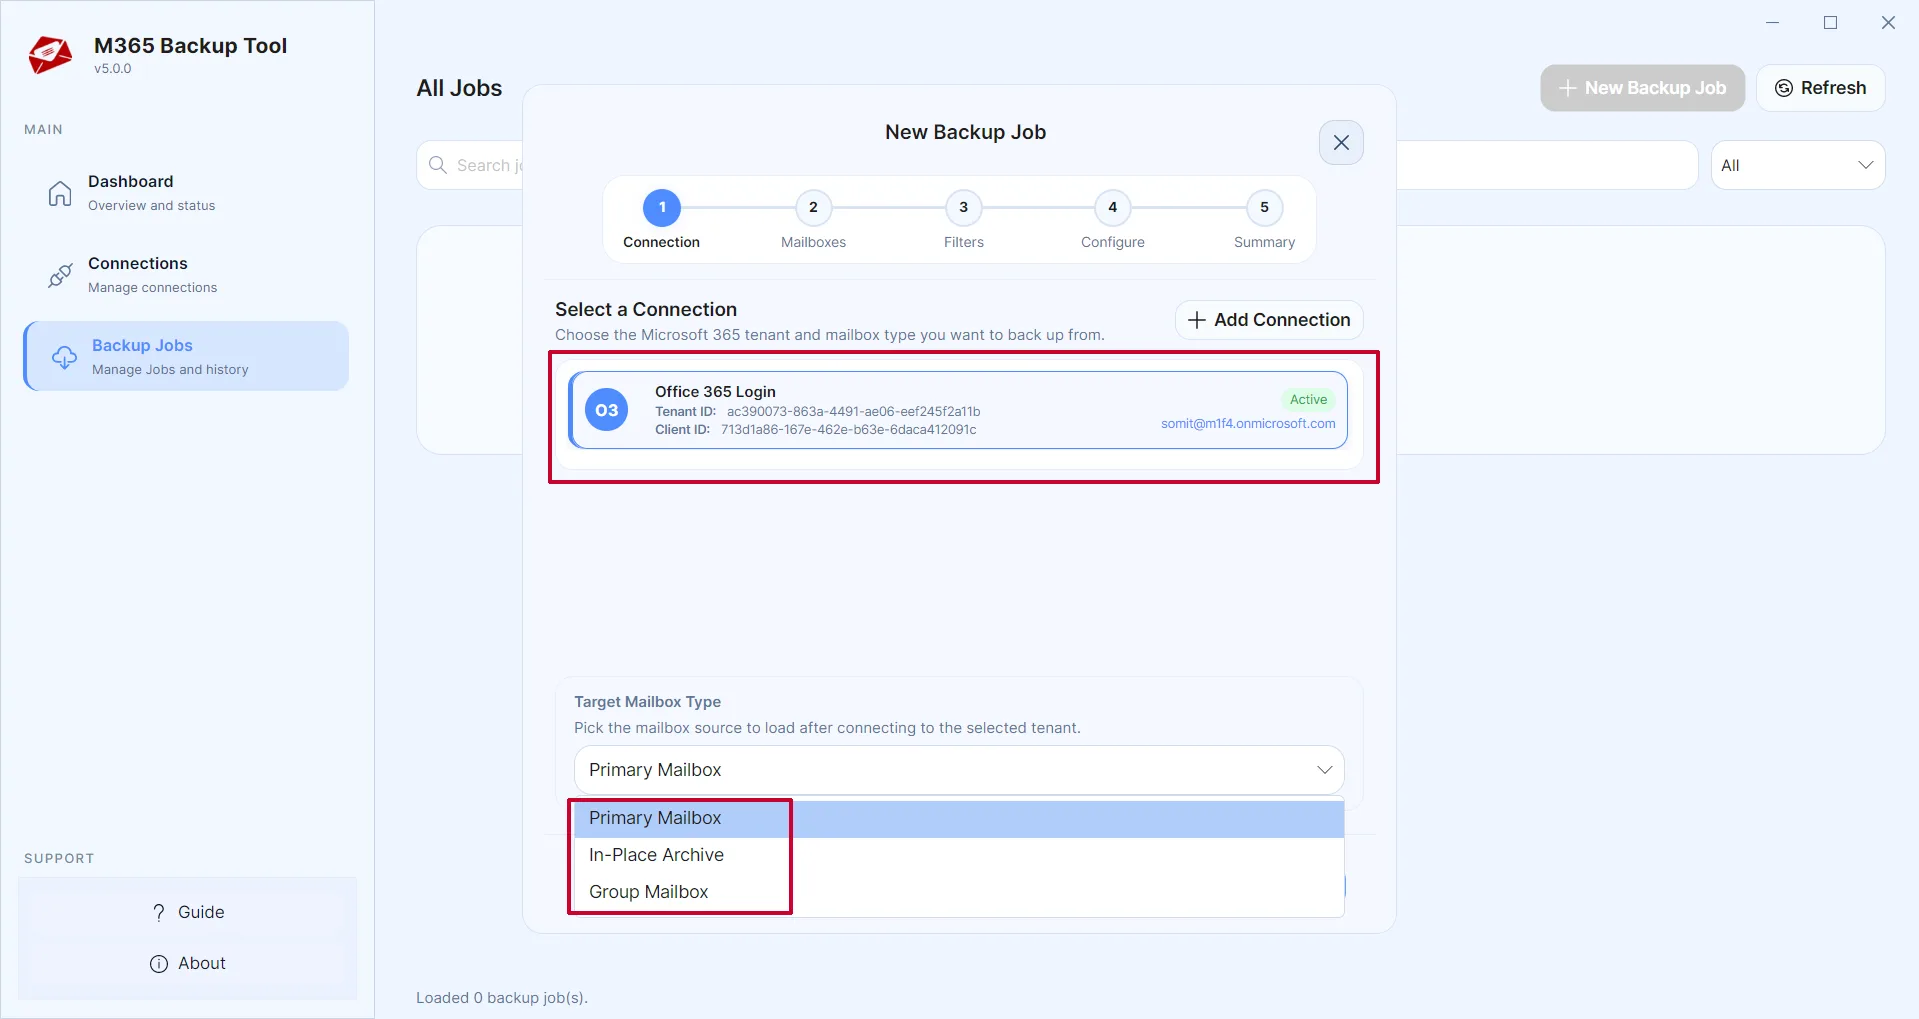
Select Mailboxes & Filter Accounts
Select all, filtered, or specific user accounts, and then click Next. You can also apply filters using the drop-down menu and choose Only Admins, Only Users and Shared mailbox.
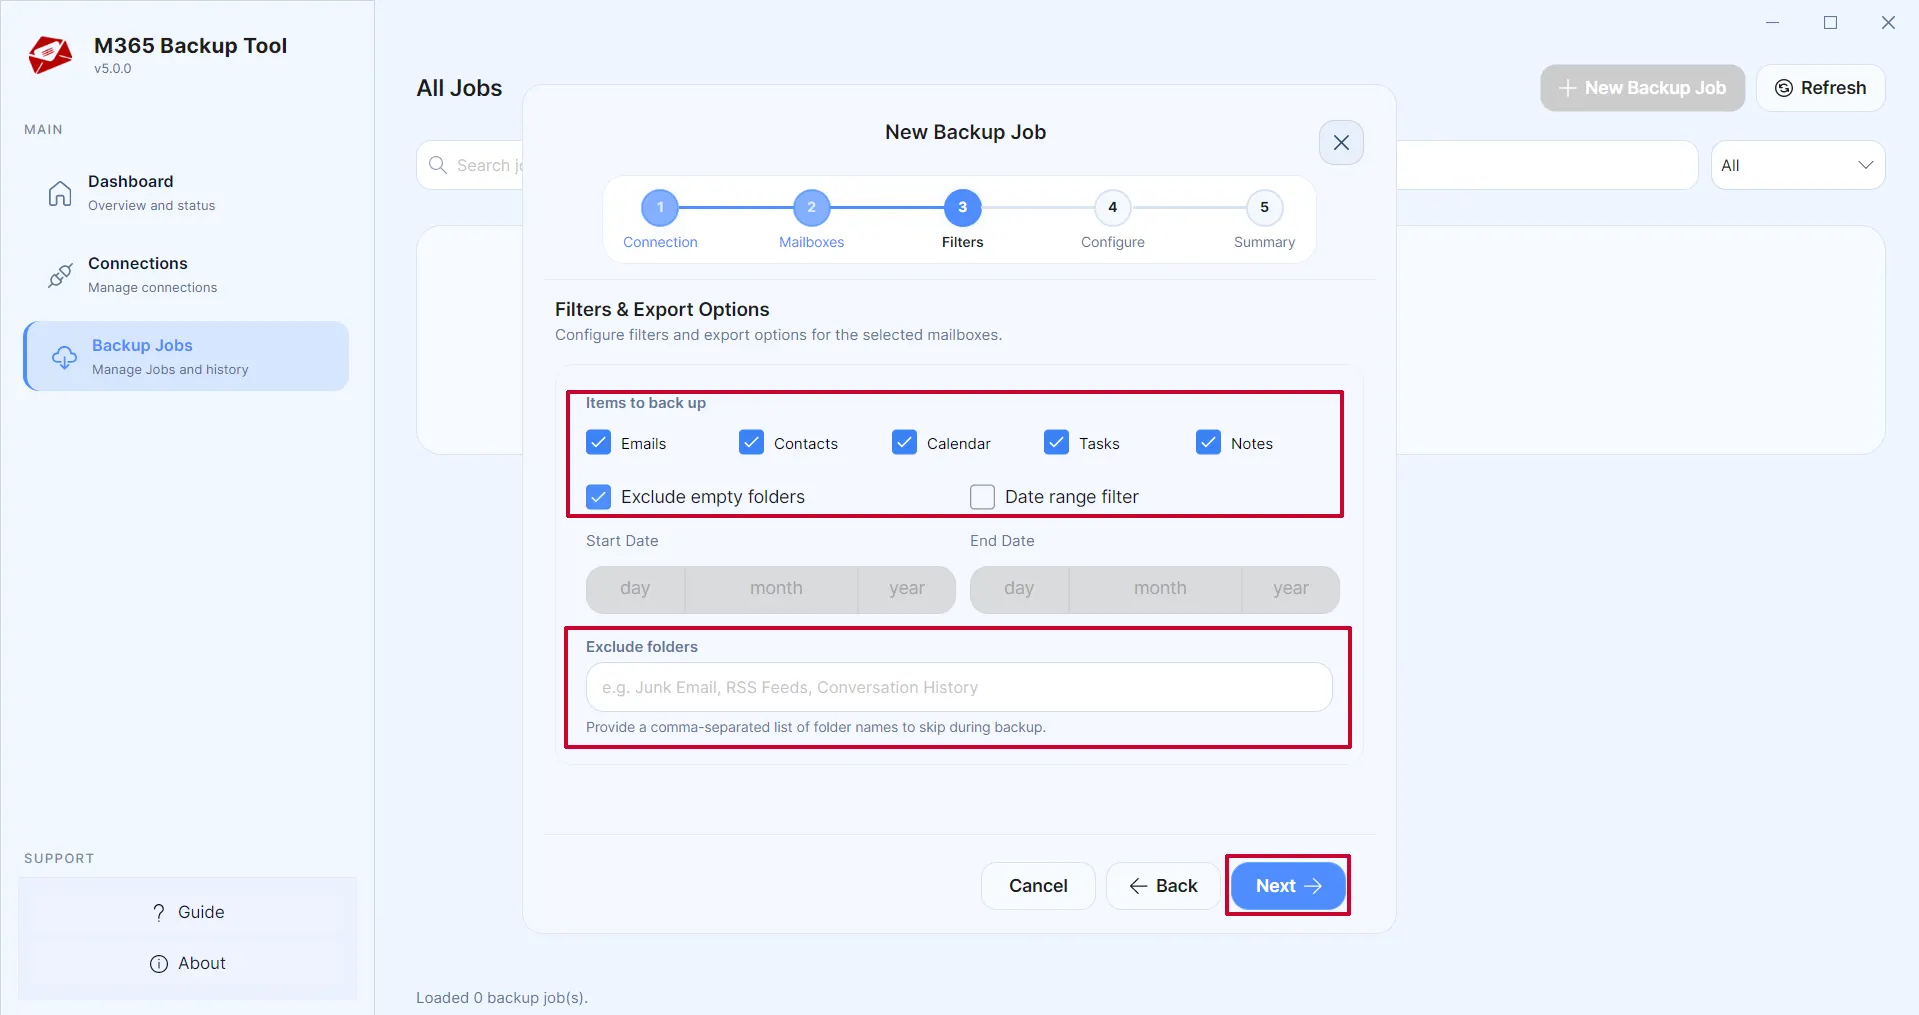
Select Data Types & Apply Filters
Select your preferred or all data: Email, Contact, Calendar, Task. Exclude folder and Date filter are optional choices.
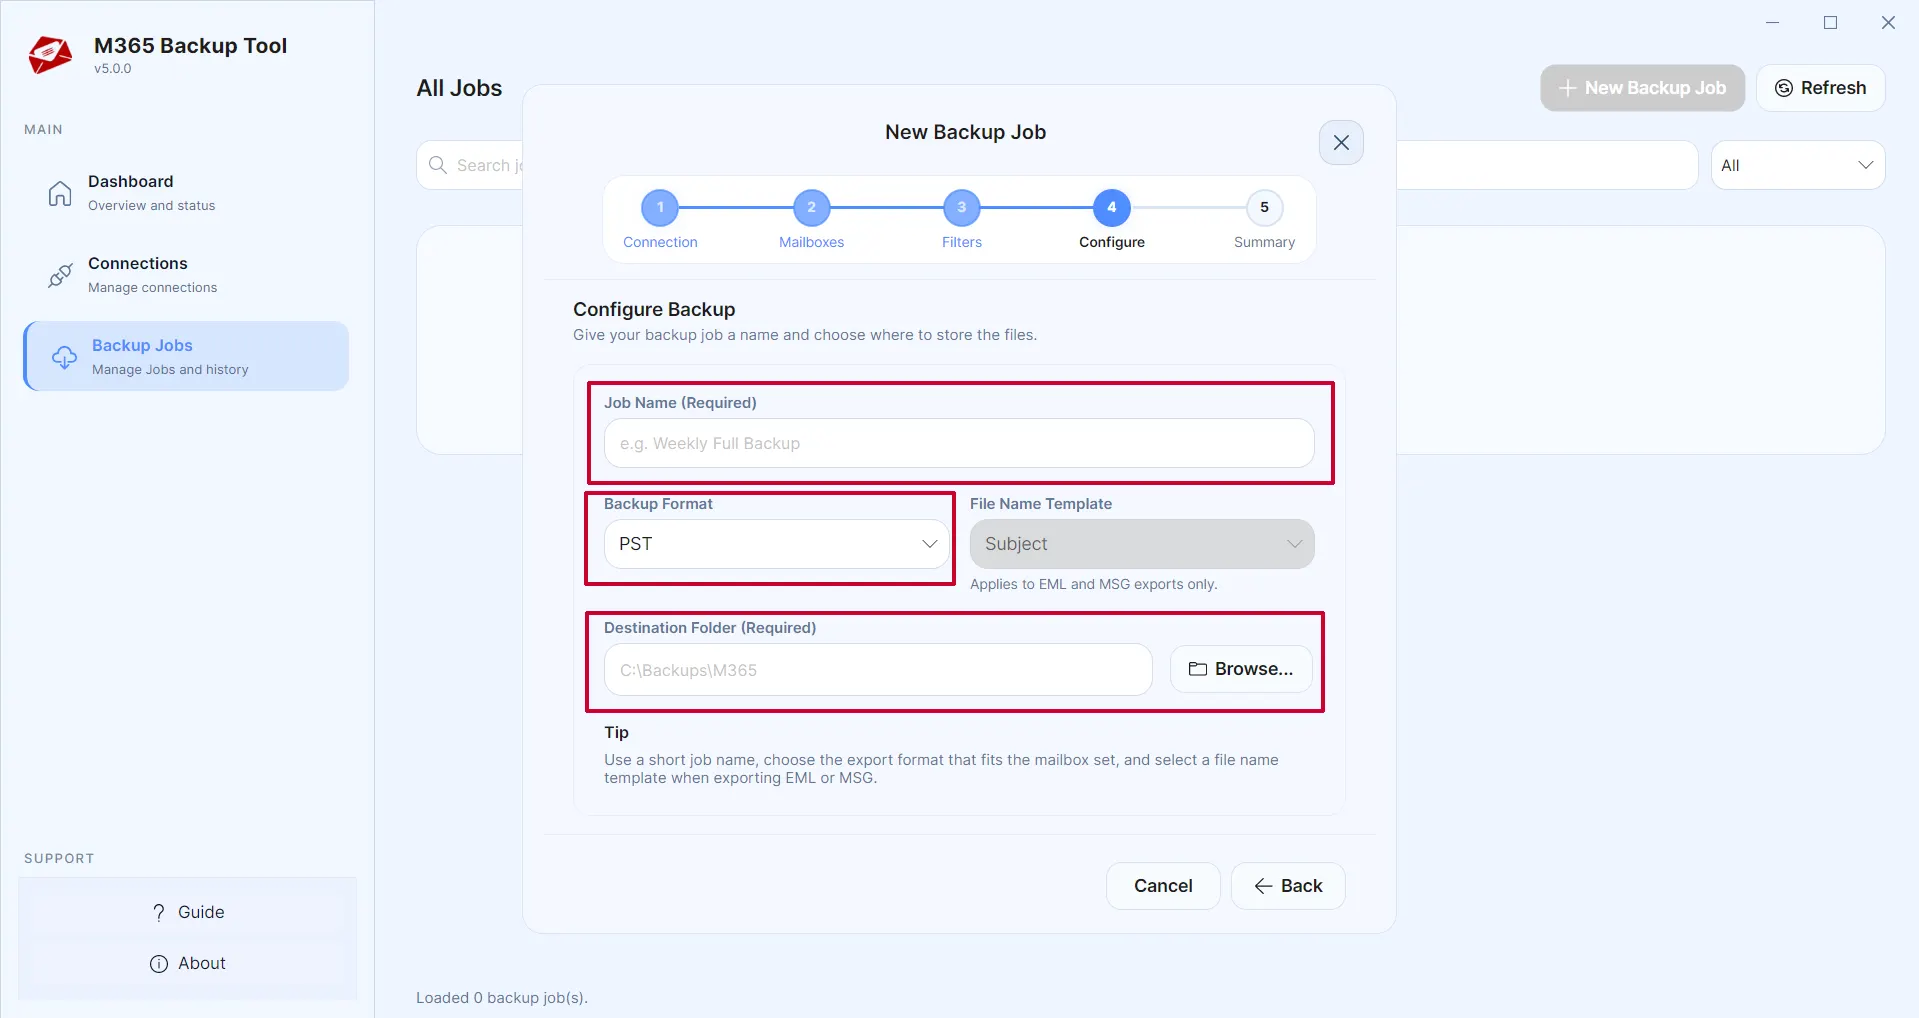
Configure Export Format & Destination Path
Enter a Job name, choose an export option: PST, EML, MSG, or MBOX from the drop-down menu, specify the file location, and click Next.
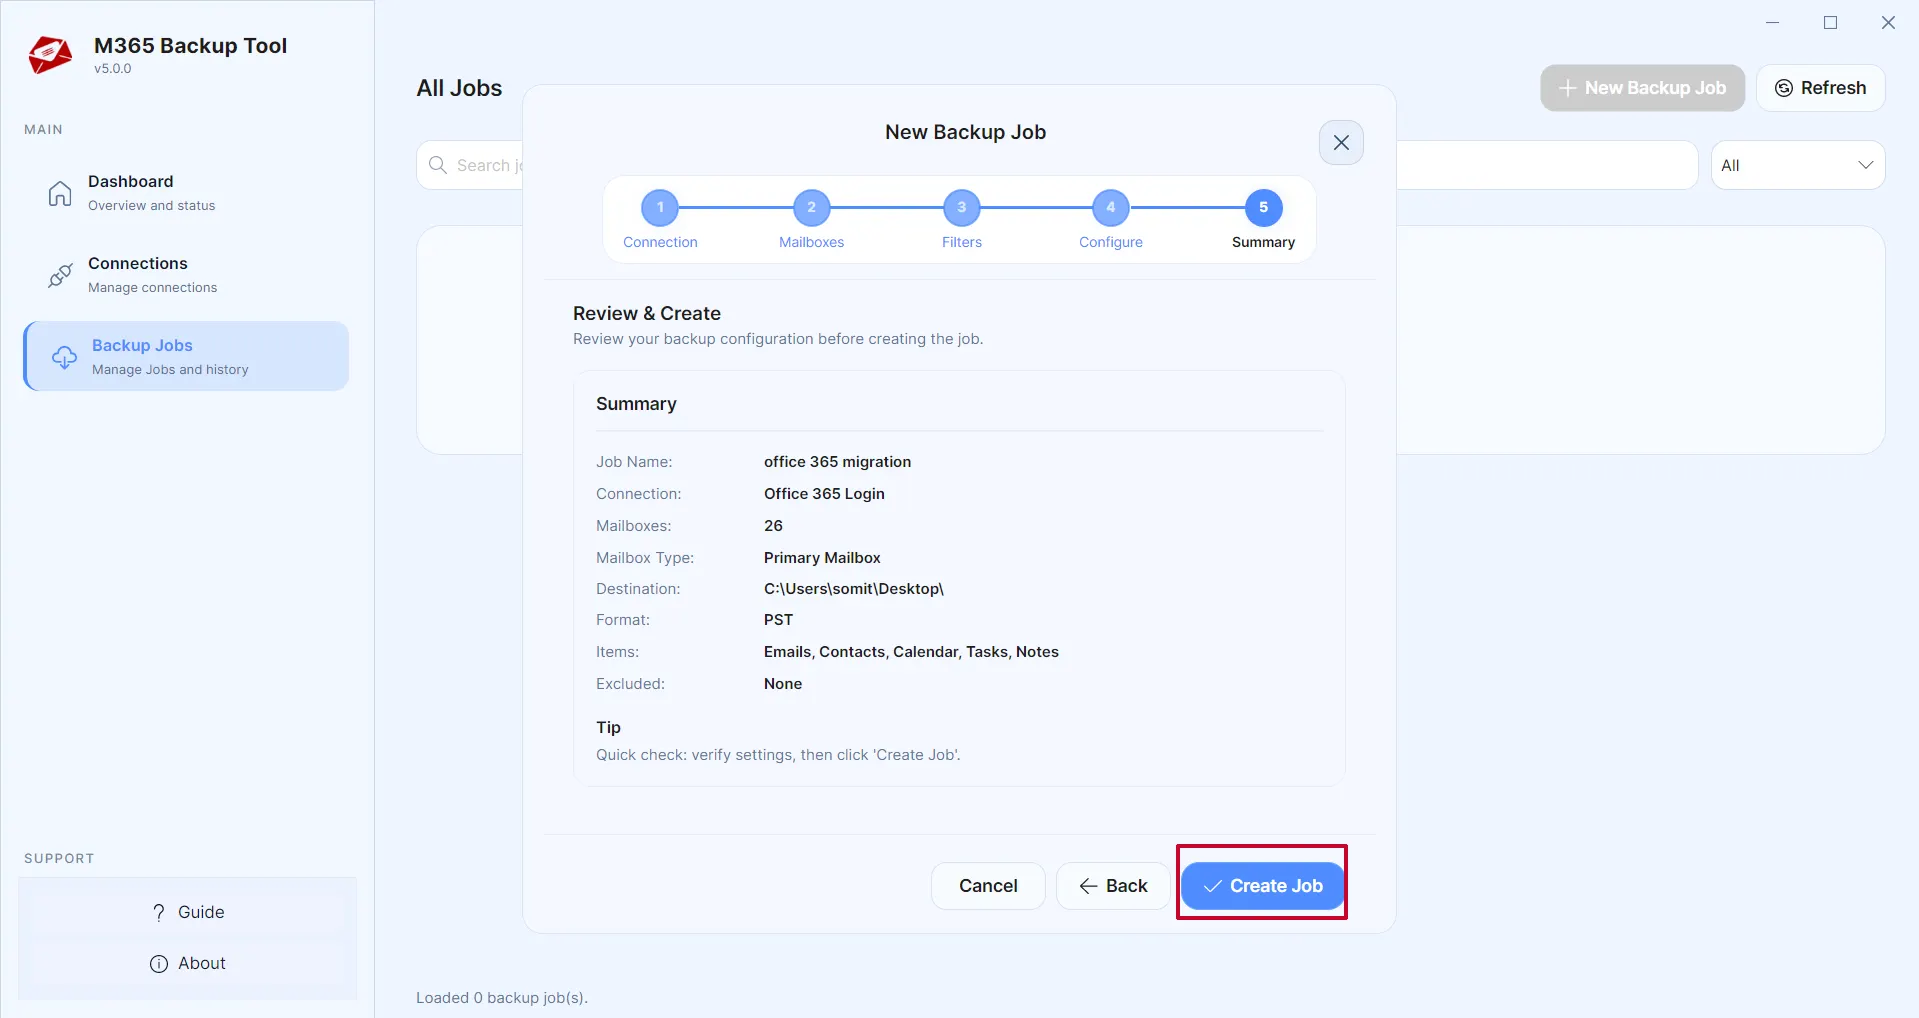
Review Configuration & Create Job
Review the configured backup parameters and click Create Job.
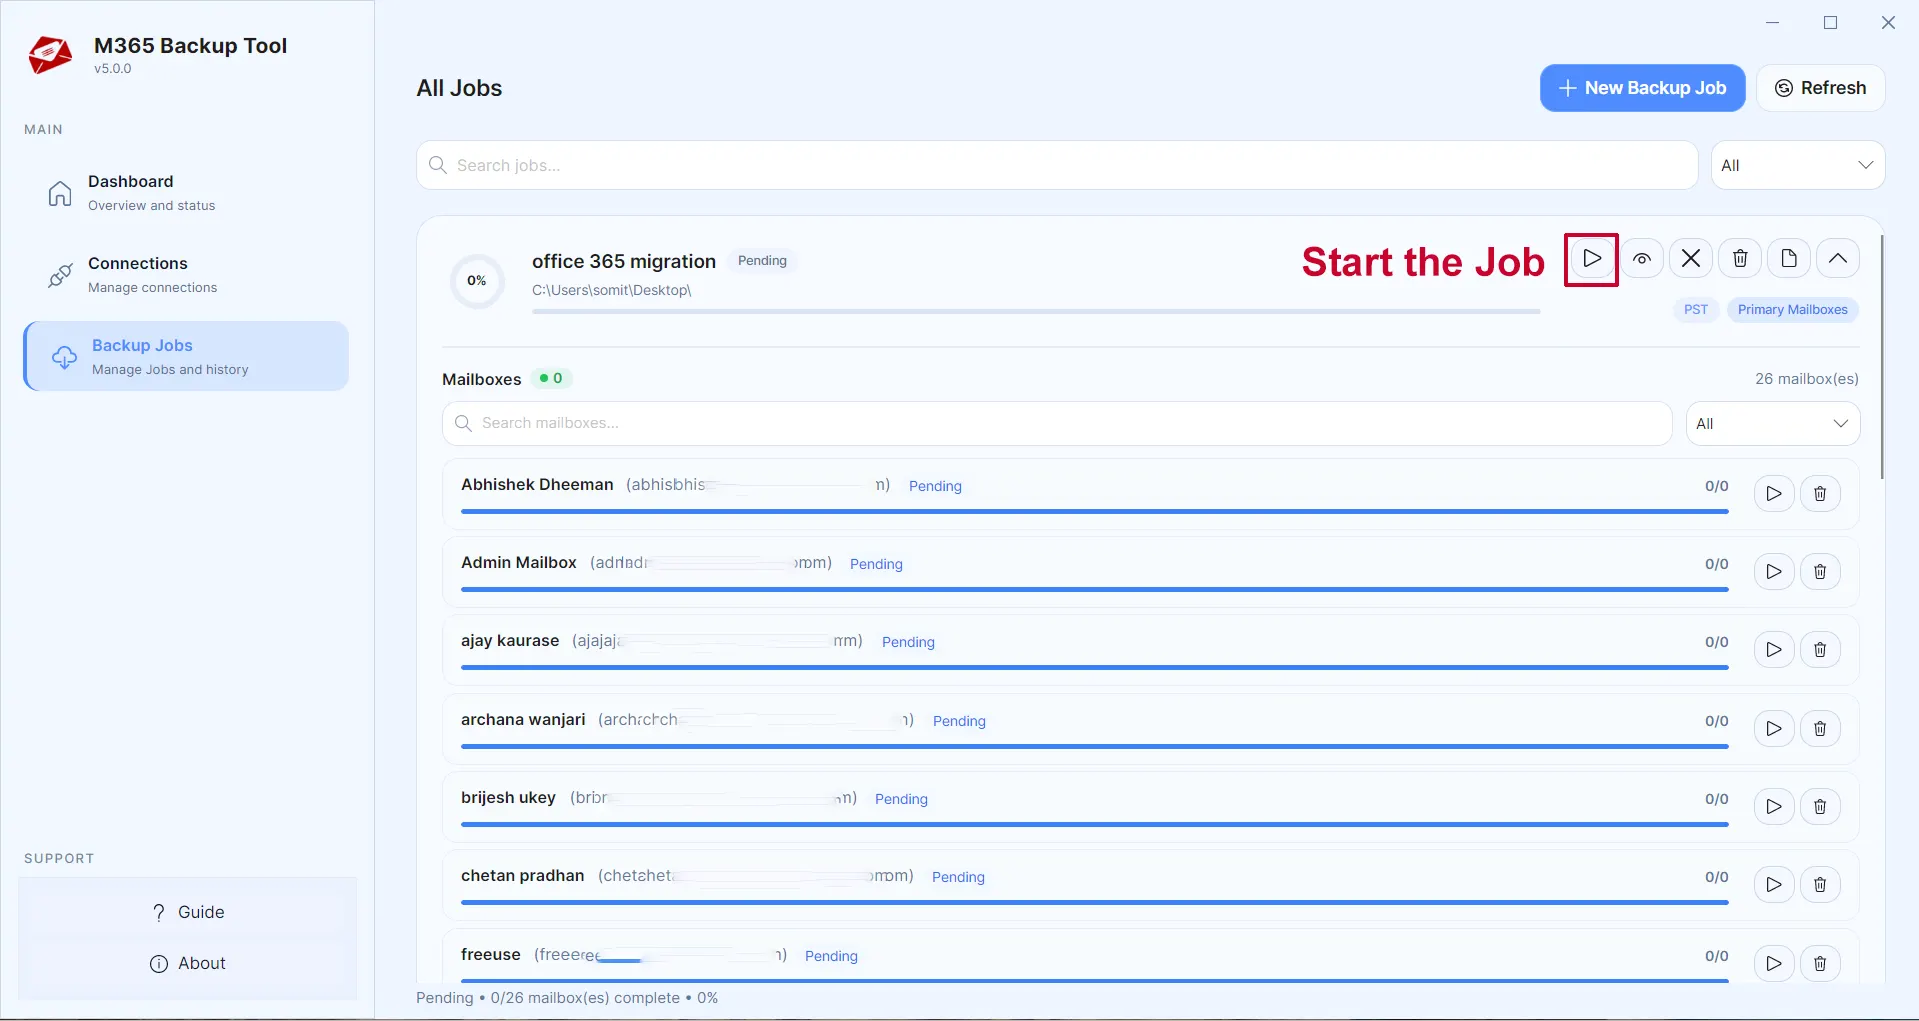
Start Backup Job & Monitor Progress
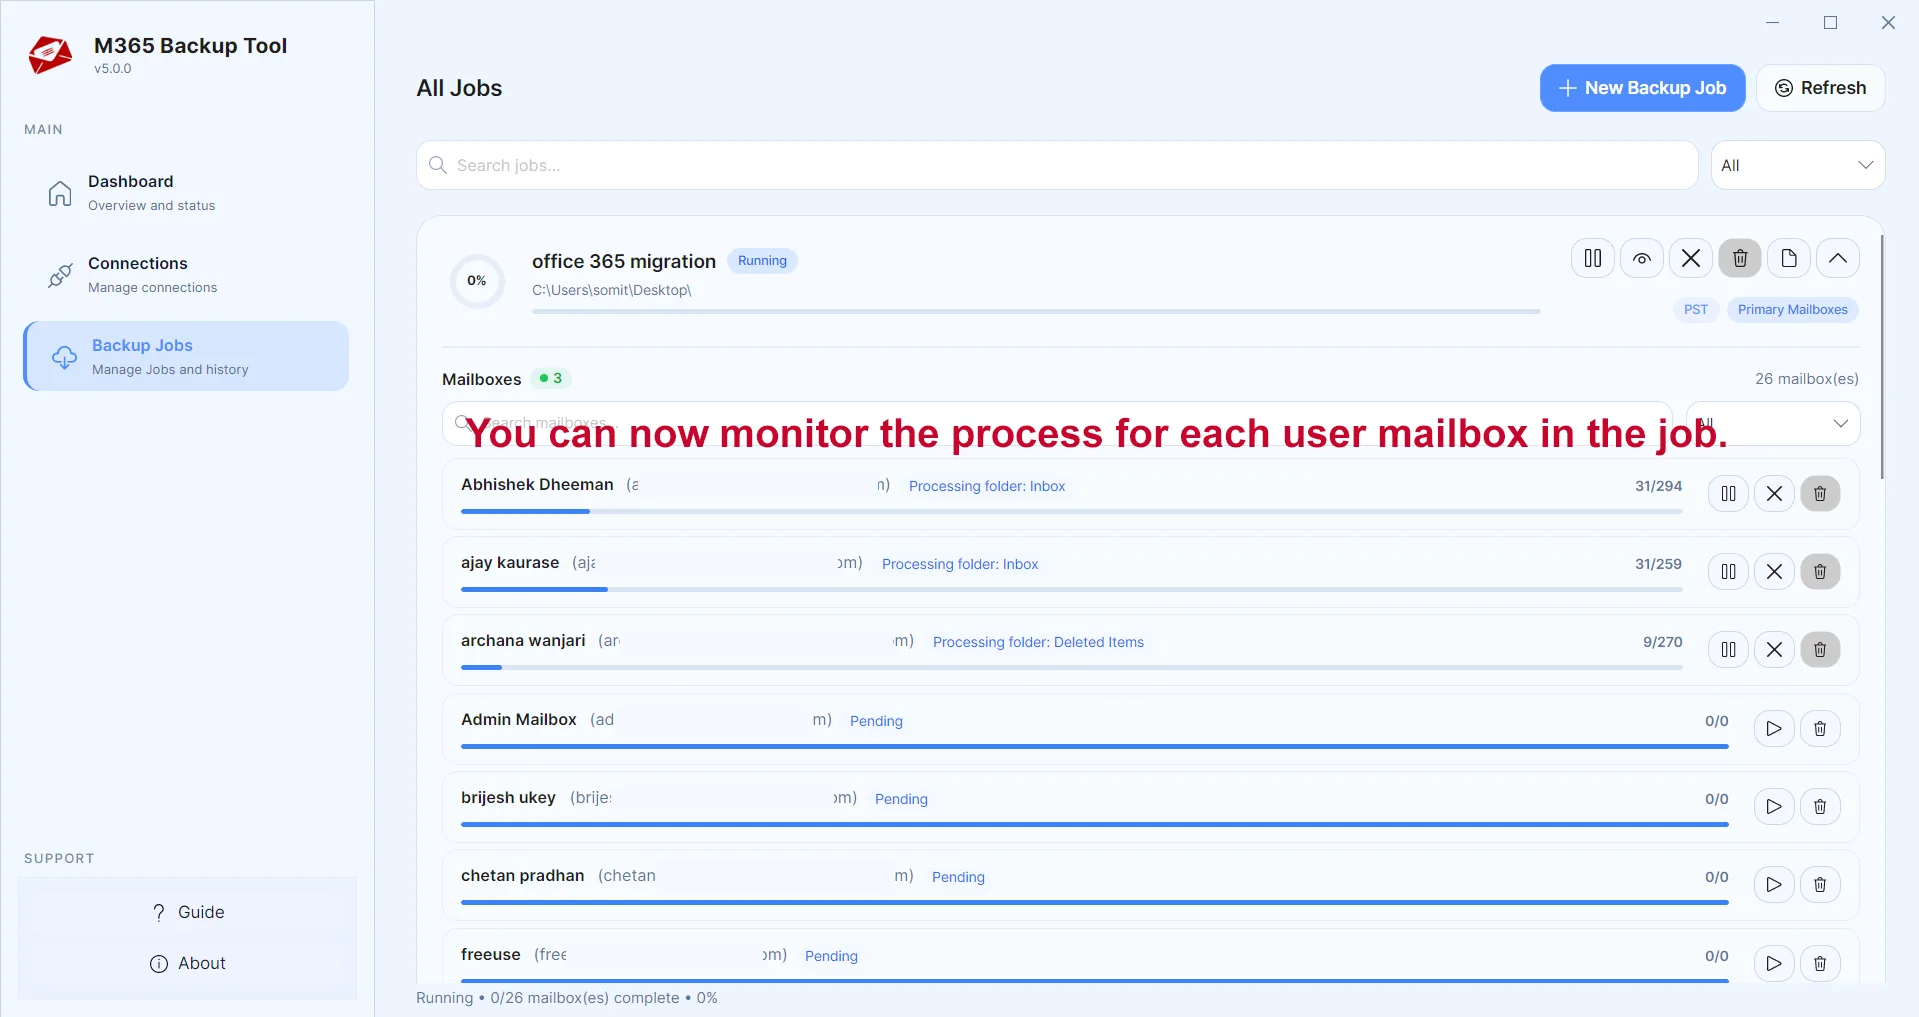
Click the Start button to begin the job. Once the migration begins, you can monitor each user account individually in the section below.
Ready to Start with Office 365 Backup Tool?
Download the free trial version to preview all mailbox items or buy the full license for unlimited conversion.