Working Guide Of The MailsDaddy OST To Office 365 Tool
Working Guide of the software
Compelete Data Migration (13 Steps)
Click on any screenshot to view full resolution.
Download and install the OST to Office 365 Migration Tool (Installation Guide included)
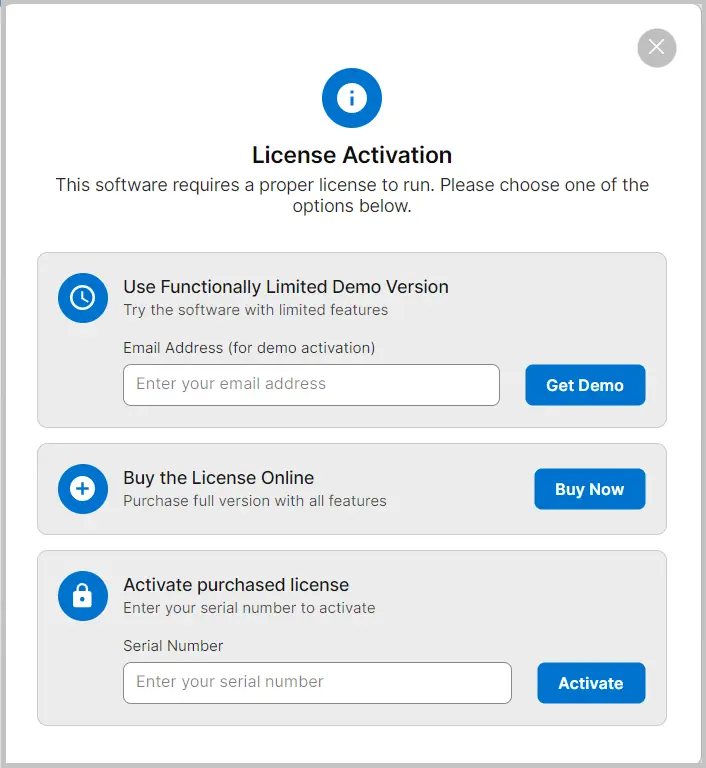
Download and install the OST to Office 365 Migration Tool (Installation Guide included). Launch the software and click the “Get Demo” button to use the free trial. If you’ve already purchased the software, you can activate the full version directly.
Step 2: Complete Operation
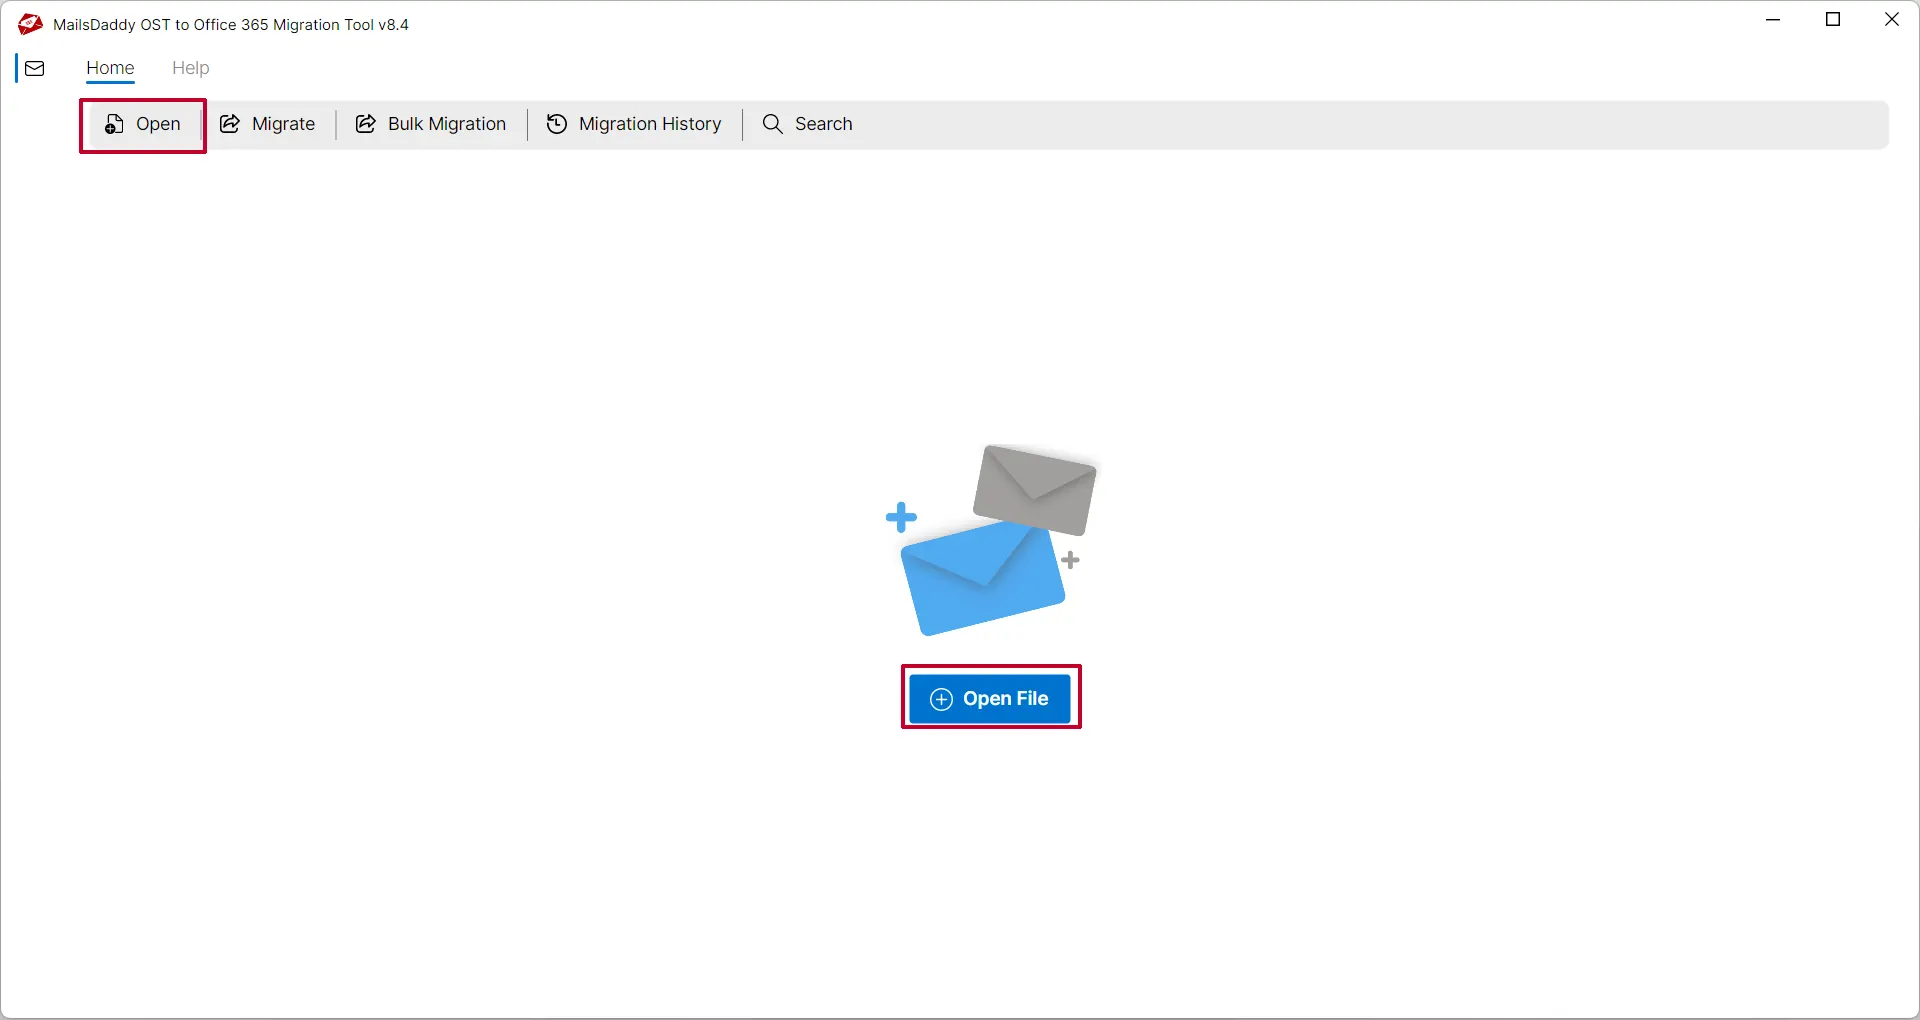
On the first screen, click the "Open" button to browse and select OST files from your local system.
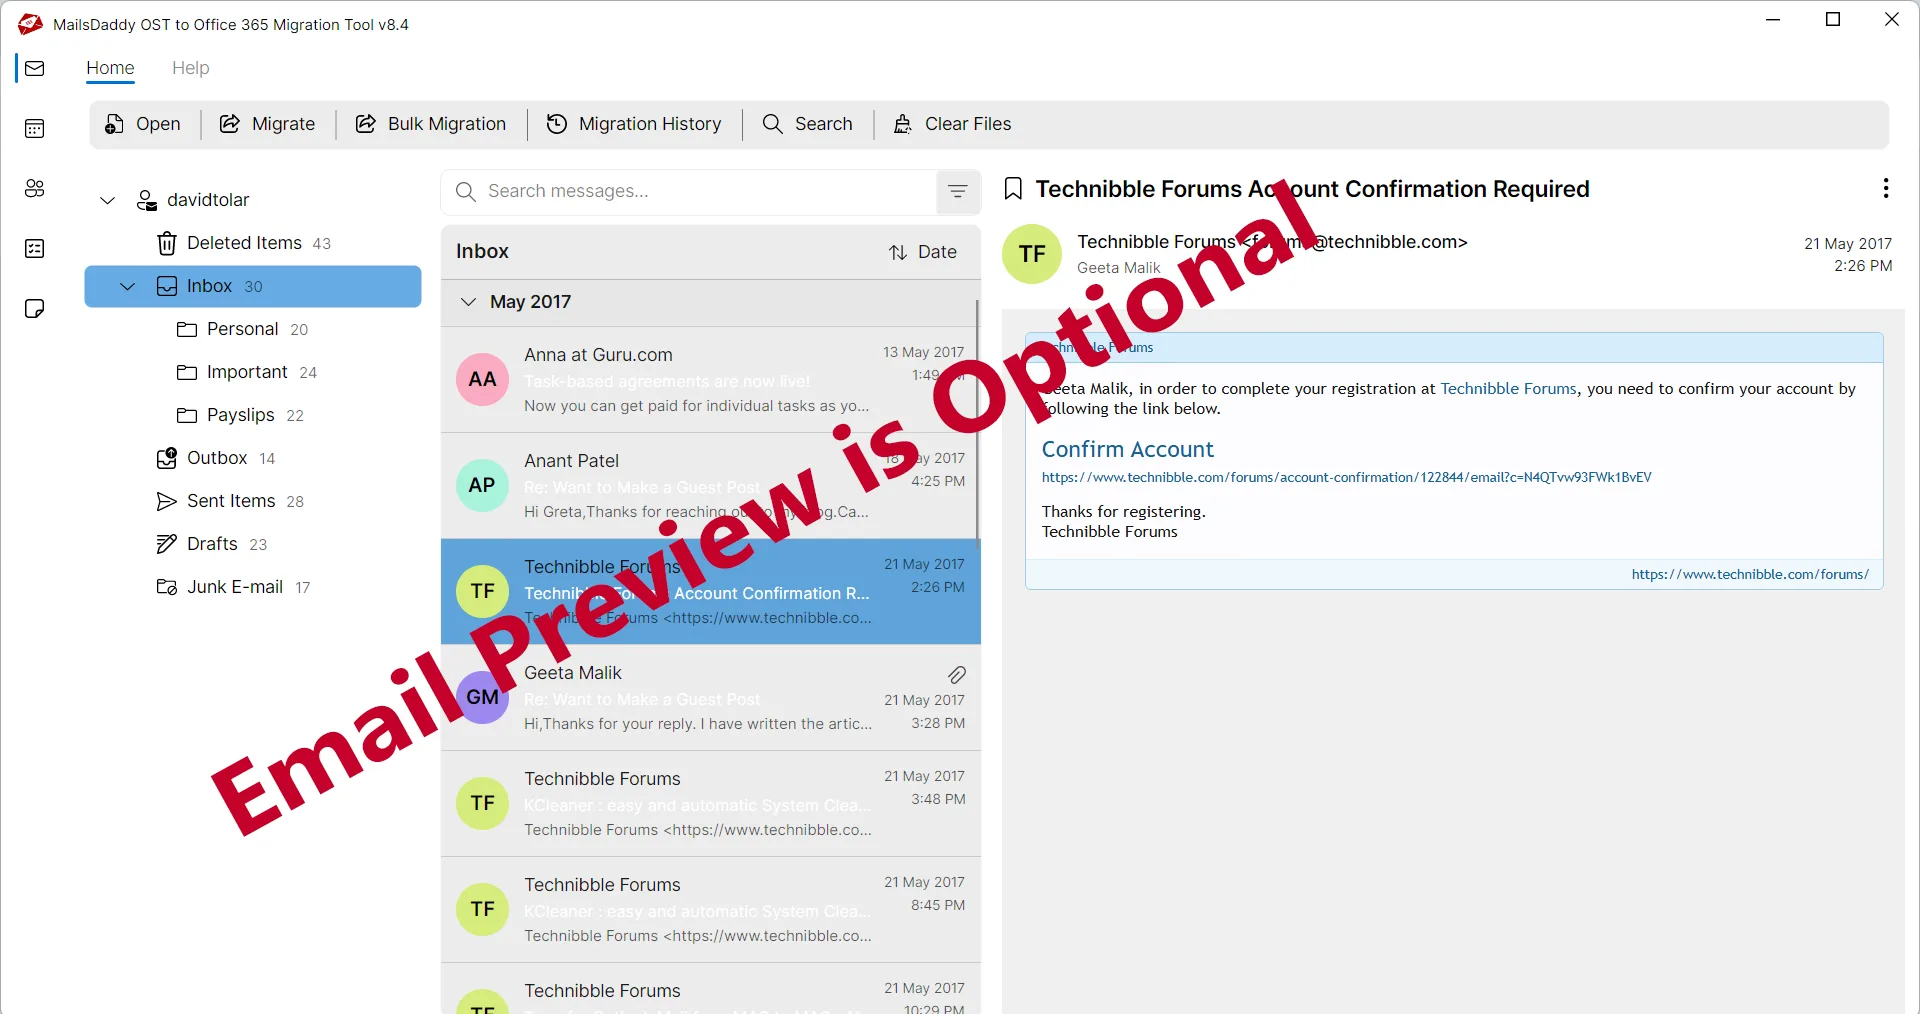
You can now view the complete OST file database in the software’s preview panel.
You can now view the complete OST file database in the software’s preview panel.
Step 4: Complete Operation
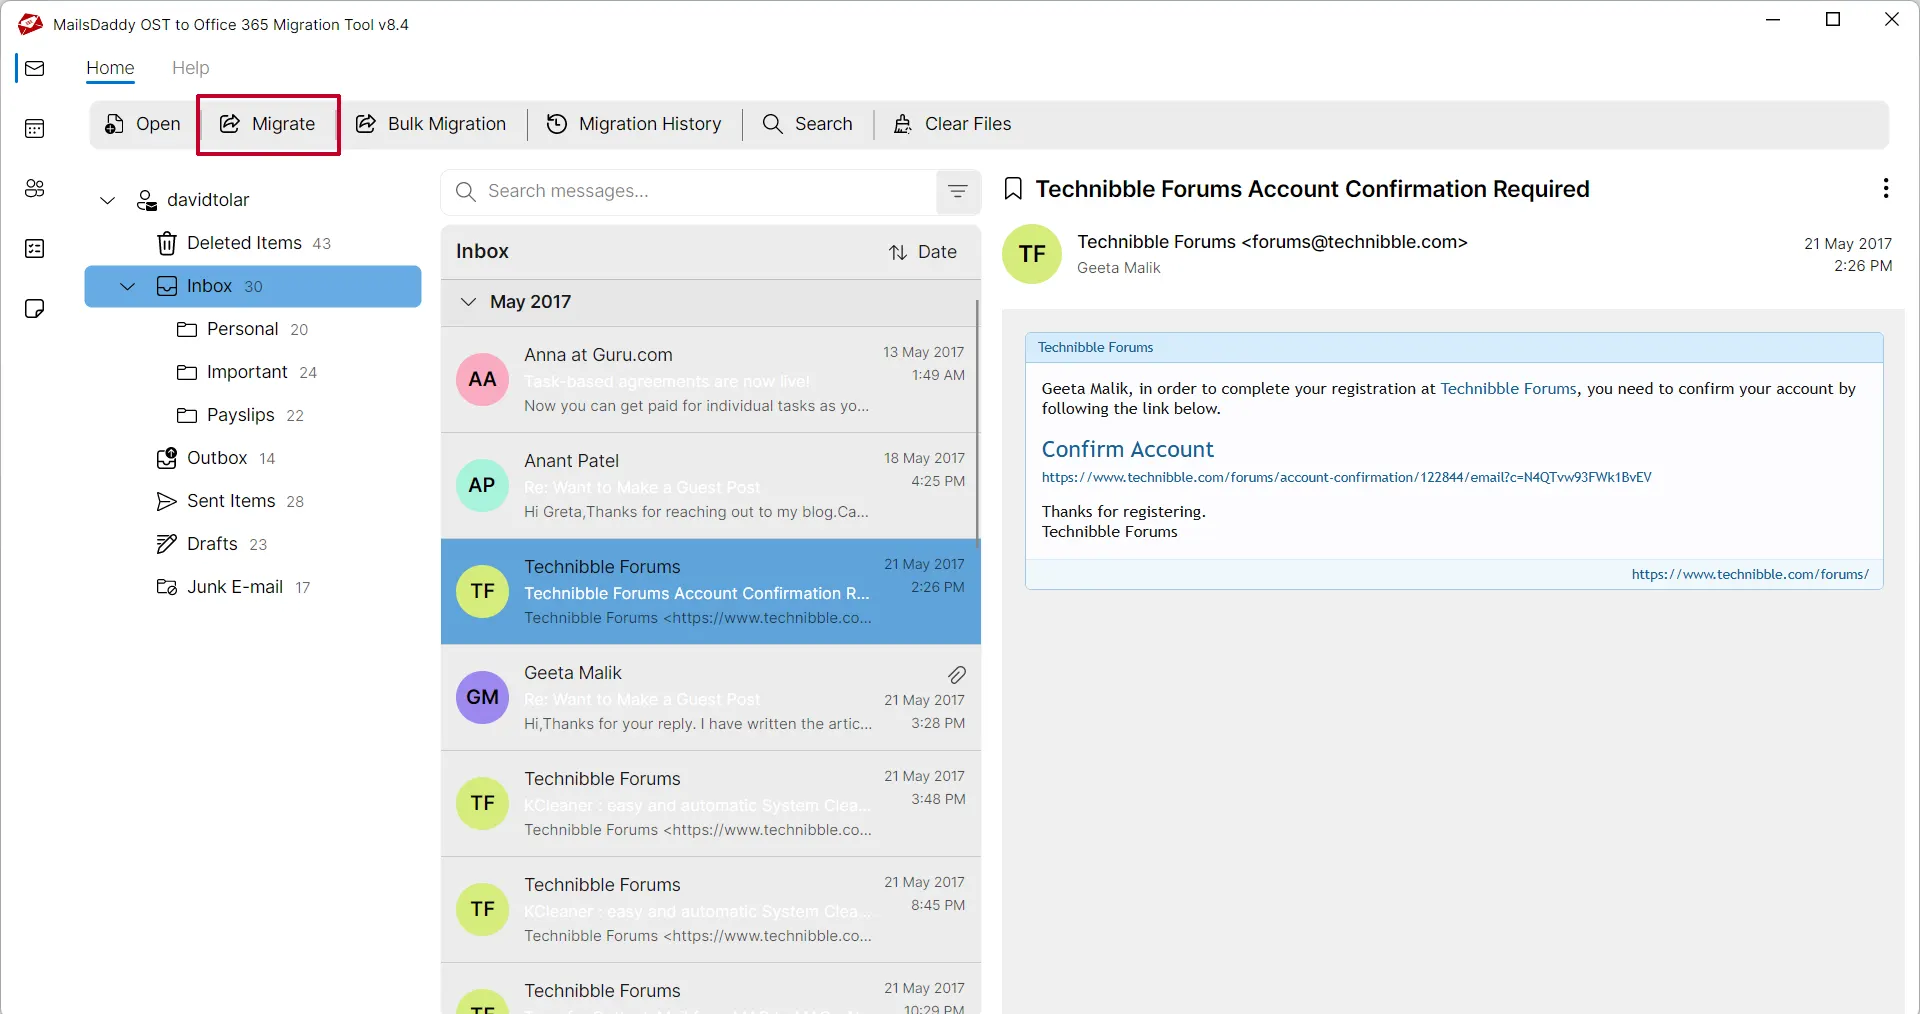
Click the “Migrate” button to upload and transfer the offline OST files to your Office 365 account.
From the right-side panel, select the OST file folders
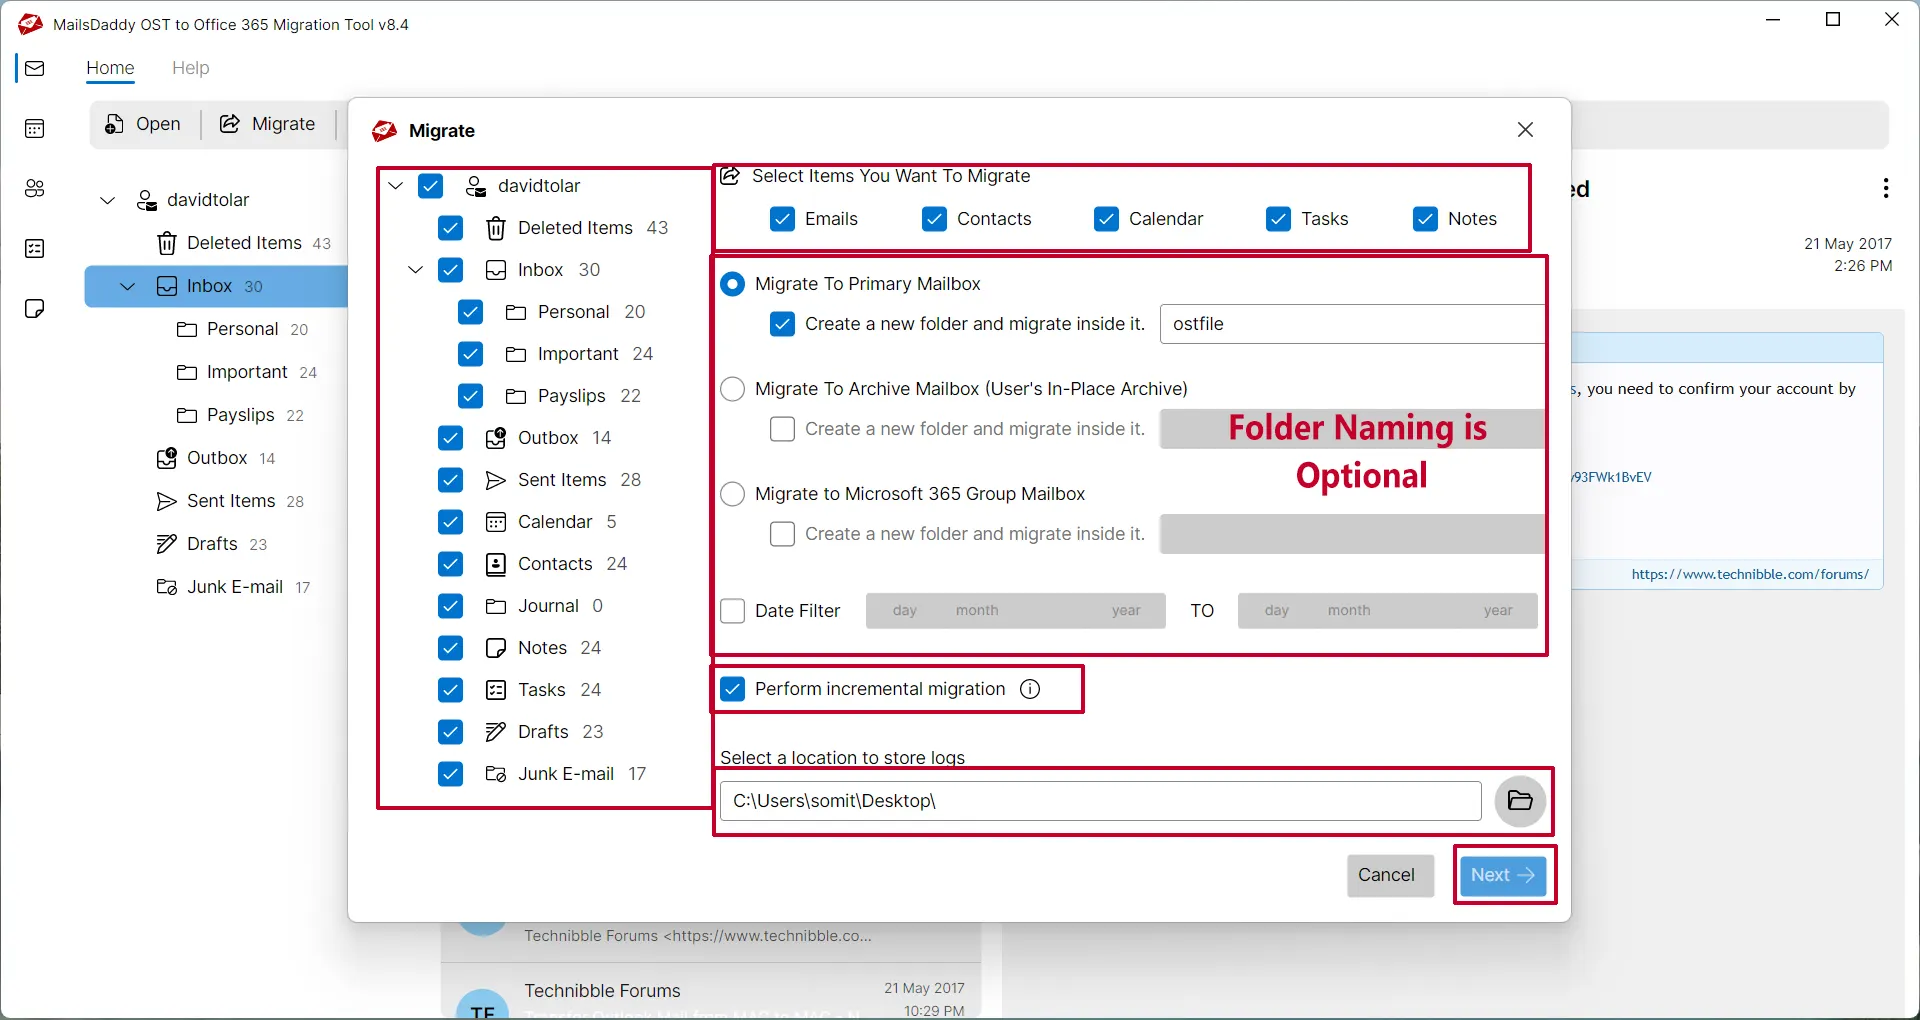
From the right-side panel, select the OST file folders. Then choose the specific items—Emails, Contacts, Calendar, Tasks, or Notes—that you want to migrate.
Step 6: Complete Operation
Select the mailbox: Primary, In-place Archive, Shared mailbox, and Group mailbox based on your requirement. If you want to migrate data into a specific folder then specify the new folder name.
Date filter is also optional choice
Date filter is also optional choice. Enable the Date Filter option and enter the start and end dates.
Step 8: Complete Operation
Enable/Disable incremental migration then click the browse icon and choose the location where you want to save the migration log file. At last, click the Next button to continue.
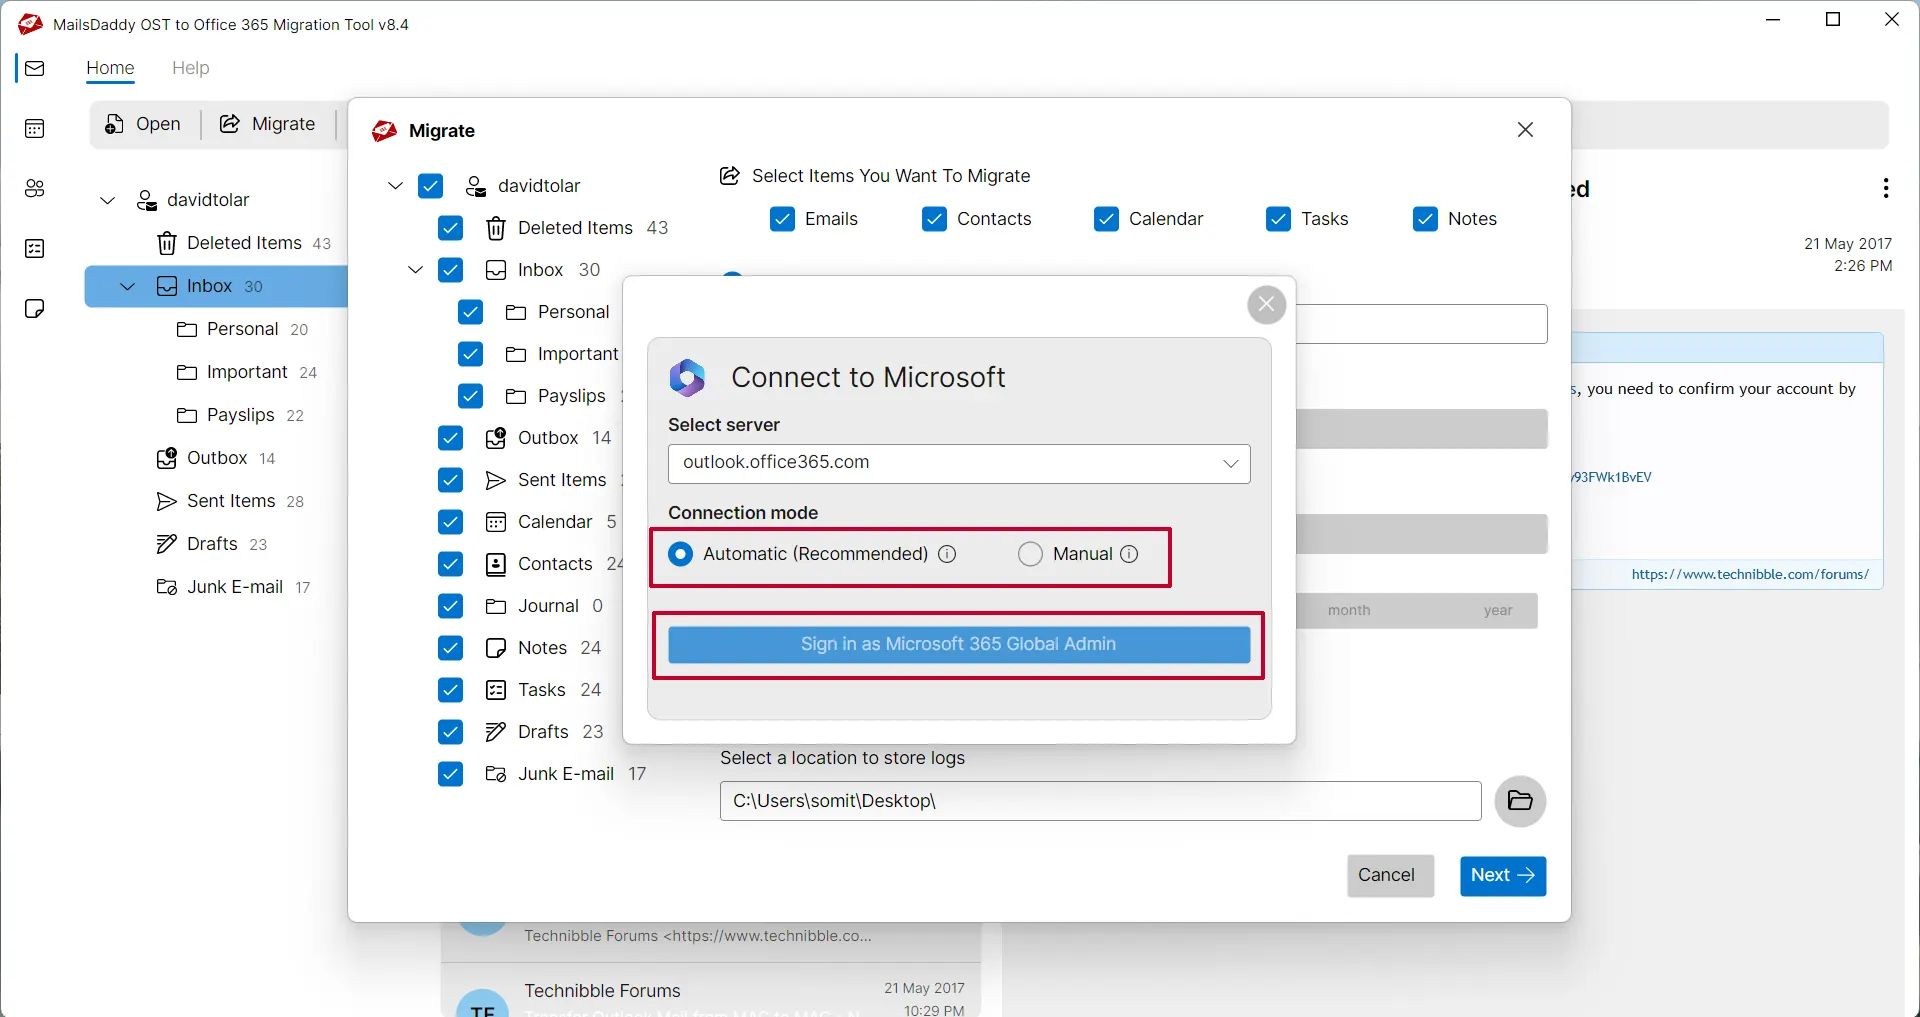
Choose an option to validate your Office 365 account: automatica or manual
Choose an option to validate your Office 365 account: automatica or manual. Both are safe way to verify Microsoft 365 account.
Step 10: Complete Operation
Manually, you have create Tenant ID, Client ID, or Client Secret (Value), following our guide on the left side of the software panel.
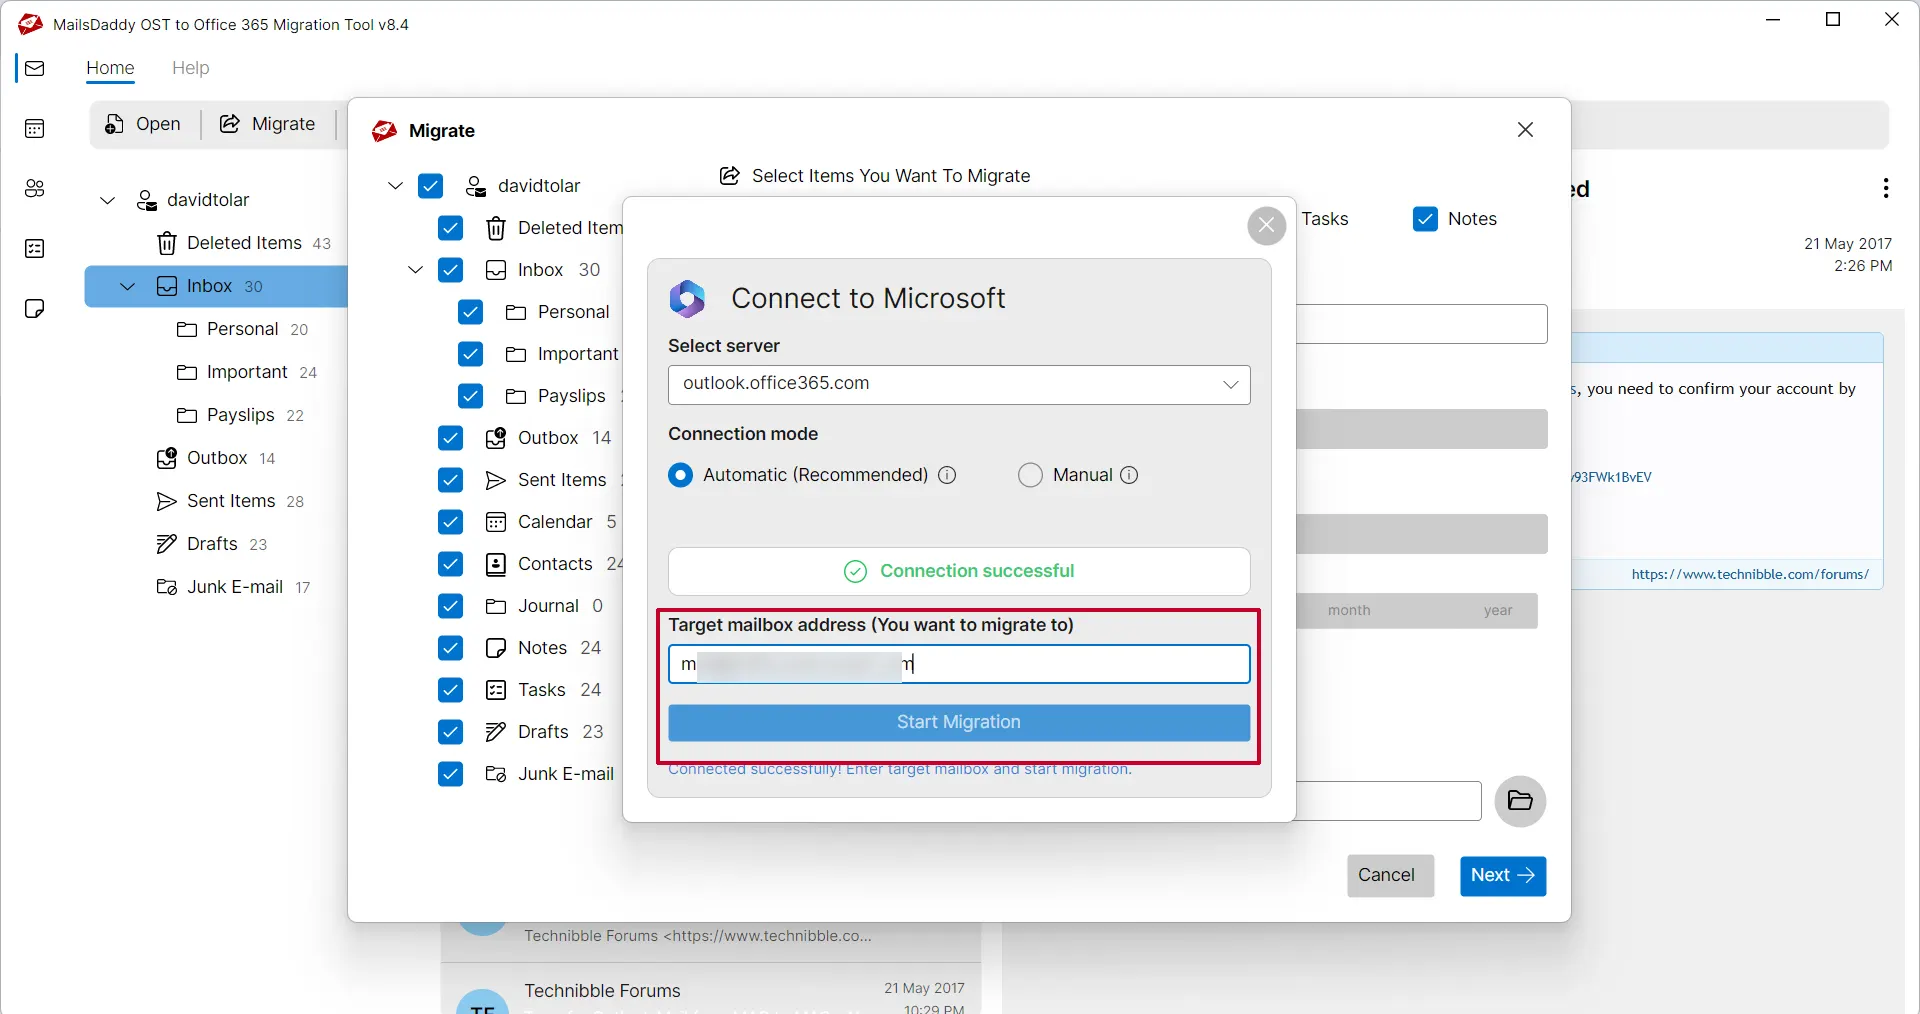
After verification, specify the target email address and click on Start migration button.
After verification, specify the target email address and click on Start migration button.
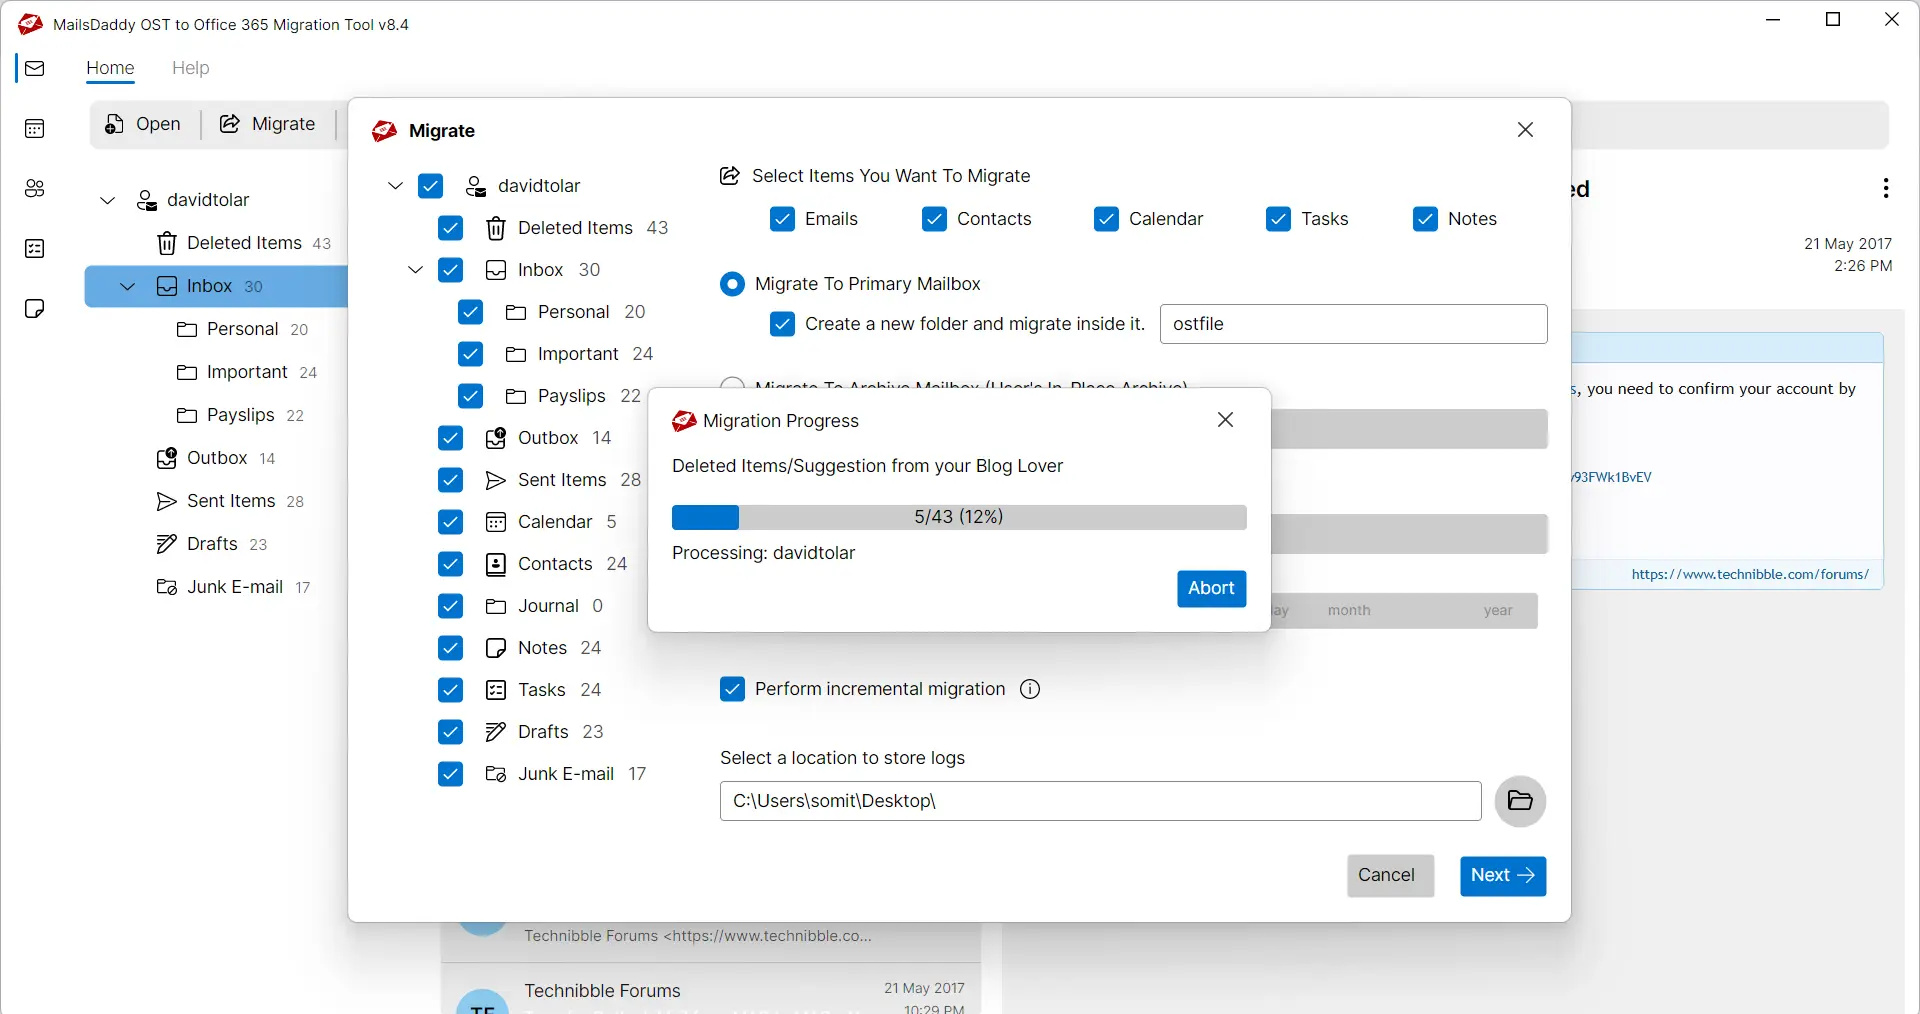
Step 12: Complete Operation
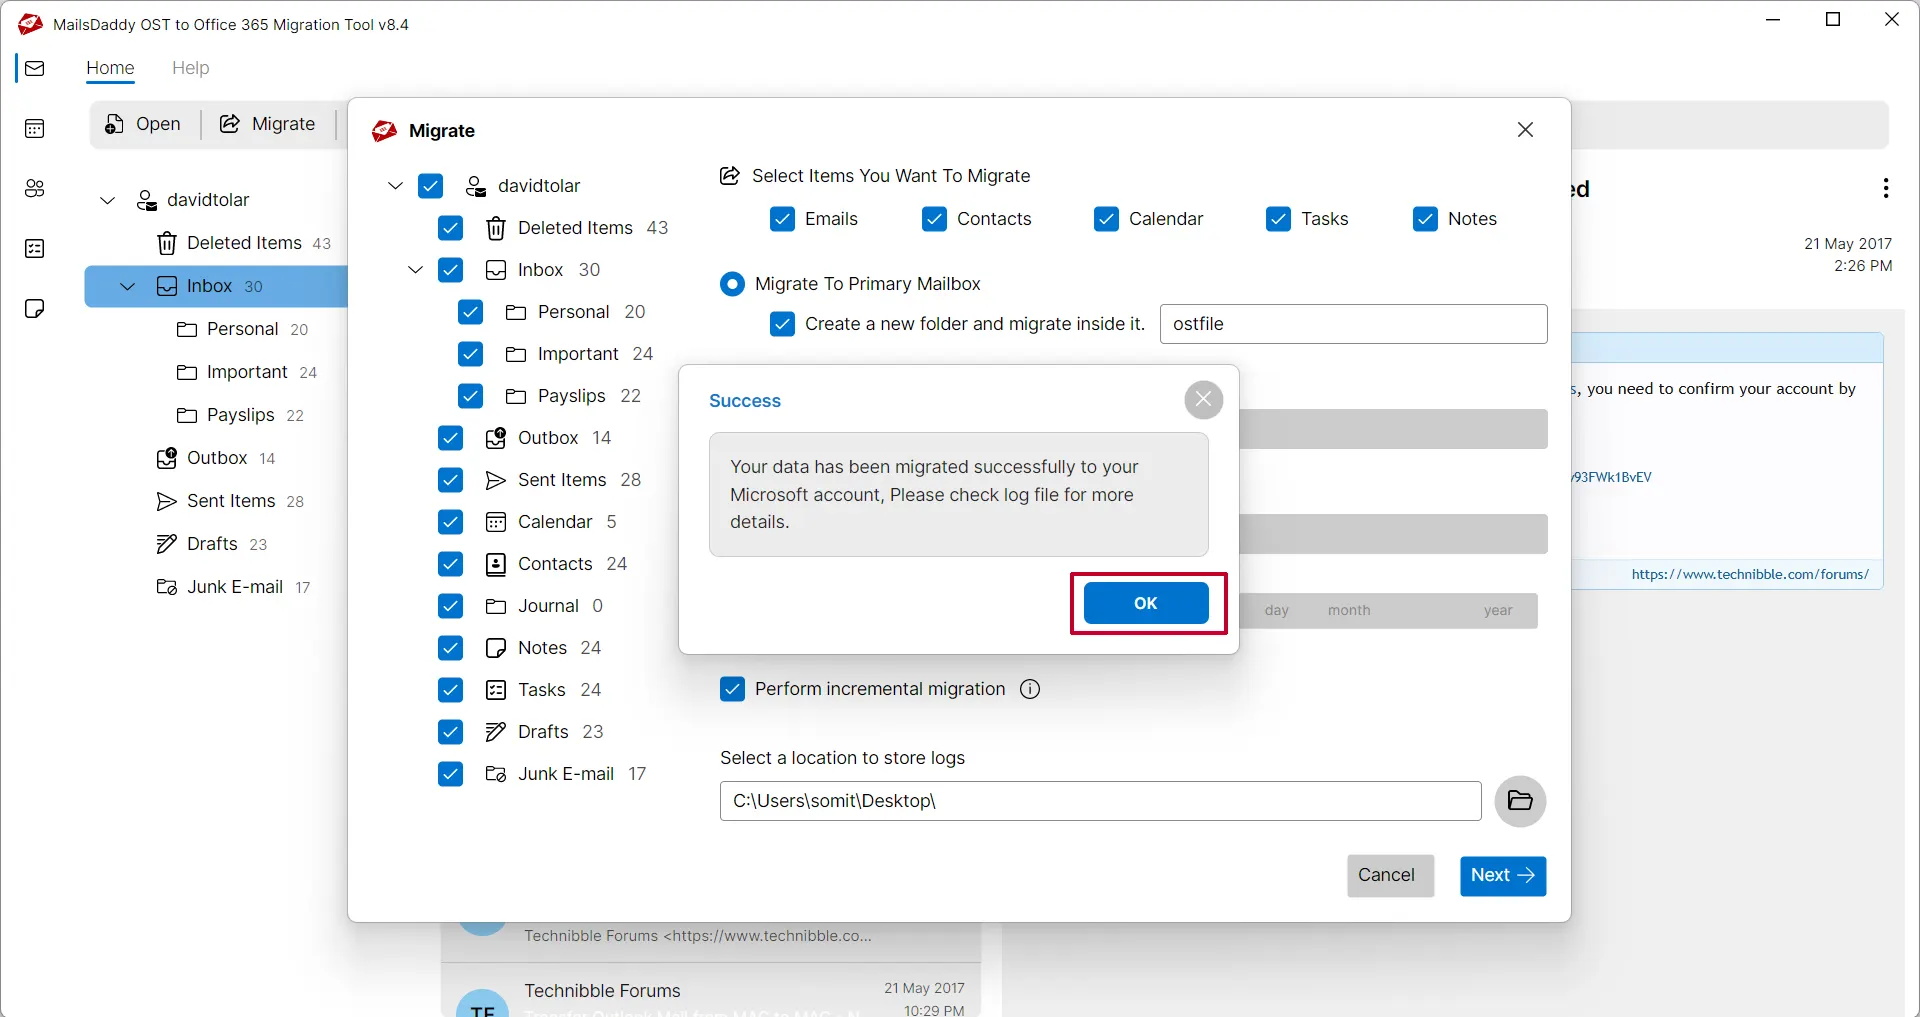
The software will start the migration and display a confirmation message: "Your data has been migrated successfully to your Microsoft account." Once it is done.
Click the OK button and check your mailbox in Office 365.
Click the OK button and check your mailbox in Office 365.
Ready to Start with OST to Office 365 Migration?
Download the free trial version to preview all mailbox items or buy the full license for unlimited conversion.