Complete Systematic process to Convert Lotus Notes to Outlook
Read the complete working process to Convert Lotus Notes to Outlook with complete mailbox data and import in Exchange Server.
How to Convert NSF to PST ? (9 Steps)
Click on any screenshot to view full resolution.
Step 1: Complete Operation
Download the NSF to PST Converter tool form the official website and after completion of the downloading process, run the executable file of the tool.
Step 2: Complete Operation
As you run the .exe file, a popup window will appear to the confirmation about the license you have. From here, you can proceed to get the demo license of the tool or activate your license by inserting the license key already purchased as per your requirements. Note: If you'd like to use a demo version before purchasing the software, enter your email address and click Get demo. You'll receive a mailed verification email to your email address. Find your email in your inbox. If you don't find it there, go to your junk or spam folder. Open the email and click the demo activation link. After activating the license (demo or purchased), the tool restarts automatically and moves you to the first window of the tool. -->

Step 3: Complete Operation
Now from the first appeared window of the tool, click on the Open button to add the NSF file in the software.

Step 4: Complete Operation
Now select the NSF file that you want to convert from NSF to PST file format and click on Open button.

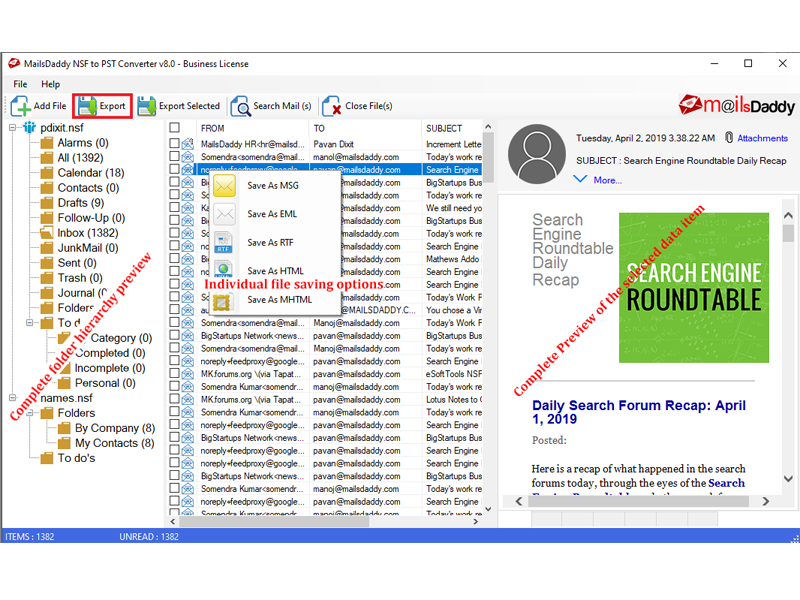
Here, you can see the preview of the data items, folder hierarchy
Here, you can see the preview of the data items, folder hierarchy. After seeing the complete information of the NSF files, click on the Export option.
From left side panel, select those mailbox items which you want to export
From left side panel, select those mailbox items which you want to export. After then choose Outlook data file (.pst) option and apply the available filter (if required). Suggest a PST file saving location form the Browse button and click on the Export button.

Step 7: Complete Operation
From the next window titled Export to PST, choose an option to create a PST file (Single or Separate), and split the large PST files according to the size.

Step 8: Complete Operation
Now click on the Next button to start the NSF to PST conversion process and wait until the process finishes.

Step 9: Complete Operation
After completing the process, click on the Ok button in the confirmation window to finish the process. <!--

Ready to Start with NSF to PST Converter?
Download the free trial version to preview all mailbox items or buy the full license for unlimited conversion.