Working Instructions of MailsDaddy Exchange Server Suite
Easily perform recovery as well as migration of EDB, OST, PST, Exchange Server and Office 365 mailboxes
Step-by-Step Walkthrough (50 Steps)
Click on any screenshot to view full resolution.
Convert Single OST to PST
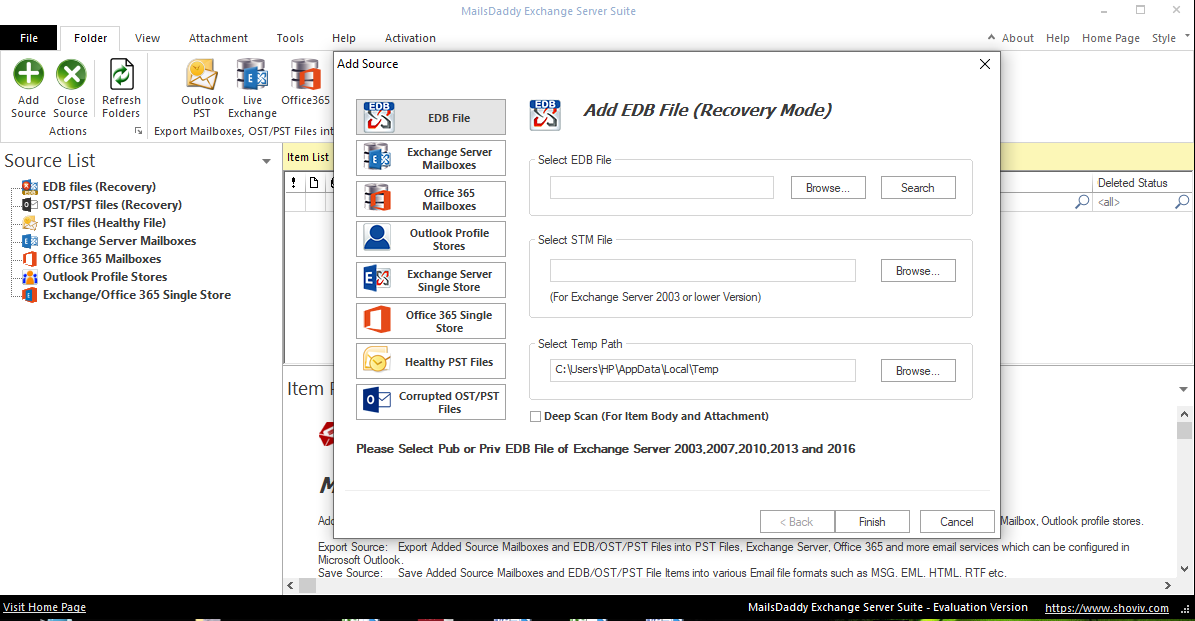
Download, install ( Installation Guide ) the free demo version of MailsDaddy Exchange Server Suit. If you have purchased a license key then activate the full version.
Installation Guide
Download, install ( Installation Guide ) the free demo version of MailsDaddy Exchange Server Suit. If you have purchased a license key then activate the full version.

Installation Guide
Download, install ( Installation Guide ) the free demo version of MailsDaddy Exchange Server Suit. If you have purchased a license key then activate the full version.
Installation Guide
Download, install ( Installation Guide ) the free demo version of MailsDaddy Exchange Server Suit. If you have purchased a license key then activate the full version.
Installation Guide
Download, install ( Installation Guide ) the free demo version of MailsDaddy Exchange Server Suit. If you have purchased a license key then activate the full version.

How to add single Office 365 mailbox?
How to add single Office 365 mailbox?

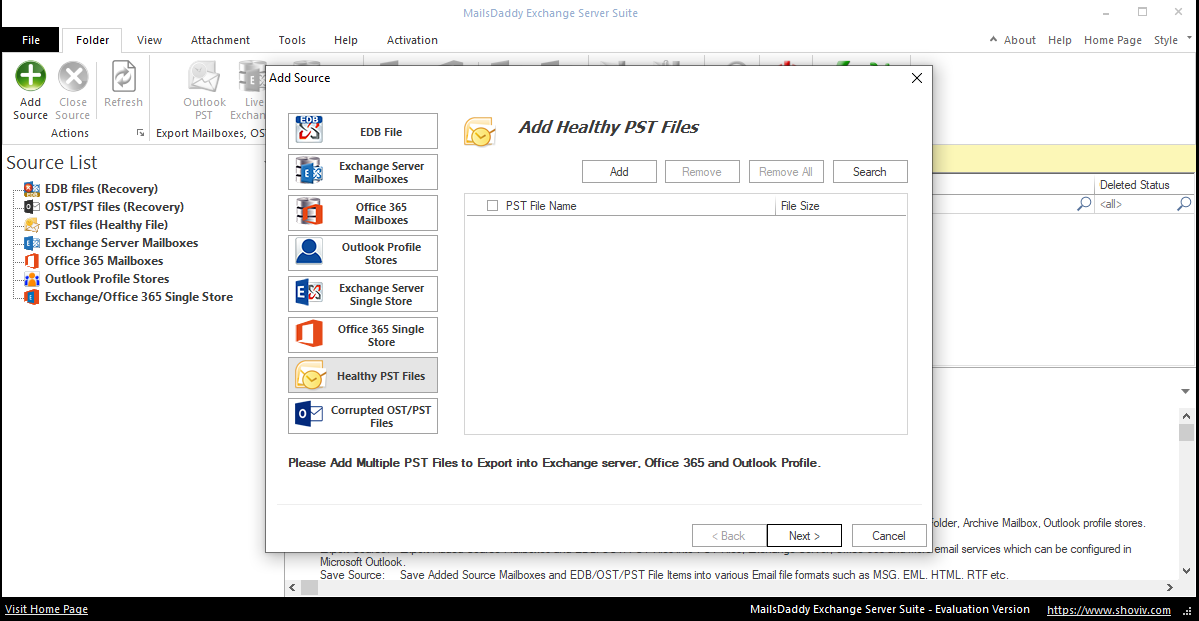
How to add healthy PST file?
Download, install (Installation Guide) the free demo version of MailsDaddy Exchange Server Suit. If you have purchased a license key then activate the full version.
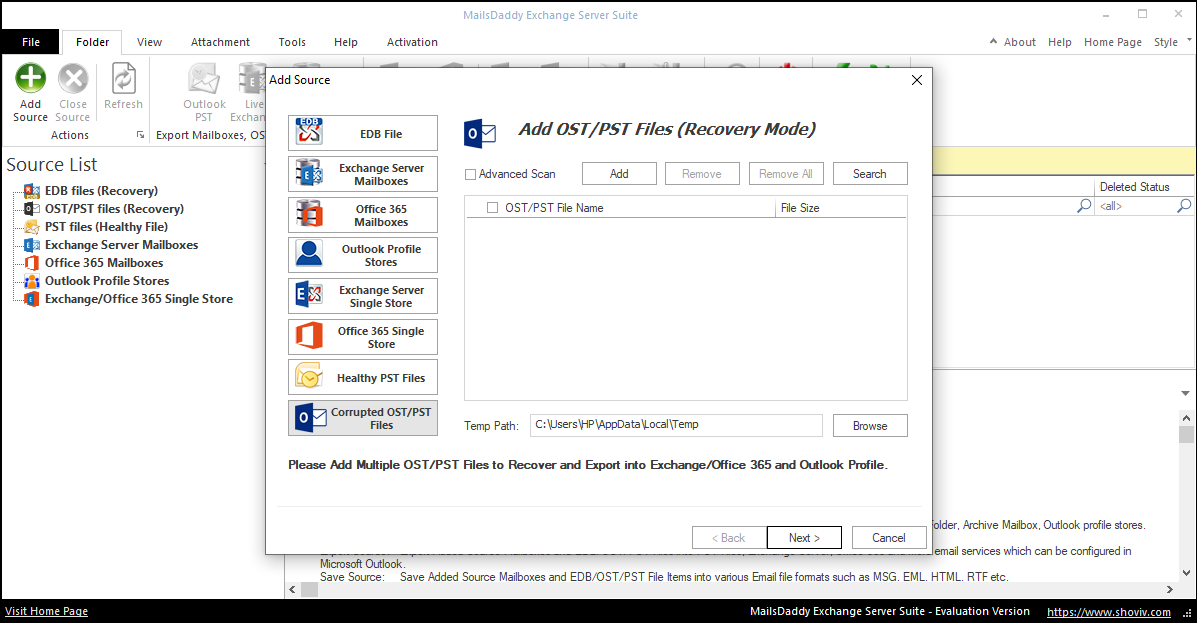
How to add corrupted OST/PST file?
Download, install (Installation Guide) the free demo version of MailsDaddy Exchange Server Suit. If you have purchased a license key then activate the full version.
Migrate multiple mailboxes to Outlook
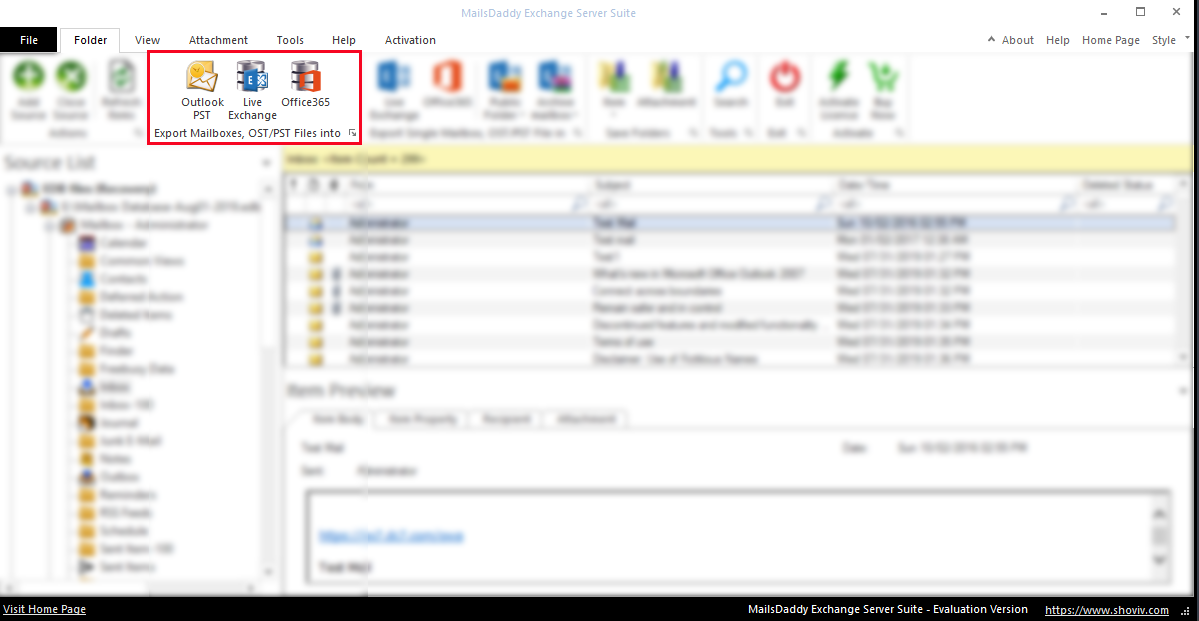
After selecting the source, user can choose the desire target to migrate bulk EDB/Live Exchange/Office 365/Outlook mailboxes. There are 3 destination points for the user to move batch folder at once.
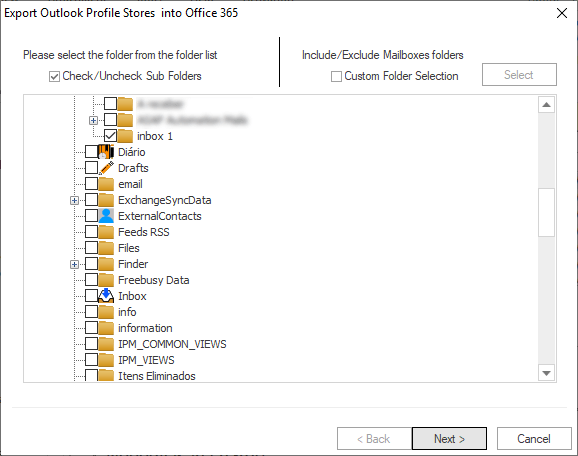
After that, you will see another wizard with two options: Check/Uncheck Folder and Custom Folders. Check/Uncheck folder
For recovering Live Exchange, EDB and Office 365 bulk mailboxes into Outlook PST format. Select Outlook option from red-ribbon area and follow the below steps. You can also select the target by right-clicking on the folder.
After that, you will see another wizard with two options: Check/Uncheck Folder and Custom Folders. Check/Uncheck folder
After that, you will see another wizard with two options: Check/Uncheck Folder and Custom Folders. Check/Uncheck folder
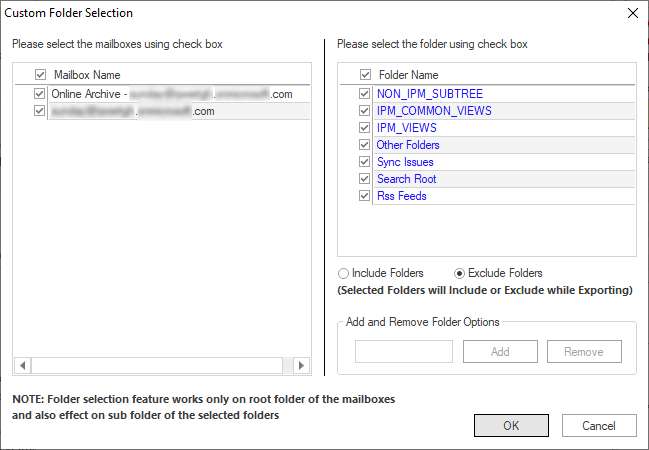
Custom Folder Selection
Custom Folder Selection
Once you have done with above options click on Next/Ok button. New window provides you two options again. Existing PST file
Once you have done with above options click on Next/Ok button. New window provides you two options again. Existing PST file
Split PST file
Split PST file
Message Class
Message Class
Message Date Filter
Message Date Filter
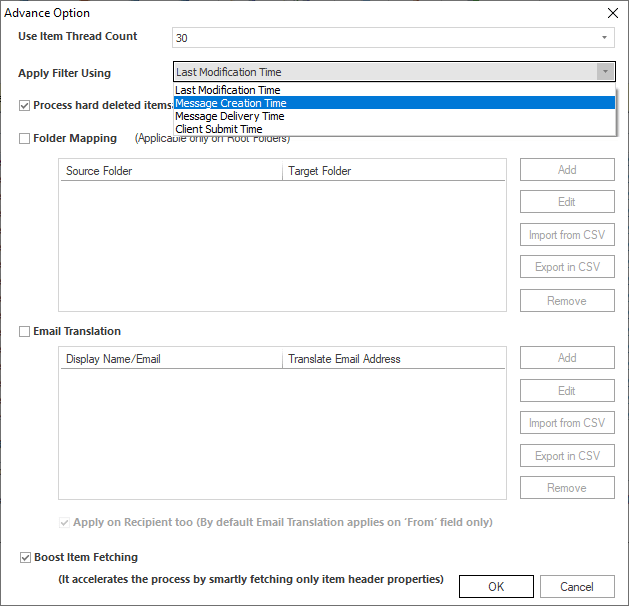
Folder Mapping
Folder Mapping
Migrate mailboxes to Office 365
After selecting the source, user can choose the desire target to migrate bulk EDB/Live Exchange/Office 365/Outlook mailboxes. There are 3 destination points for the user to move batch folder at once.
After that, you will see another wizard with two options: Check/Uncheck Folder and Custom Folders. Check/Uncheck folder
For recovering Live Exchange, EDB and Office 365 bulk mailboxes into Office 365 account. Select O365 option from red-ribbon area and follow the below steps. You can also select the target by right-clicking on the folder.
After that, you will see another wizard with two options: Check/Uncheck Folder and Custom Folders. Check/Uncheck folder
After that, you will see another wizard with two options: Check/Uncheck Folder and Custom Folders. Check/Uncheck folder
Custom Folder Selection
Custom Folder Selection
Second option lets the user to fetch mailbox from the online address of Office 365. For this user have to fill: Email of O365, Password, Server Name and Grant full acces
Second option lets the user to fetch mailbox from the online address of Office 365. For this user have to fill: Email of O365, Password, Server Name and Grant full acces
Second option lets the user to fetch mailbox from the online address of Office 365. For this user have to fill: Email of O365, Password, Server Name and Grant full acces
Second option lets the user to fetch mailbox from the online address of Office 365. For this user have to fill: Email of O365, Password, Server Name and Grant full acces
(Note)
(Note)
Demo of CSV file
Demo of CSV file
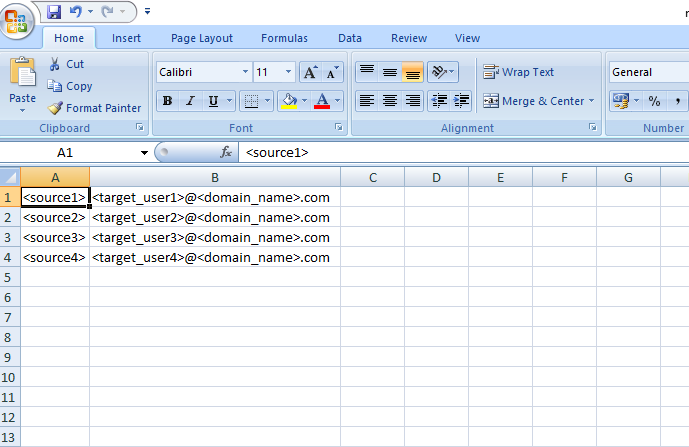
Demo of CSV file
Demo of CSV file
Exclude inaccurate item
Date range option allows user to add data between two different time period. Export all items : It prevent the duplicacy in the mailbox, if any error-occur during the migration uncheck the box and restart it. Exclude inaccurate item : With this option, user can filter the EDB file which is not accurate from source.
Folder Mapping
Folder Mapping
Migrate multiple Live Exchange database
After selecting the source, user can choose the desire target to migrate bulk EDB/Live Exchange/Office 365/Outlook mailboxes. There are 3 destination points for the user to move batch folder at once.
In new open window, you will see two options: Check/Uncheck Folder and Custom Folders. Check/Uncheck folder
For exporting Live Exchange, EDB and Office 365 bulk mailboxes into Live Exchange. Select Live Exchange option from red-ribbon area and follow the below steps. You can also select the target by right-clicking on the folder.
In new open window, you will see two options: Check/Uncheck Folder and Custom Folders. Check/Uncheck folder
In new open window, you will see two options: Check/Uncheck Folder and Custom Folders. Check/Uncheck folder
Custom Folder Selection
Custom Folder Selection
After that click on Next/Ok button. New window provides you two options again. Fetch all mailboxes from the Outlook Profile
After that click on Next/Ok button. New window provides you two options again. Fetch all mailboxes from the Outlook Profile
Password
Password
Map Source using CSV
Map Source using CSV
Demo of CSV file
Demo of CSV file
Message Class
Message Class
Message Date Filter
Message Date Filter
Folder Mapping
Folder Mapping
Folder Mapping for MS Outlook using CSV file
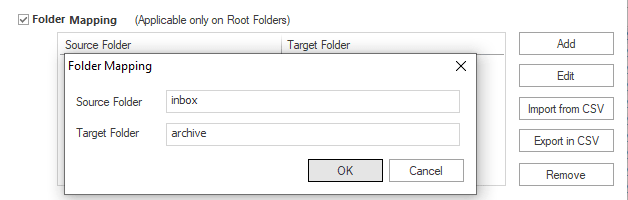
It allows you to export data from one folder to another manually or using CSV file. The user can take advantage of this feature by mapping the source folder to the destination folder as well as creating a new custom folder for the given source folder.
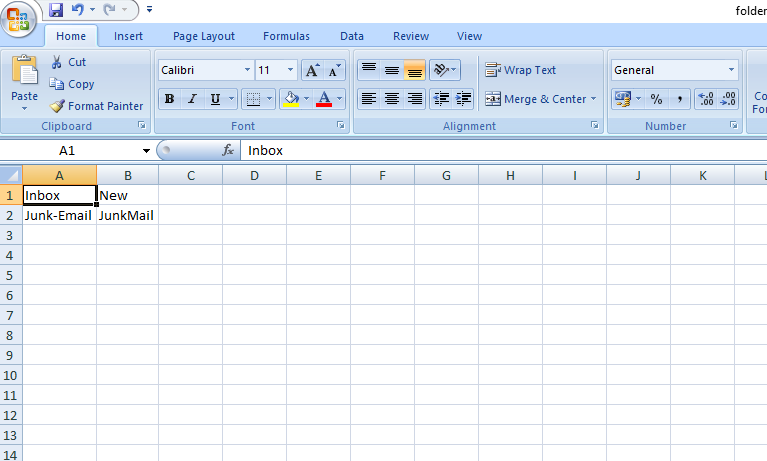
Demo of CSV file
Click on Add button >> Type Source folder name and destination folder name to map each other then press OK button.
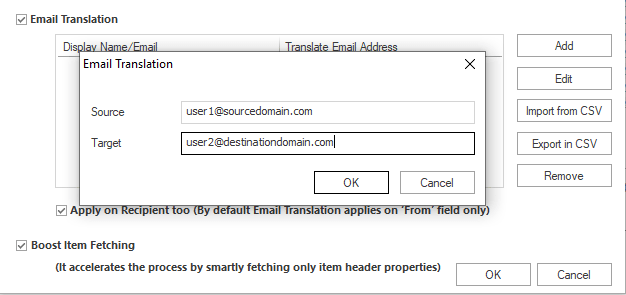
Email Translation
Export in CSV : Export mapped CSV file for future update and requirment.
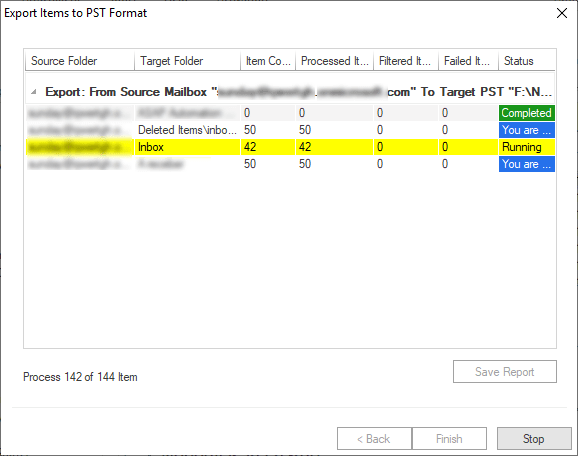
Boost Item Fetching
Import from CSV : Set desired address for Email Translate Mapping and add it in CSV.
Folder Mapping for Office 365 using CSV file
Here user can map folder to folder from source to target manually and CSV file. Also, create a new folder to import source folder data. To Map a folder, click on Add button and wrote folder name in the source and target field.
Email Translation
Remove : allows user to delete added source/target folder
Boost Item Fetching
Apply on Recipient too : Enable the email translation process for the recipients as well otherwise only work on the ‘From’ field of the email item.
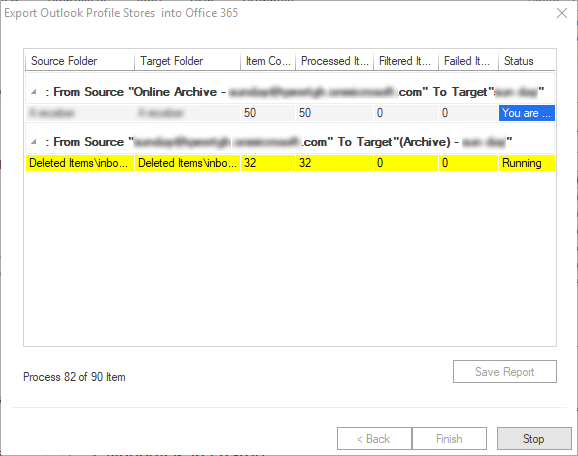
Folder Mapping for Live Exchange using CSV file
Here user can map folder to folder from source to target manually and CSV file. Also, create a new folder to import source folder data. To Map a folder, click on Add button and wrote folder name in the source and target field.
Live Exchange Demo CSV file
Click on Add button >> Type Source folder name and destination folder name to map each other then press OK button.
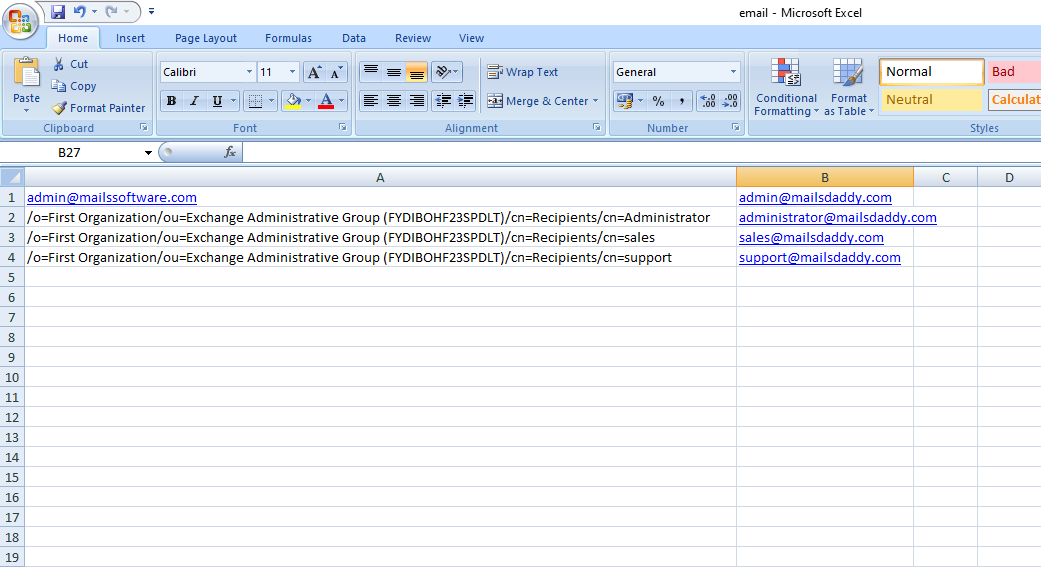
Email Translation
Remove : allows user to delete added source/target folder
Boost Item Fetching
Apply on Recipient too : Enable the email translation process for the recipients as well otherwise only work on the ‘From’ field of the email item.
Ready to Start with Exchange Server Suite?
Download the free trial version to preview all mailbox items or buy the full license for unlimited conversion.