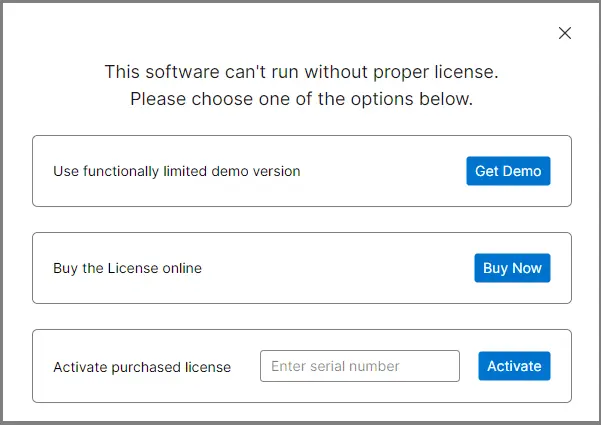
Step 1: First, download, install, and then launch the PST to IMAP migration tool on your Windows system. Click on 'Get Demo' or activate it (if a license is available). The software will then automatically relaunch.
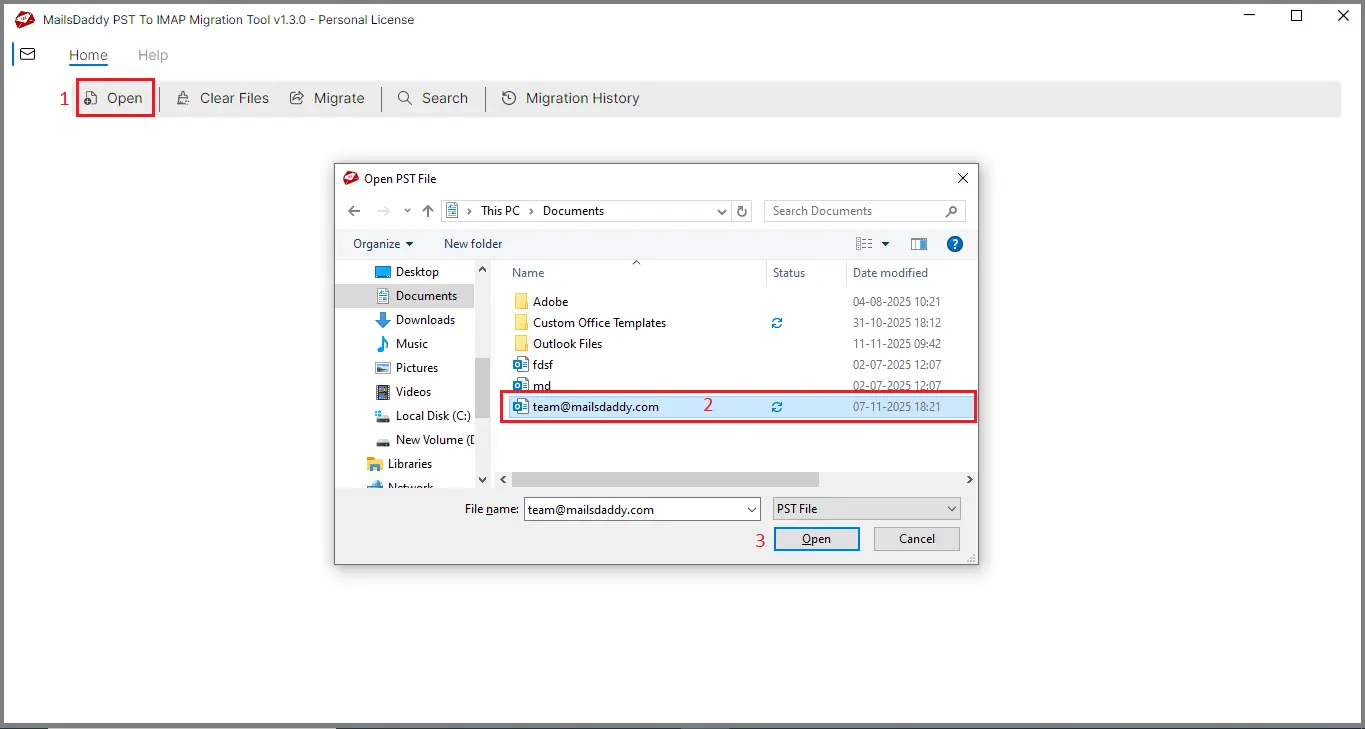
Step 2: Click on Open and select the Outlook PST file which you want to import in IMAP Account.
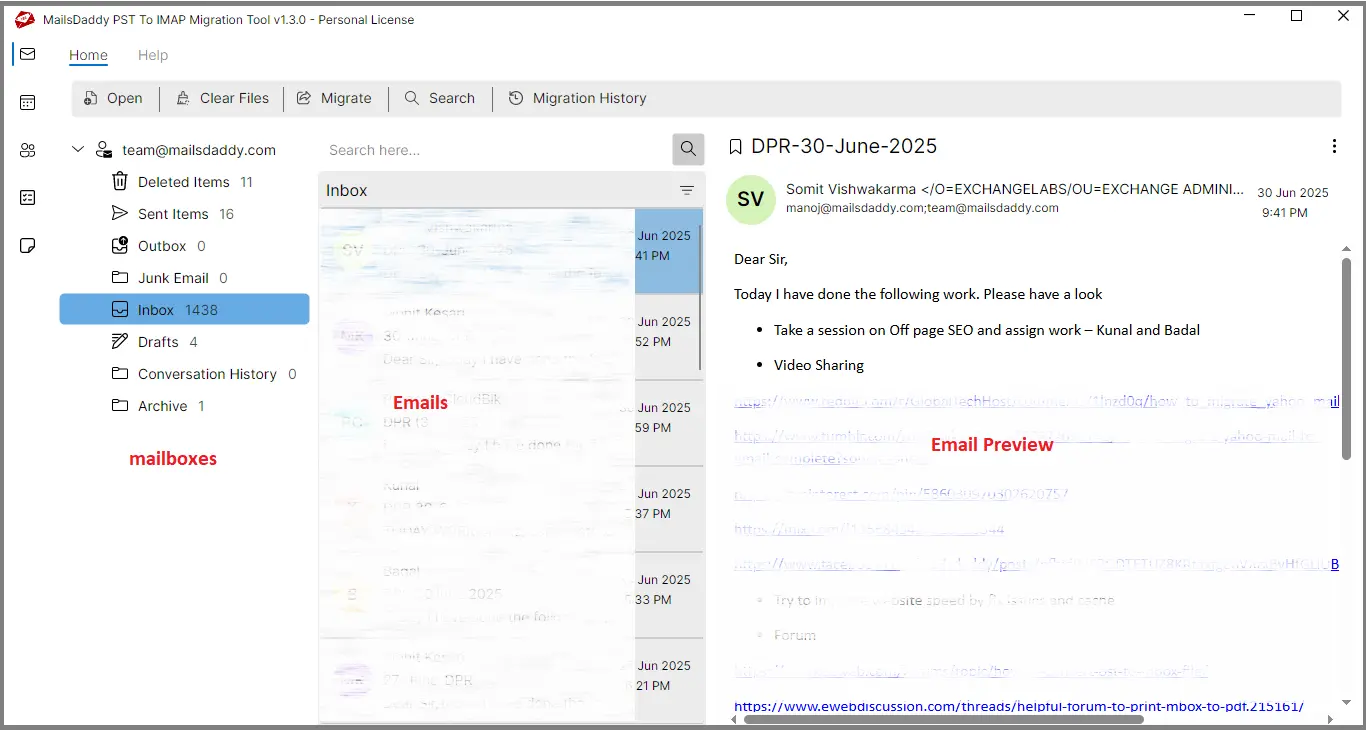
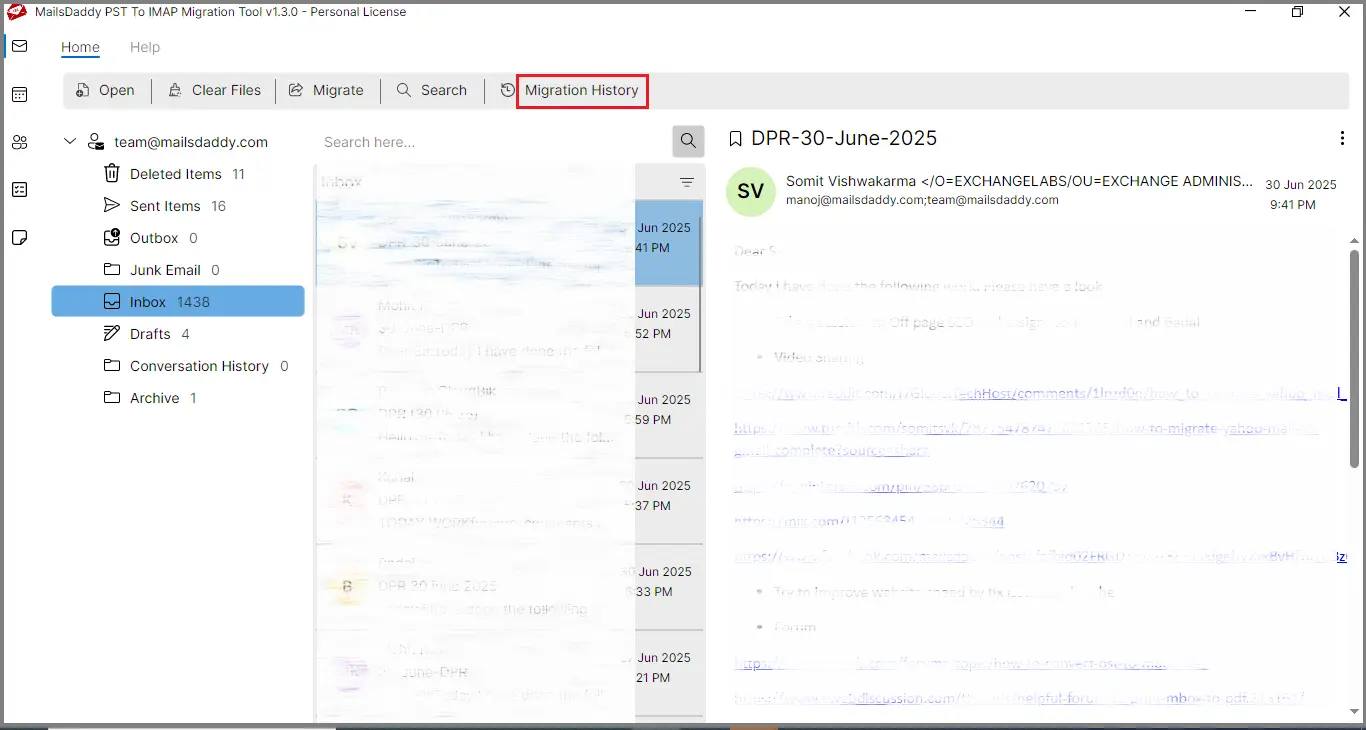
Step 3: Now the software will scan the PST file and display complete PST file database in the preview section.
Step 4: Press the Migration tab and choose all folders or selected folders from left side.

Step 5: Now enter your email address and App Password. If you don’t know the app passwd and want to know how to find it, click on How to generate App Password.
Note * Some IMAP accounts let you log in using your regular account password without needing an app-specific password. However, if the login doesn’t work with your normal password, then you’ll need to generate and use the app password instead.
Step 6: If you want to save credential for future migration enable it otherwise disable it.
Step 7: The software will automatically fetch the IMAP server details. If it doesn't appear in the IMAP server options, click on Find.
Step 8: If you want to export data between two selected dates, use the date filter option; otherwise, leave this option unchecked.
Step 9: If you enable the 'Perform Incremental Migration' option, the software will skip any duplicate emails found on the IMAP server during the migration process, so you don't receive the same email twice. Choose this option according to your needs.
Step 10: Click the browse icon to specify the saving location for the log report file.
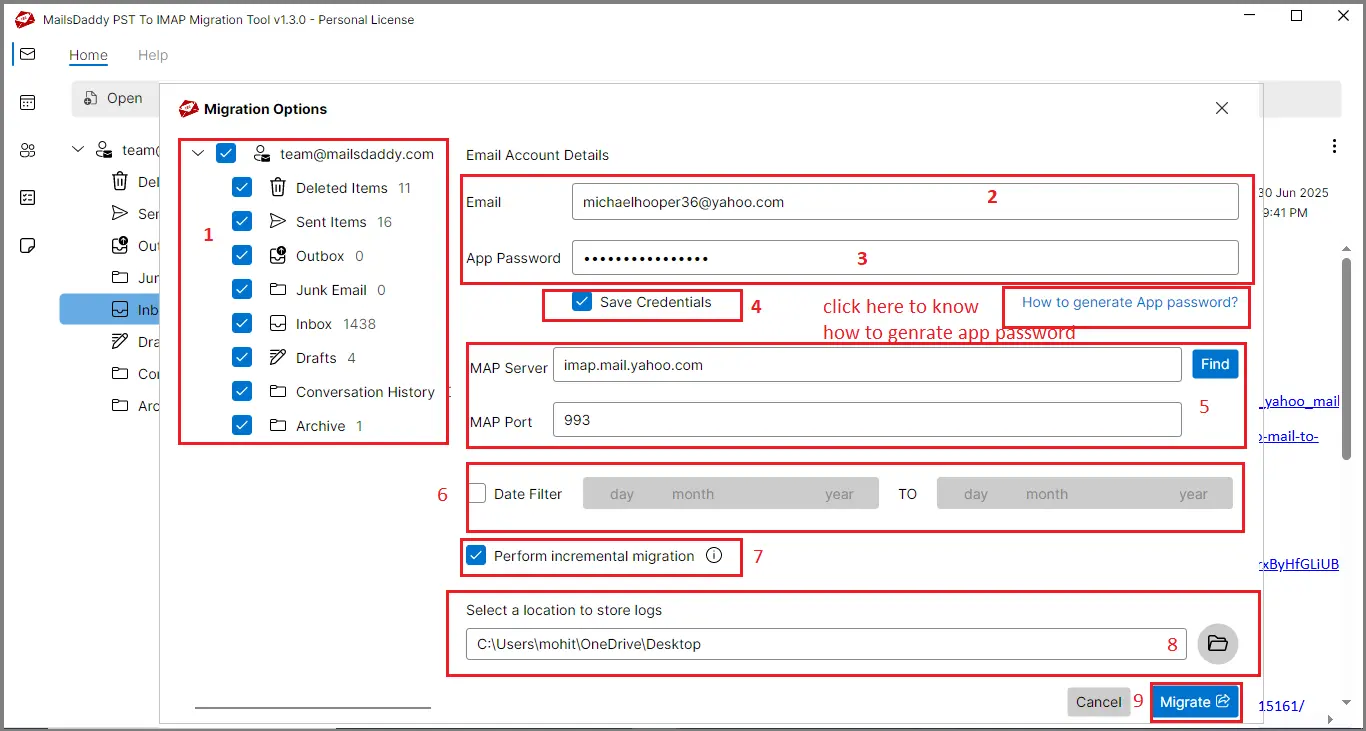
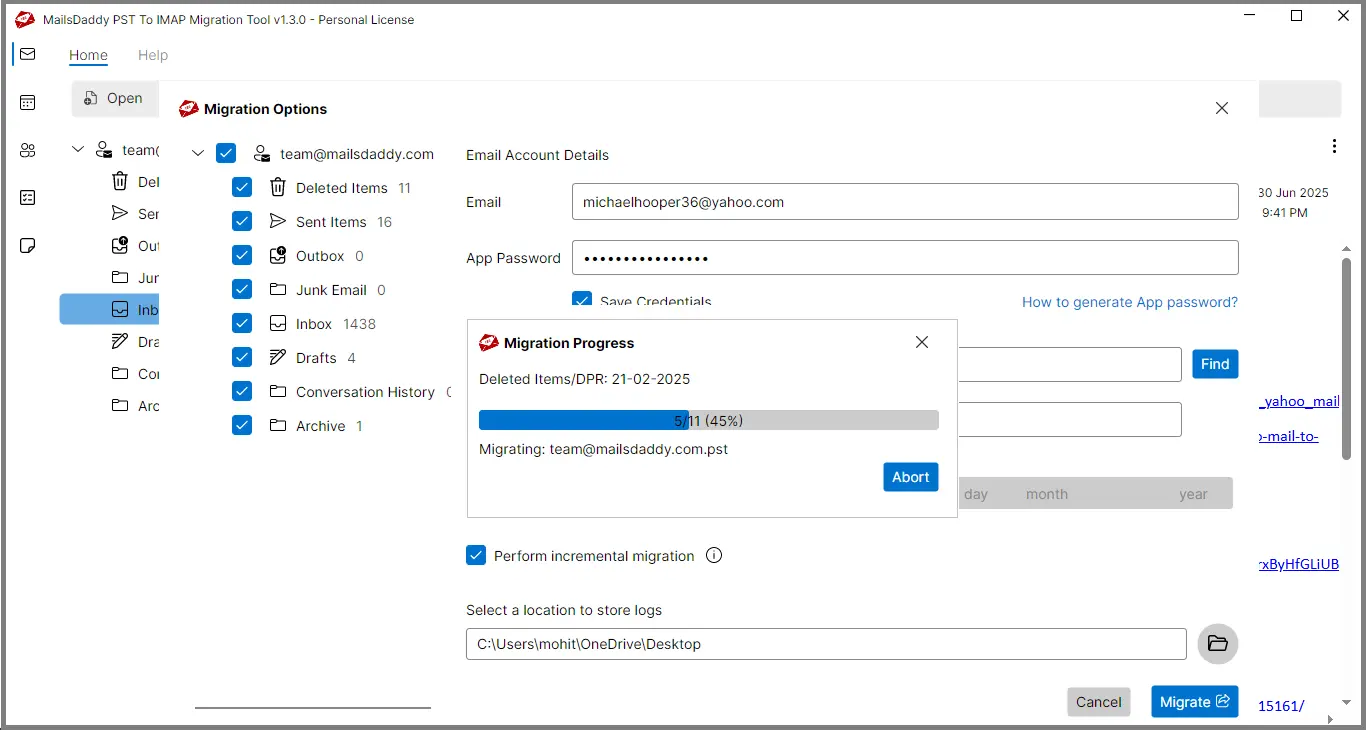
Step 11: Finally, click the Migrate button to start the migration process. Wait until the process is complete.
Required Data Migration: (This will show you all the filtered data, but you need a valid license to migrate the filtered data.)
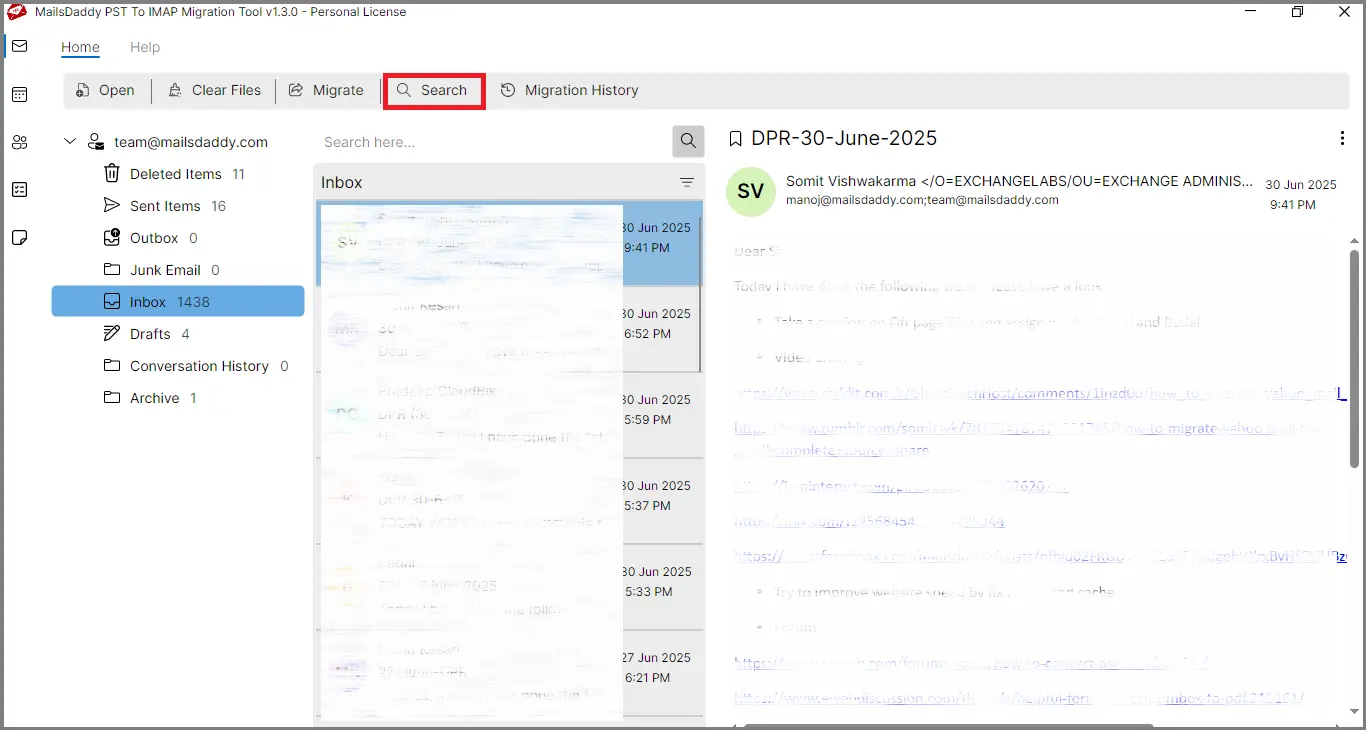
Step 1: Step 1: If you want to want to import the specific data from PST to IMAP server, select Search tab.
Step 2: From the section on the left, select the desired or all folders. Use one of the various filter options (From, To, Subject, Has the words, Date range, and others) as needed and click the search option.
Step 3: You can see all the filtered emails below. Double-click on any email to preview it.
Step 4: Now select the emails you want to export and click the migrate button.
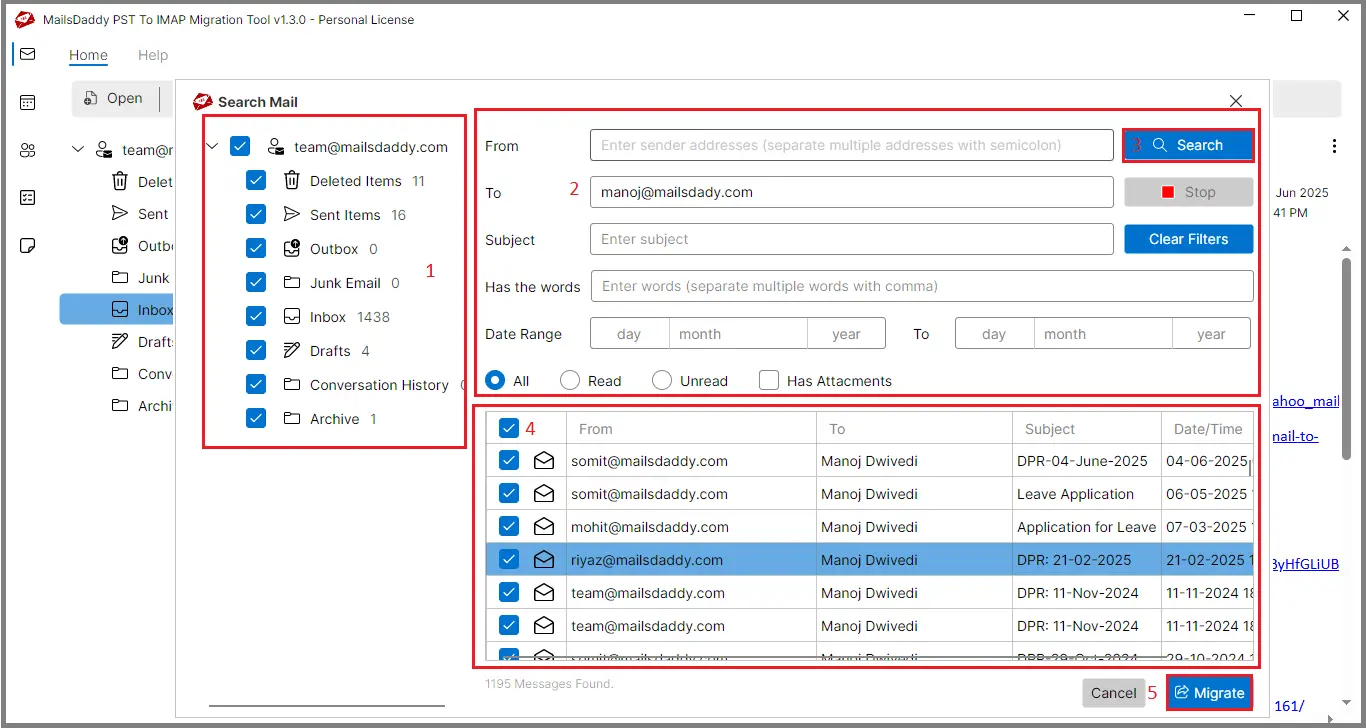
Step 5: Provide the credentials details, verify the server details. Confirm the log file saving location, and click on Migration to start the migration.

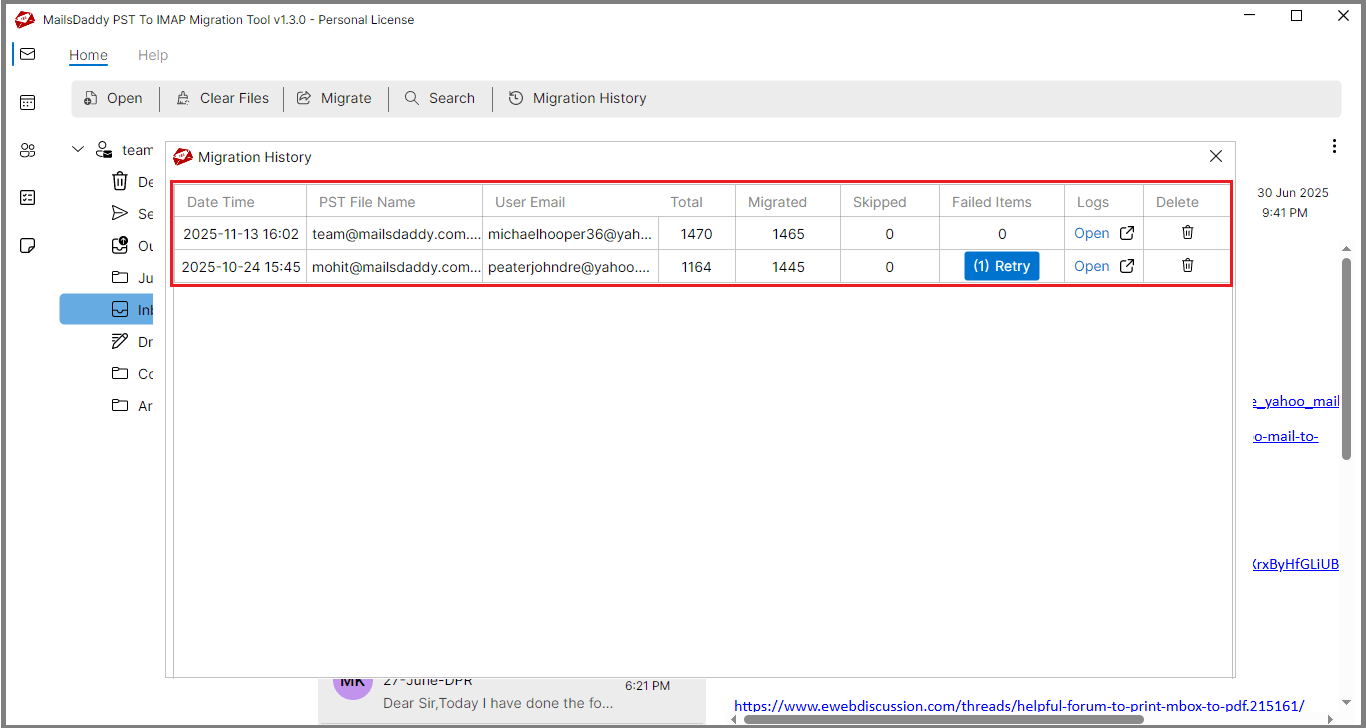
Step 1: After the migration process is complete, if you want to check the status of the migration, click on the Migration History tab. Here you will find details such as the migration start time, the name of your PST file, your IMAP account, the total message count, the number of emails migrated, the number of emails skipped, and the number of emails that failed to migrate.
Step 2: If you receive a failed email, click the retry button. Verify all the credential details and other information and then click the migrate button.