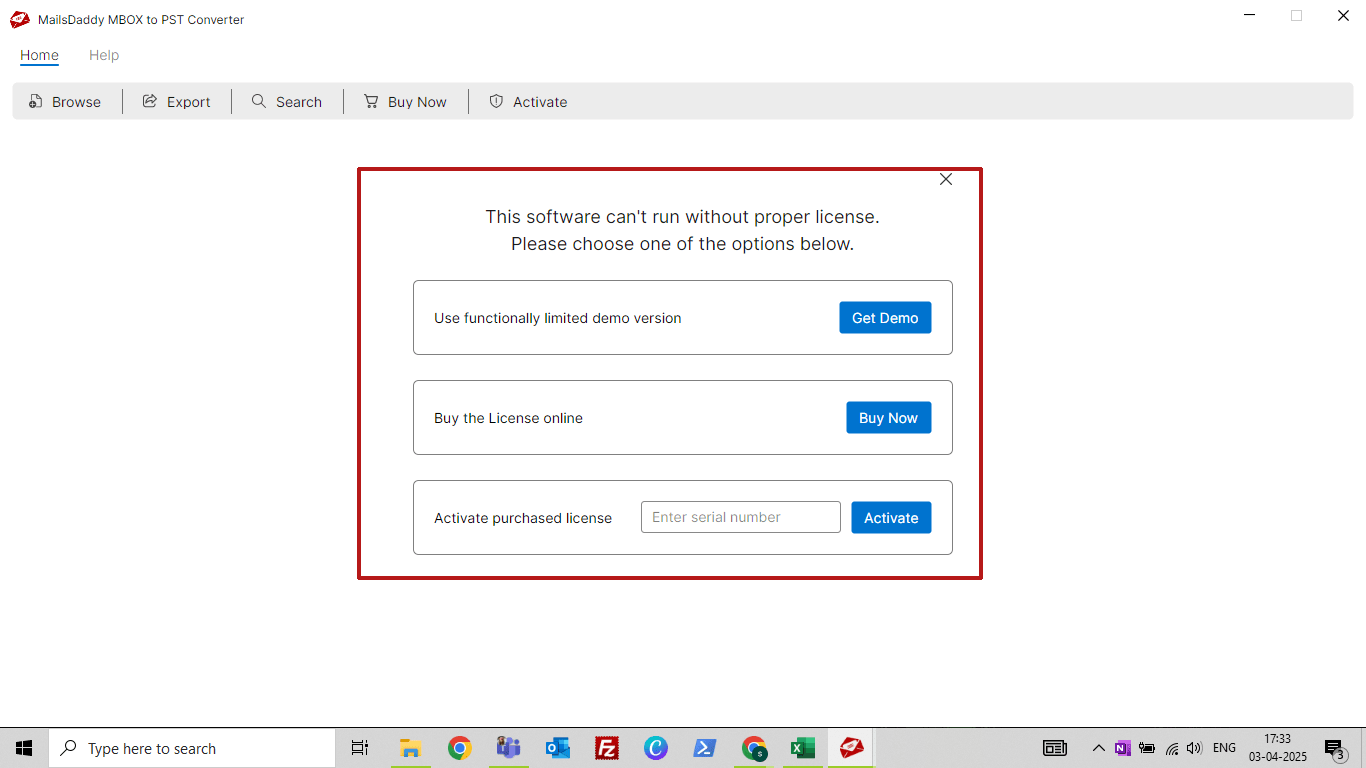
Step 1: Download and install the application (see Installation Guide). Launch the software and click the 'Get Demo' button to use the free trial edition. If you’ve already purchased an activation key, click the 'Activate' button to register the full version.
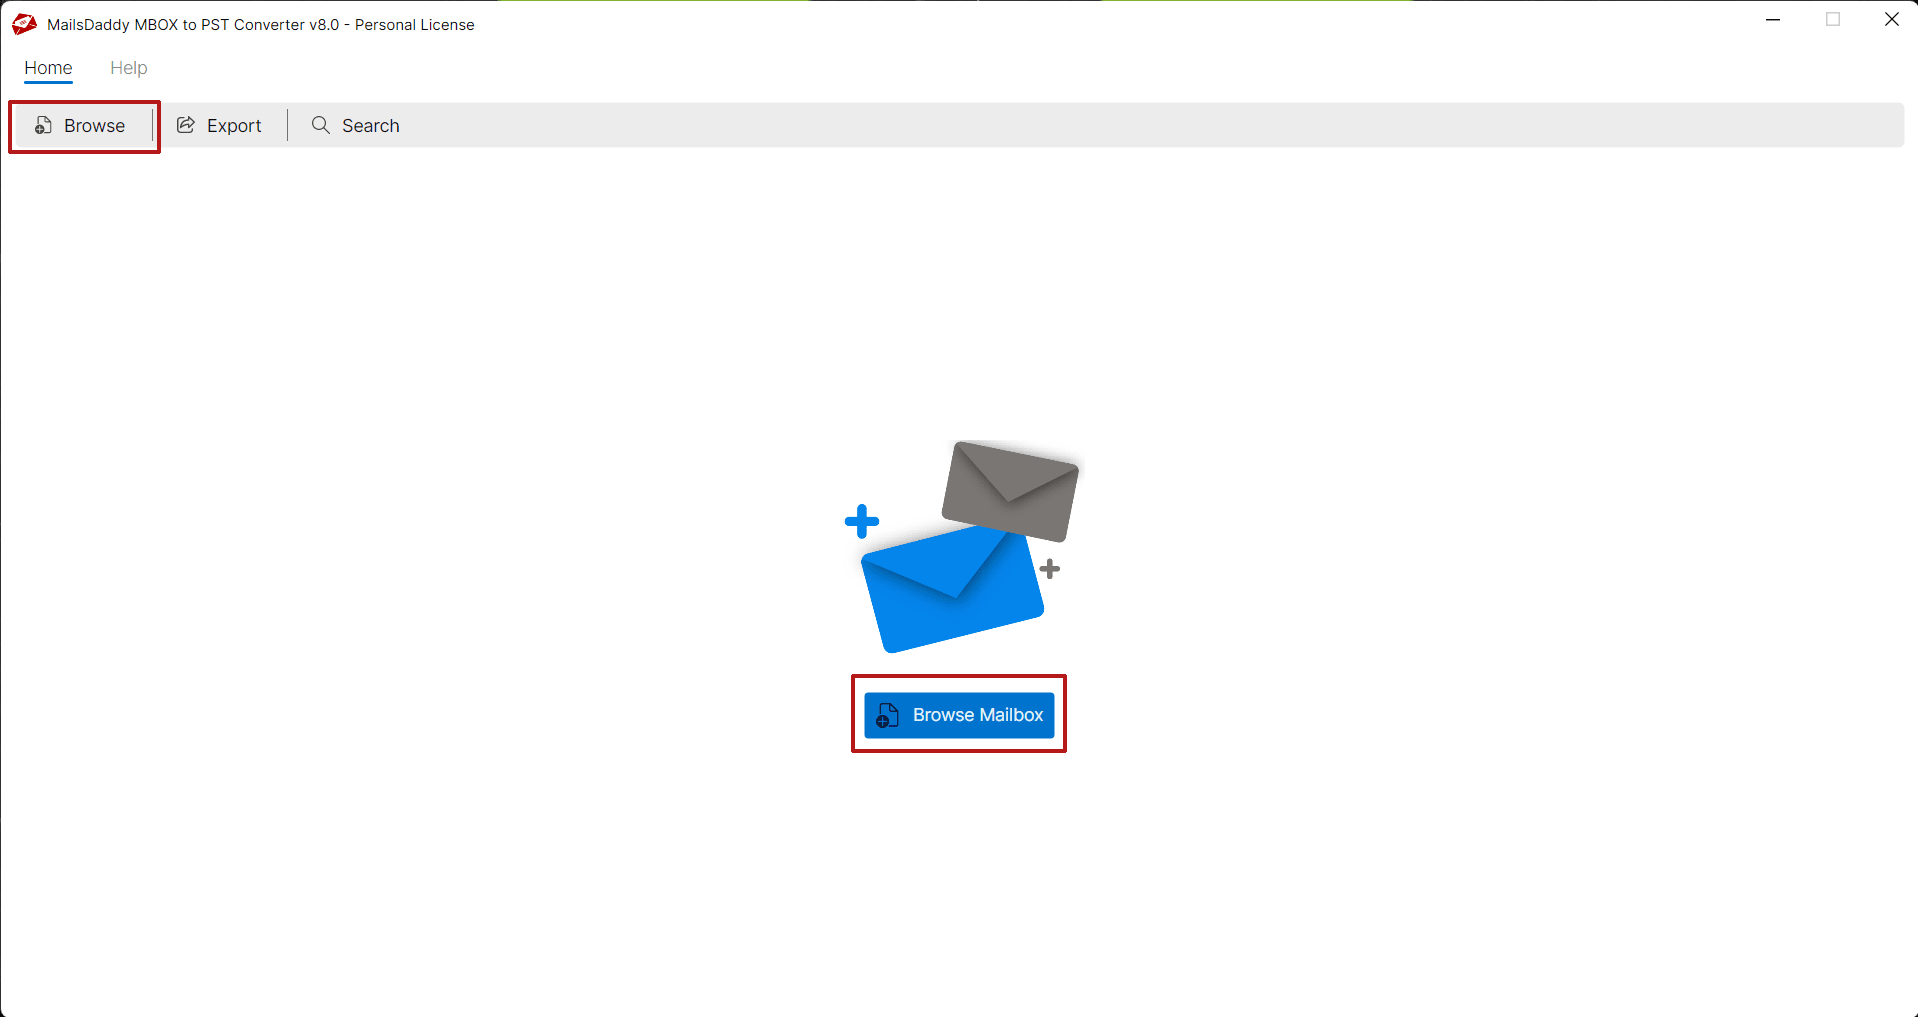
Step 2: The first screen will appear on your window. Click the 'Browse Mailbox' button or use the 'Browse' option from the header.
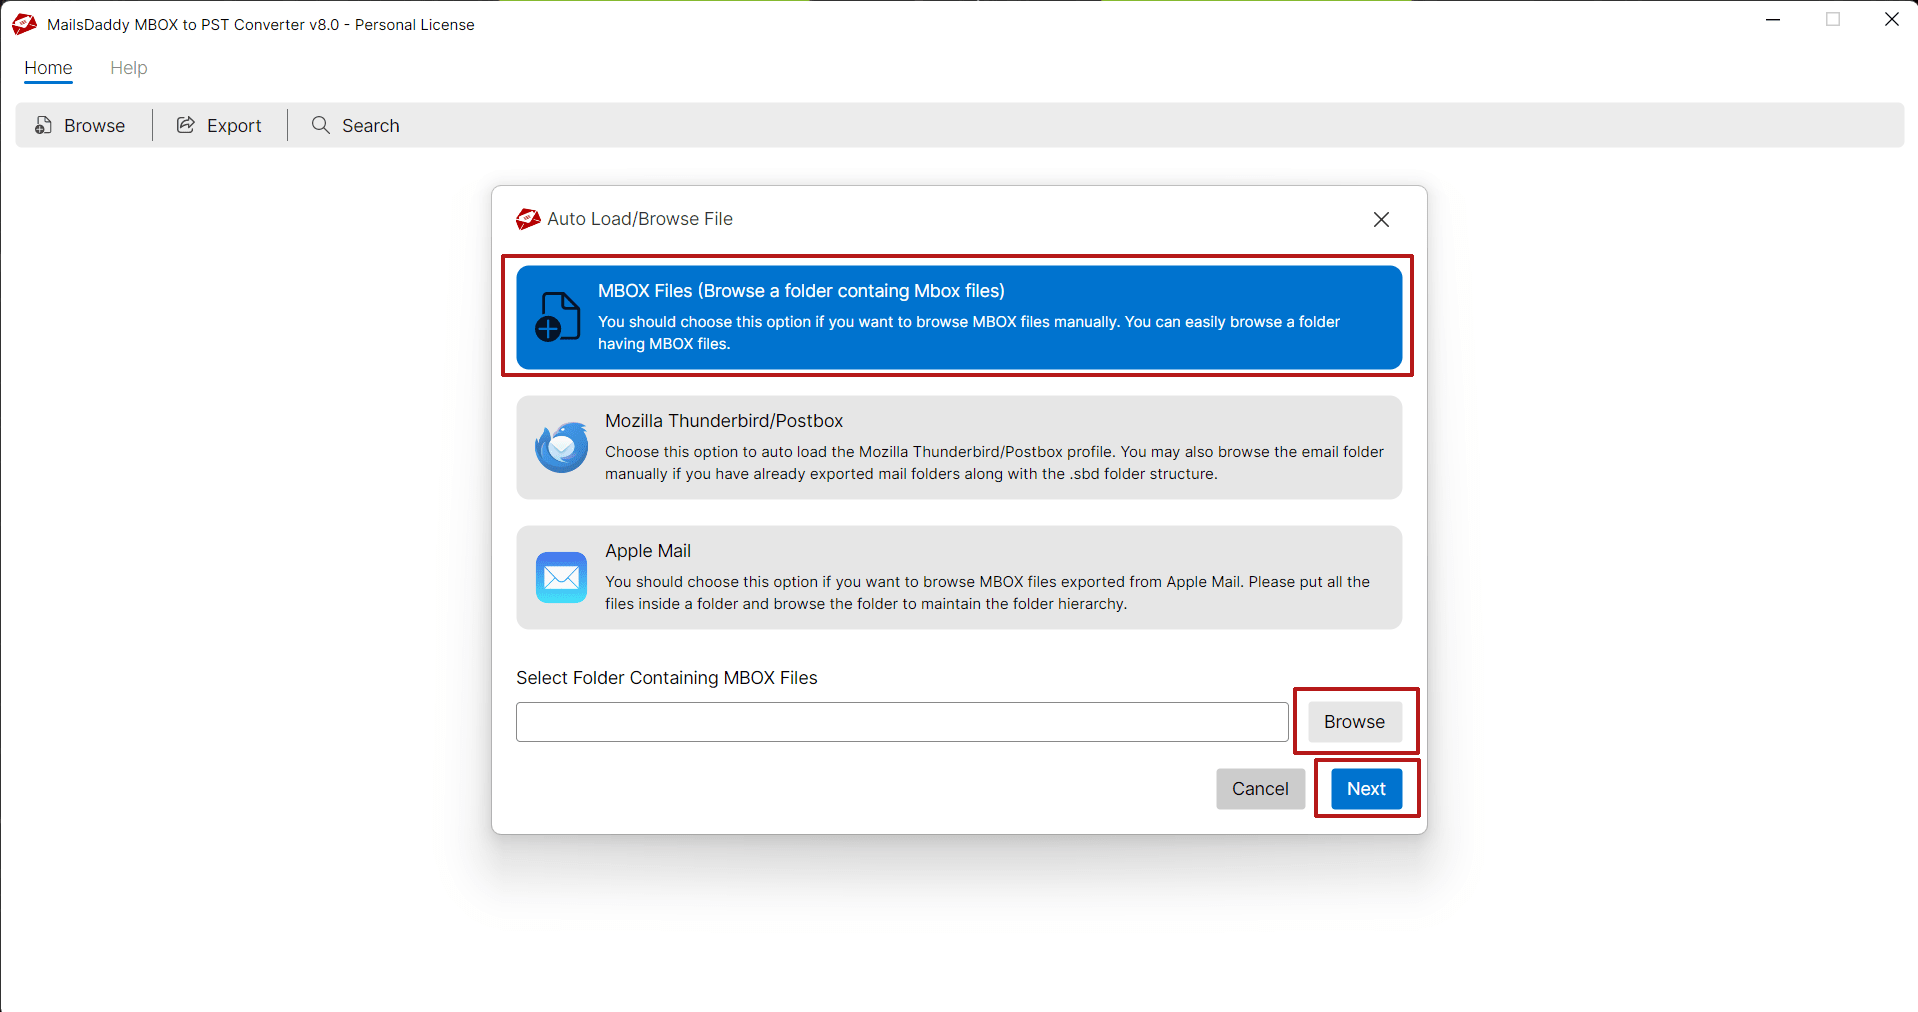
Step 3:Now you will get three options to Add MBOX Files.
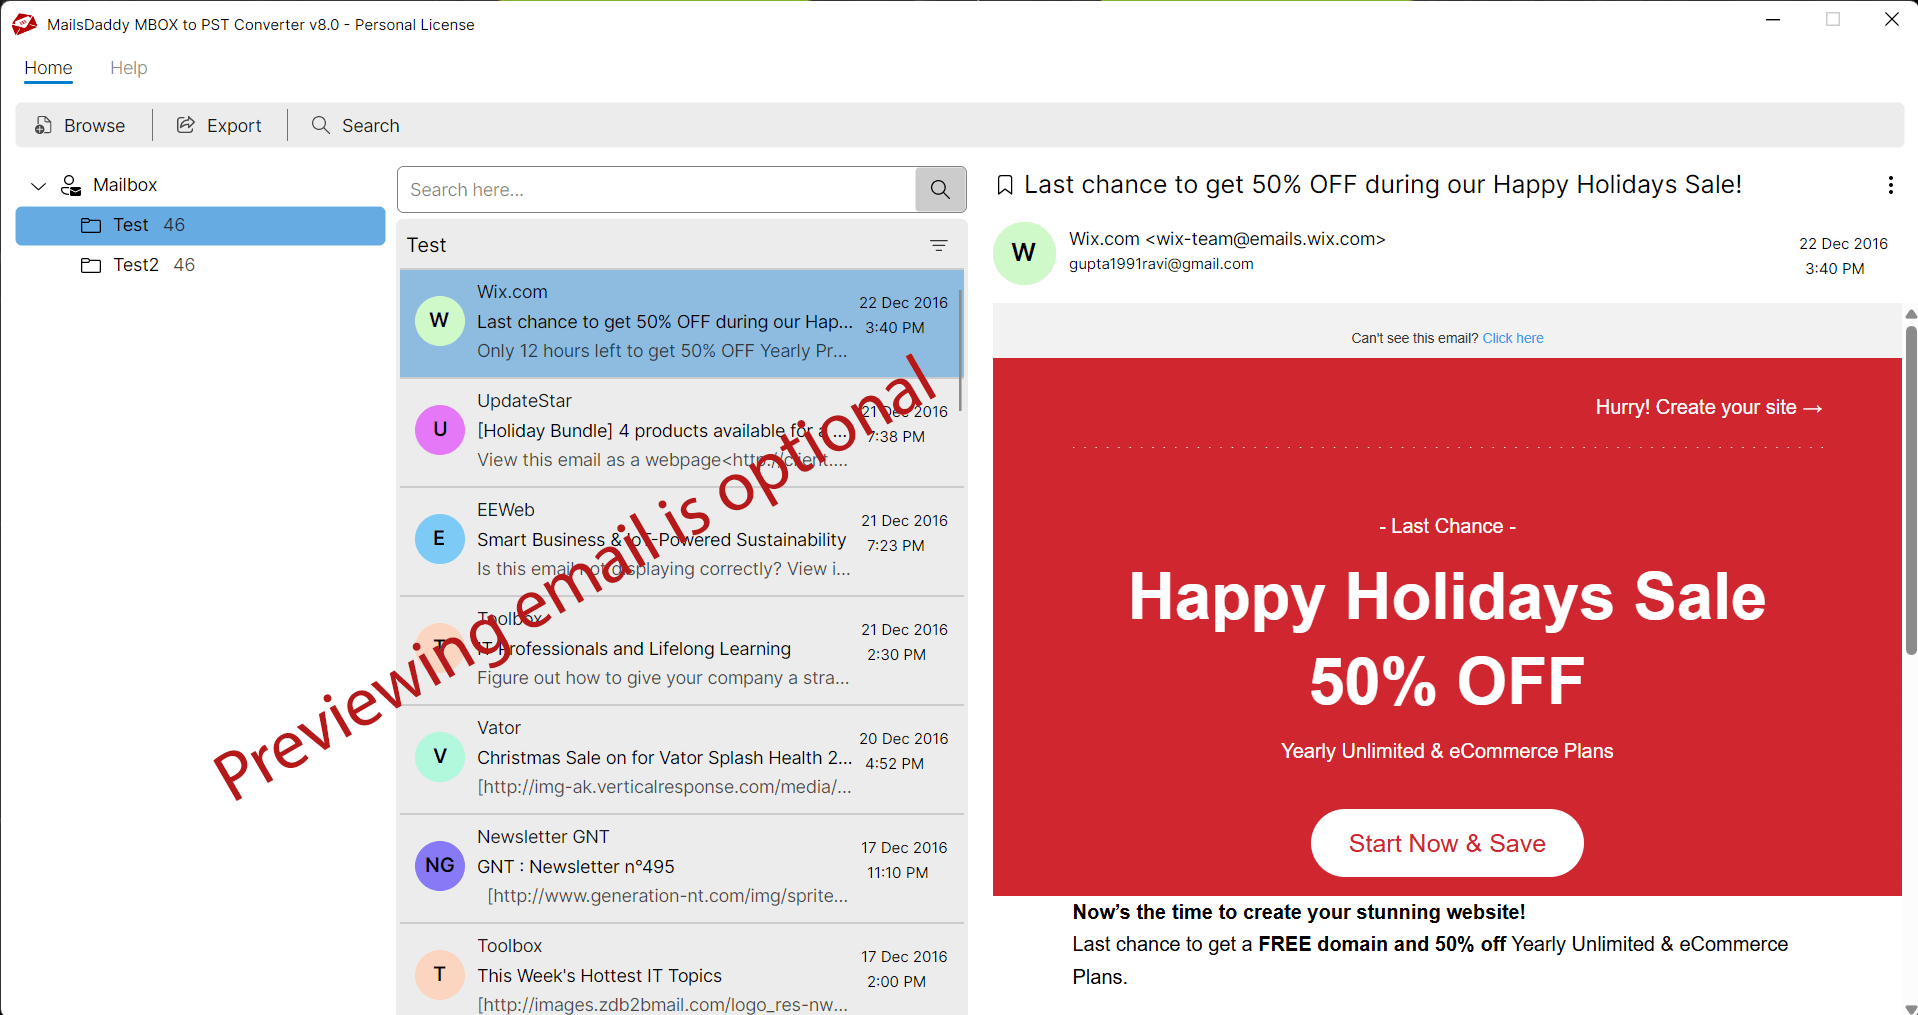
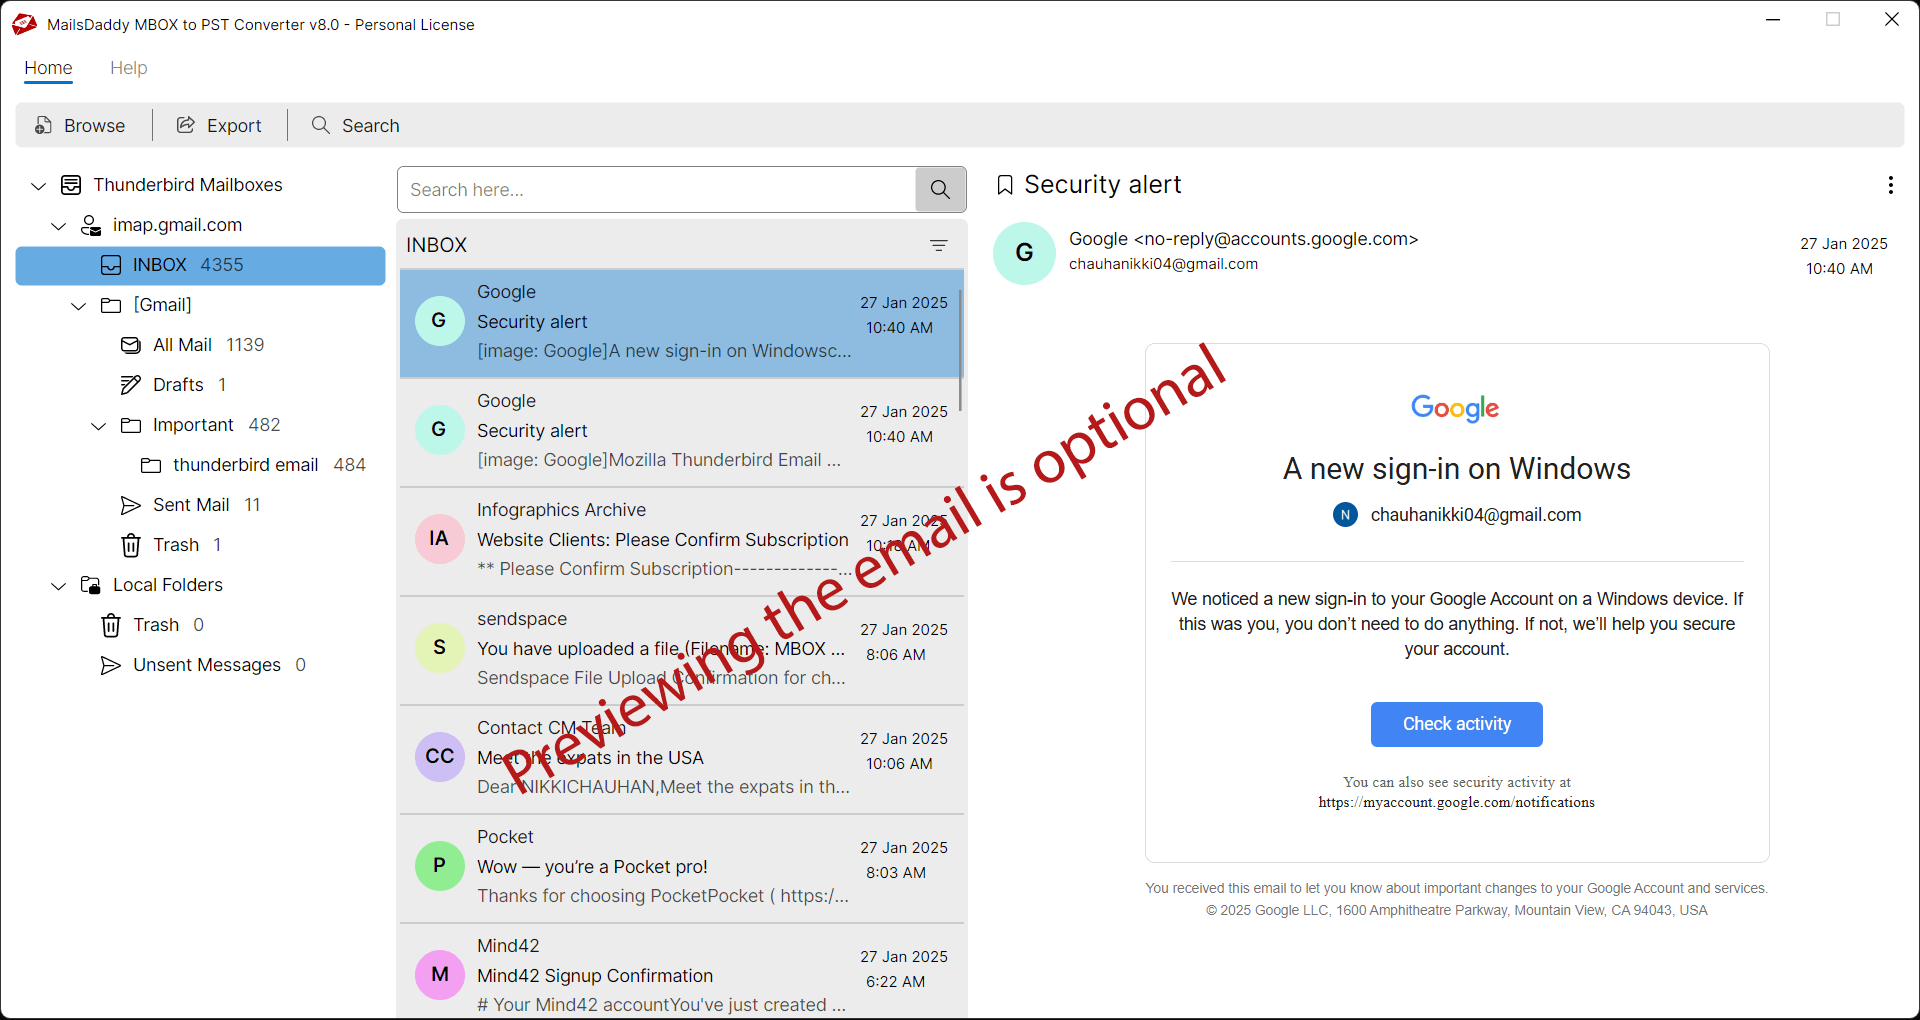
Step 4: The tool will load all selected MBOX files at once. You can click on a specific MBOX file to view all its messages, and then click on any message to preview its content along with attachments. Loading and Previewing emails is optional you may skip and click the 'Export' button directly.
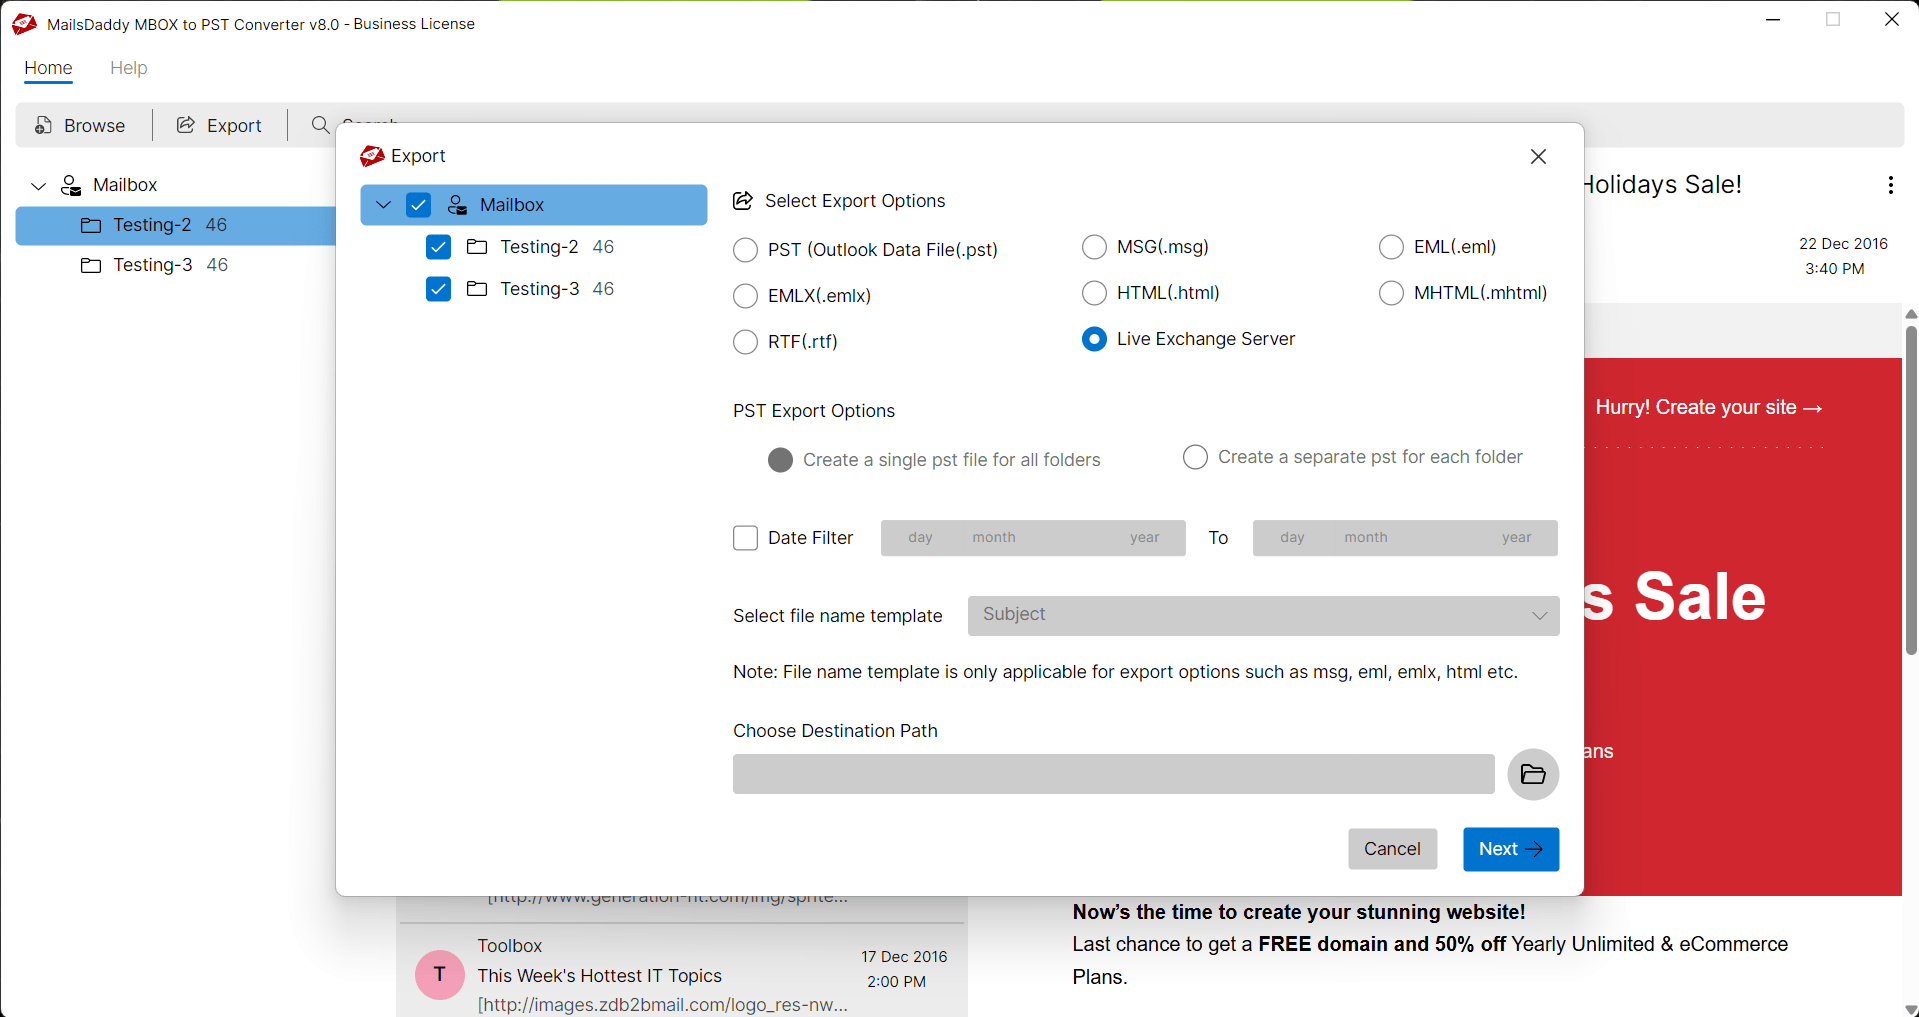
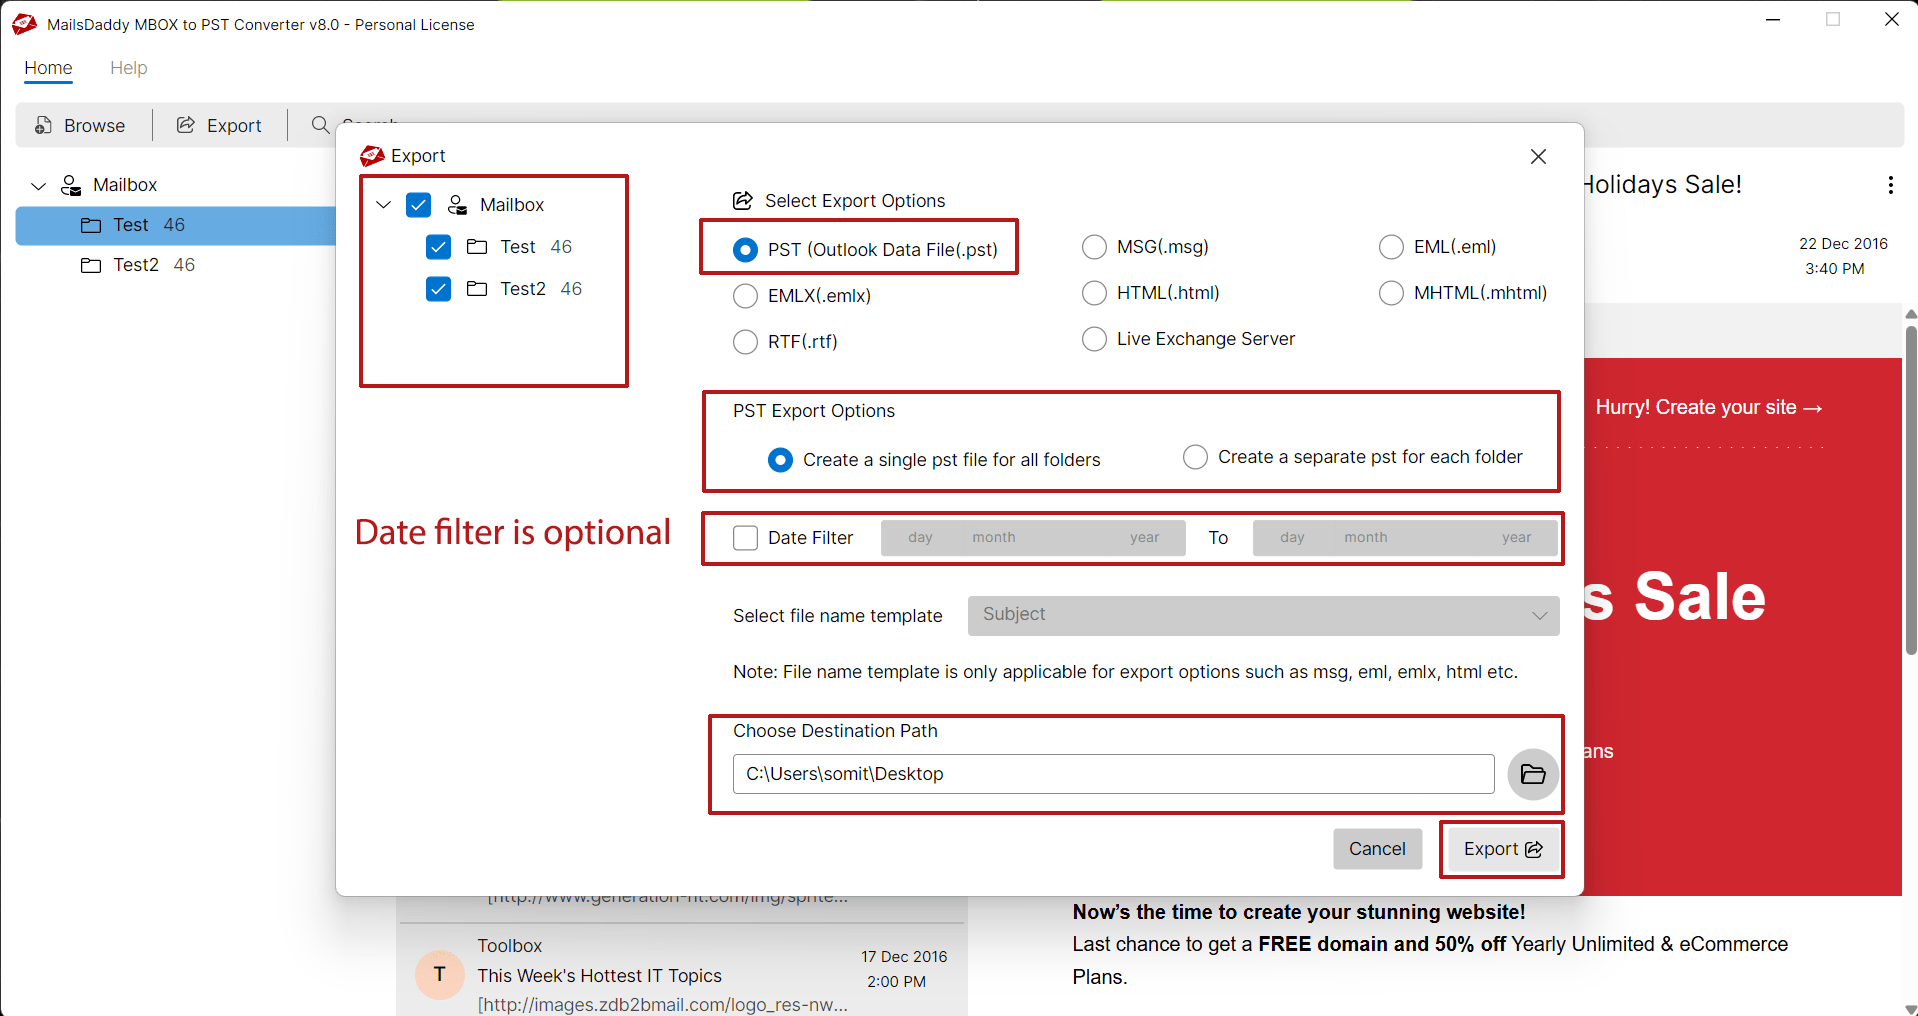
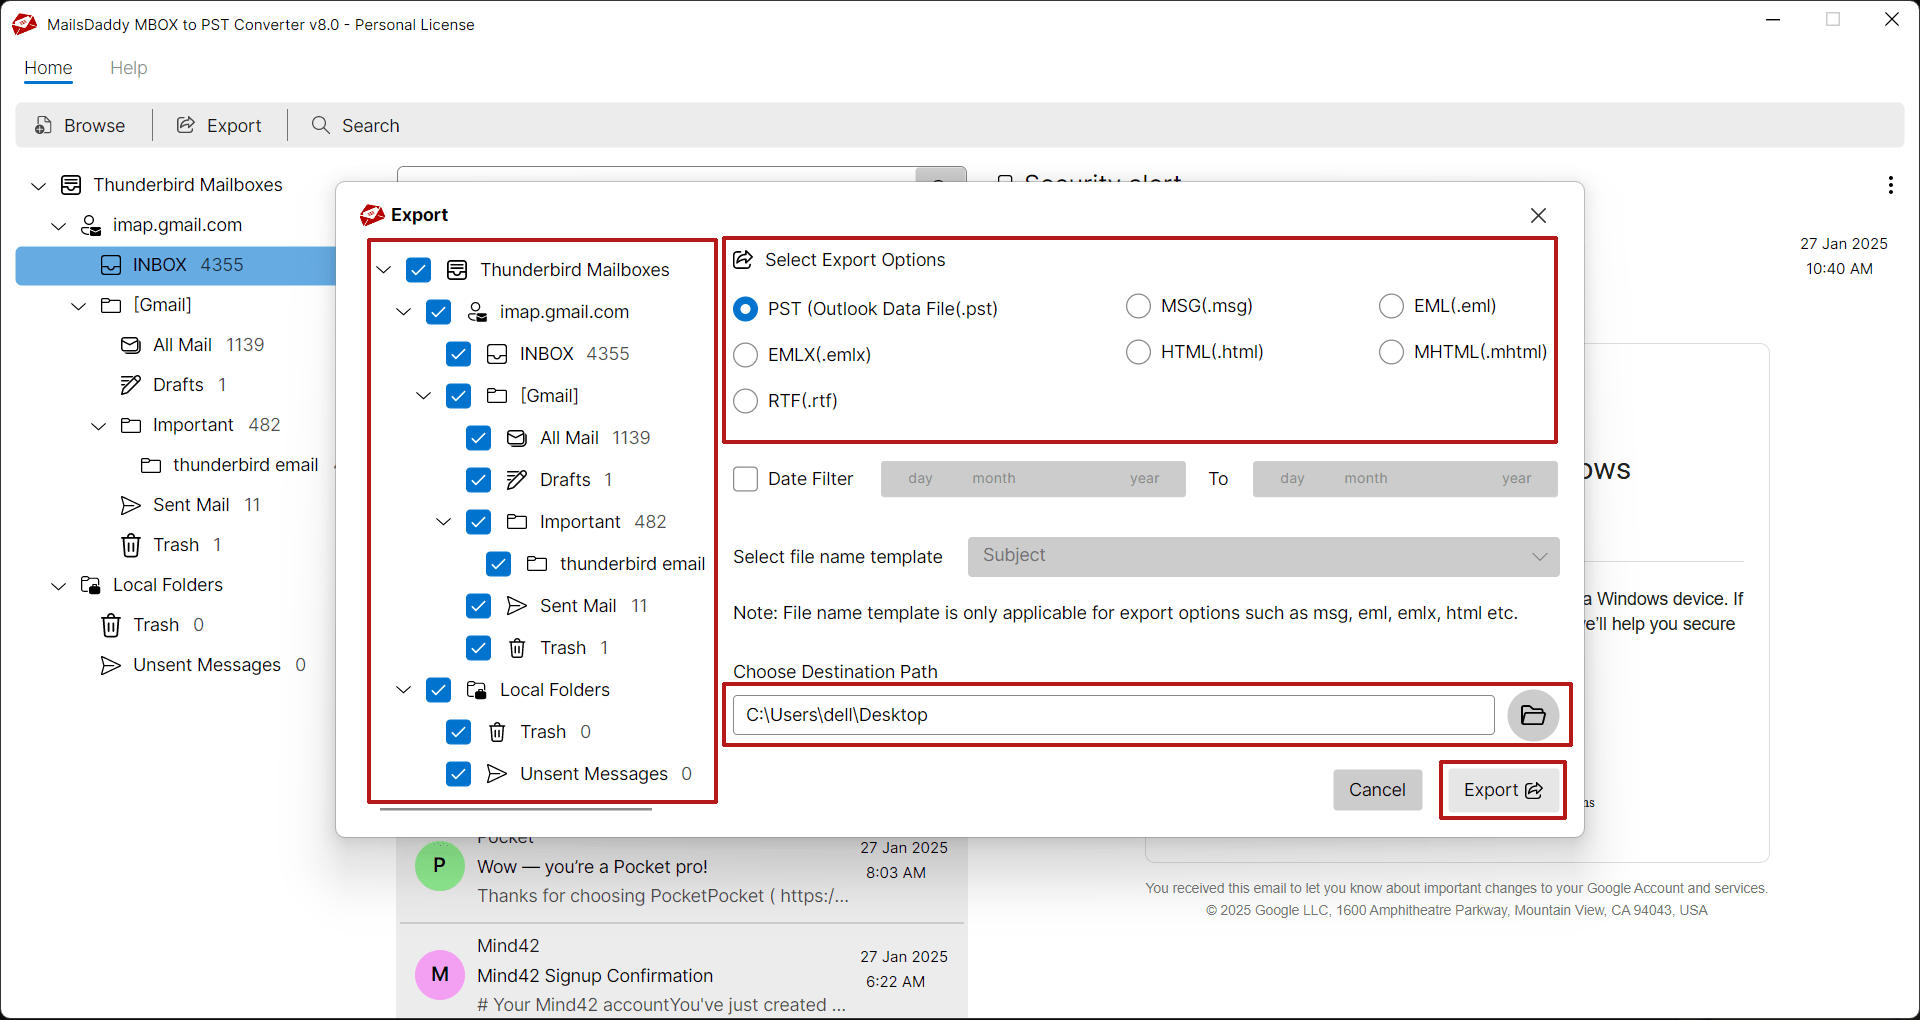
Step 5: Export Window will appear. Select MBOX files from the tree panel which you want to export > Select Export option >> Date Filter (Optional) >> Destination Path >> Click on Export Button.
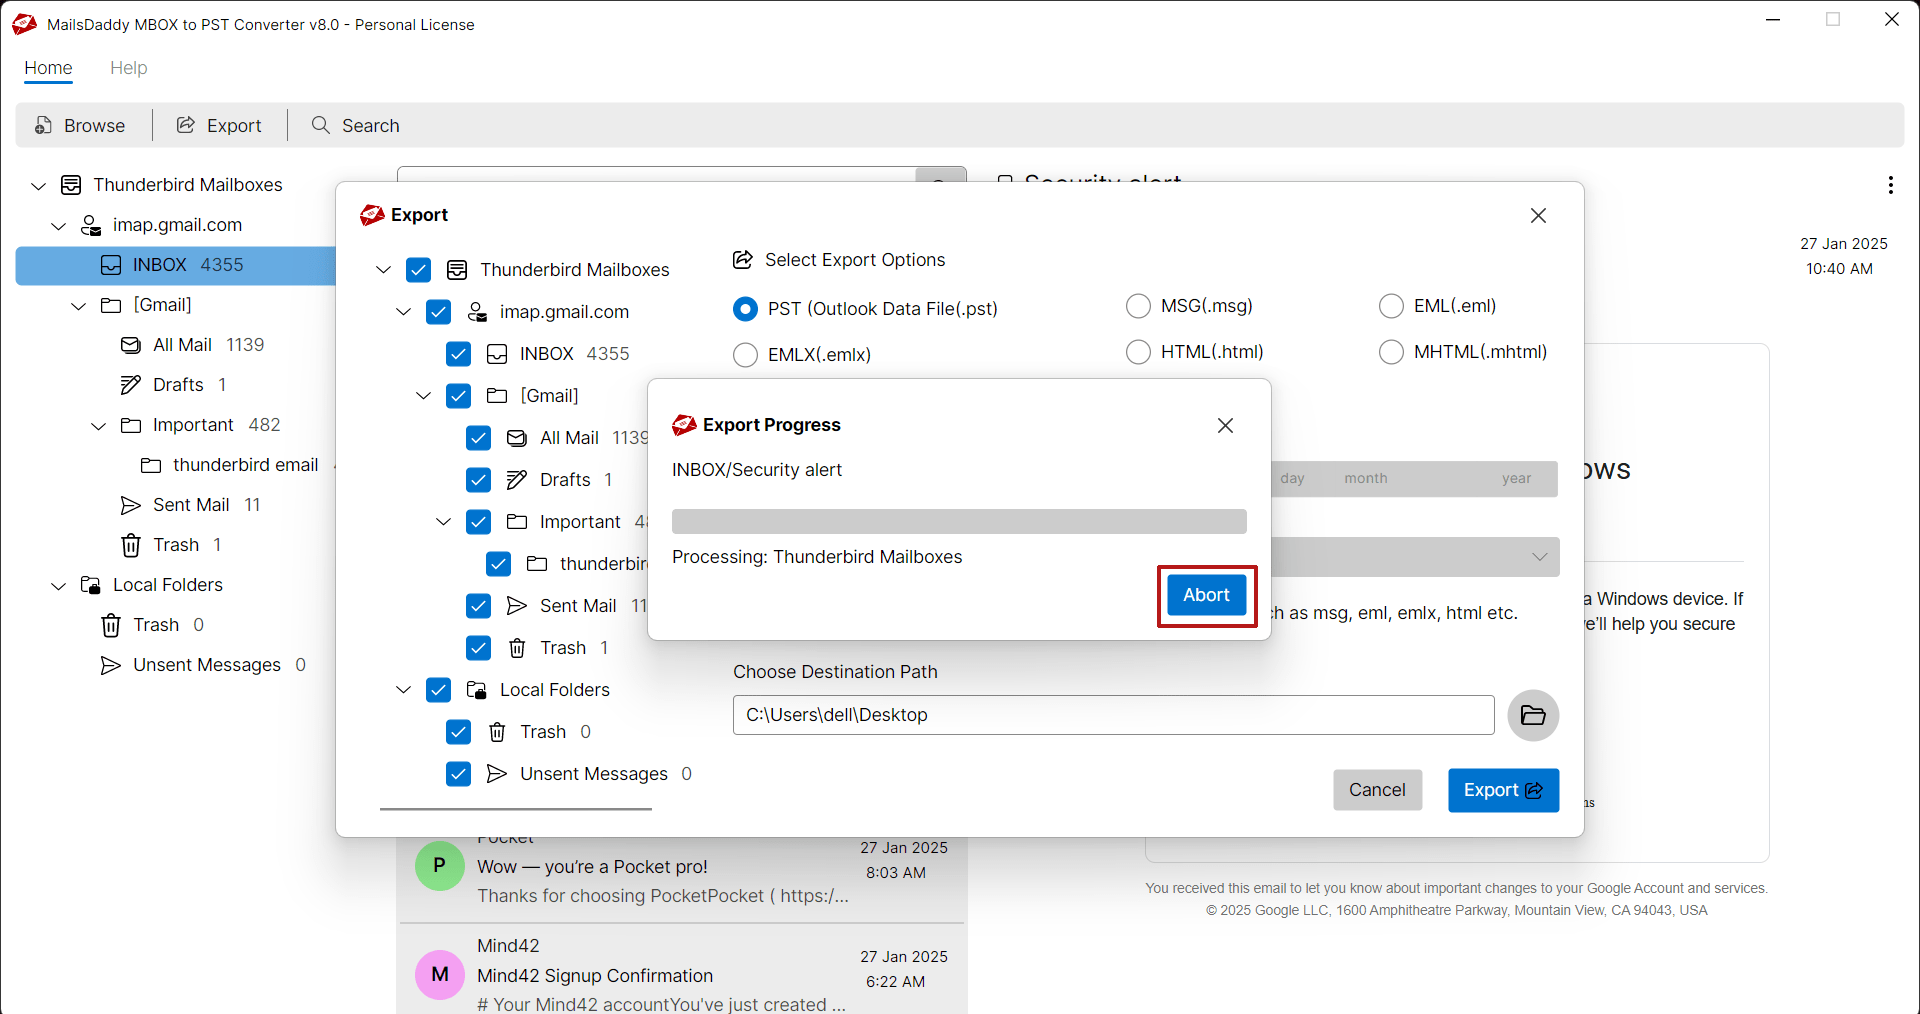
Step 5:Export process begins and it will take a few minutes to export all slected files. You can cancel the process in between by clicking on Abort button.
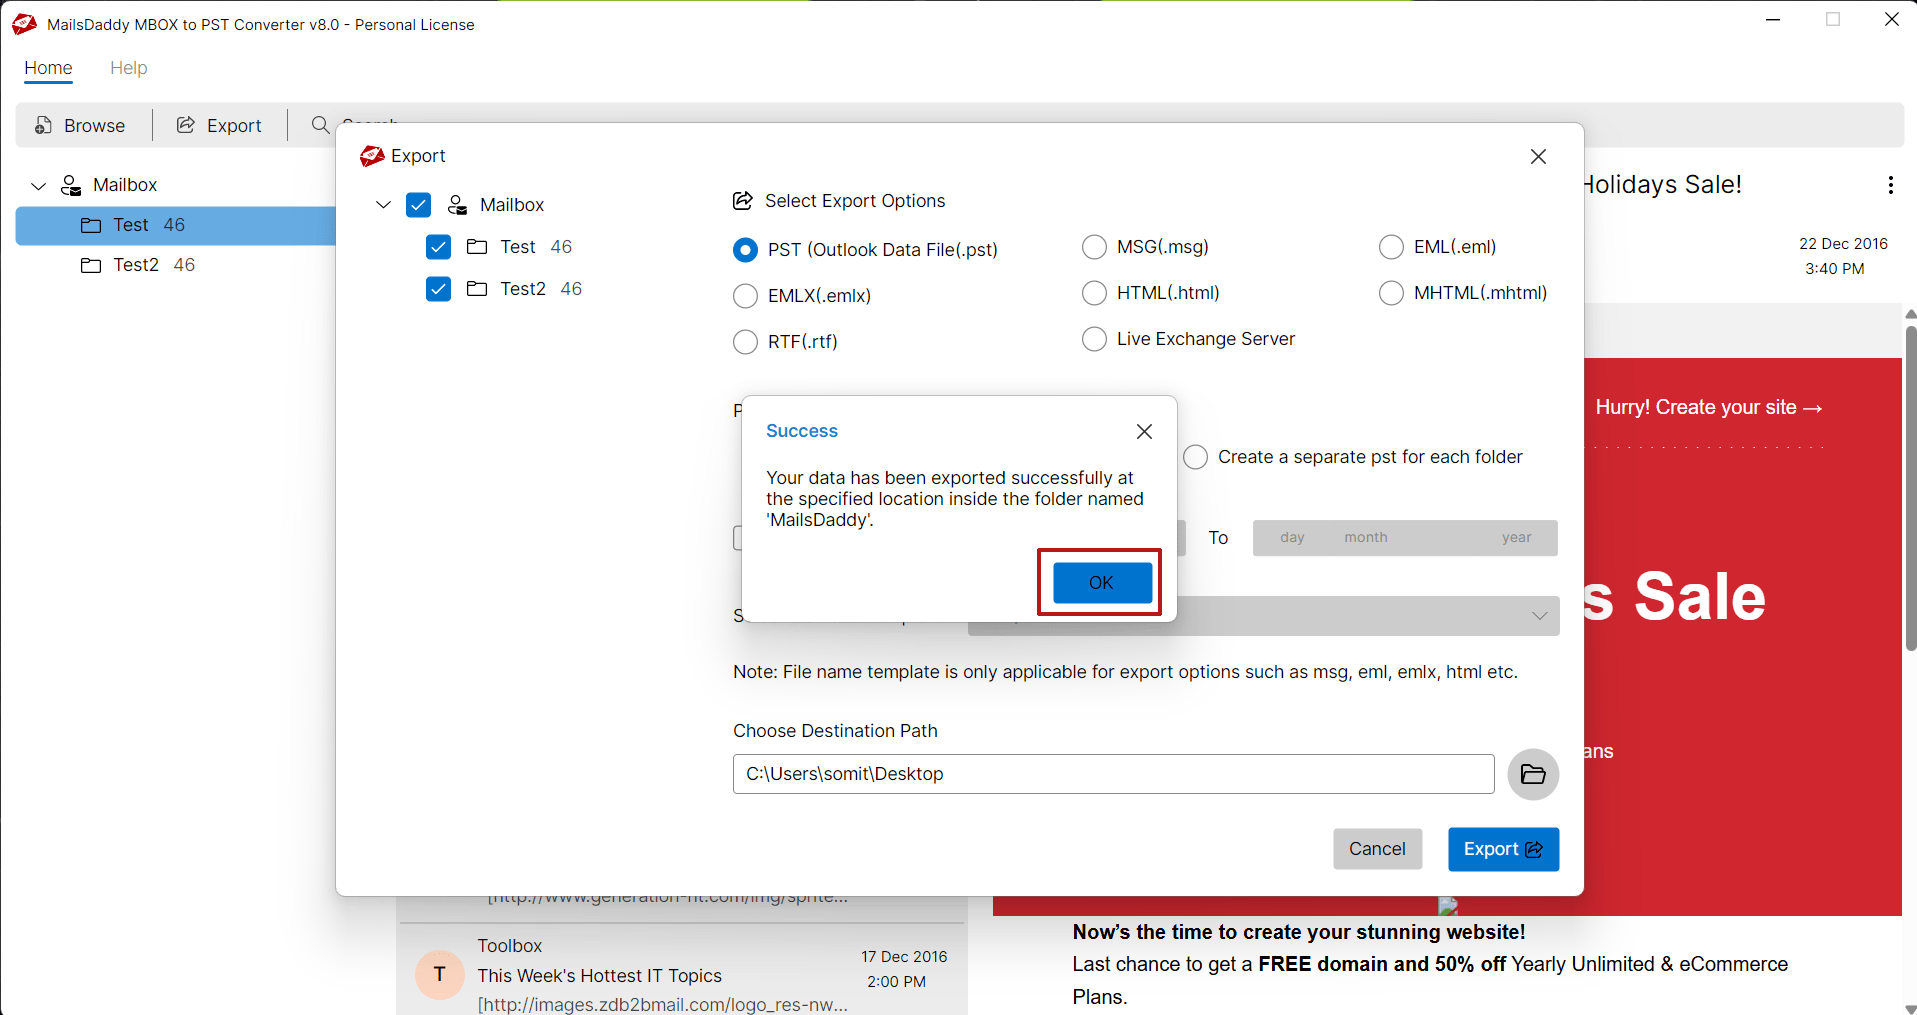
Step 6: You will get a confirmation message "Your data has been exported successfully at the specified location inside the folder name MailsDaddy". Click on the OK button
Read our blog to make sure how to open or import PST file in MS Outlook.
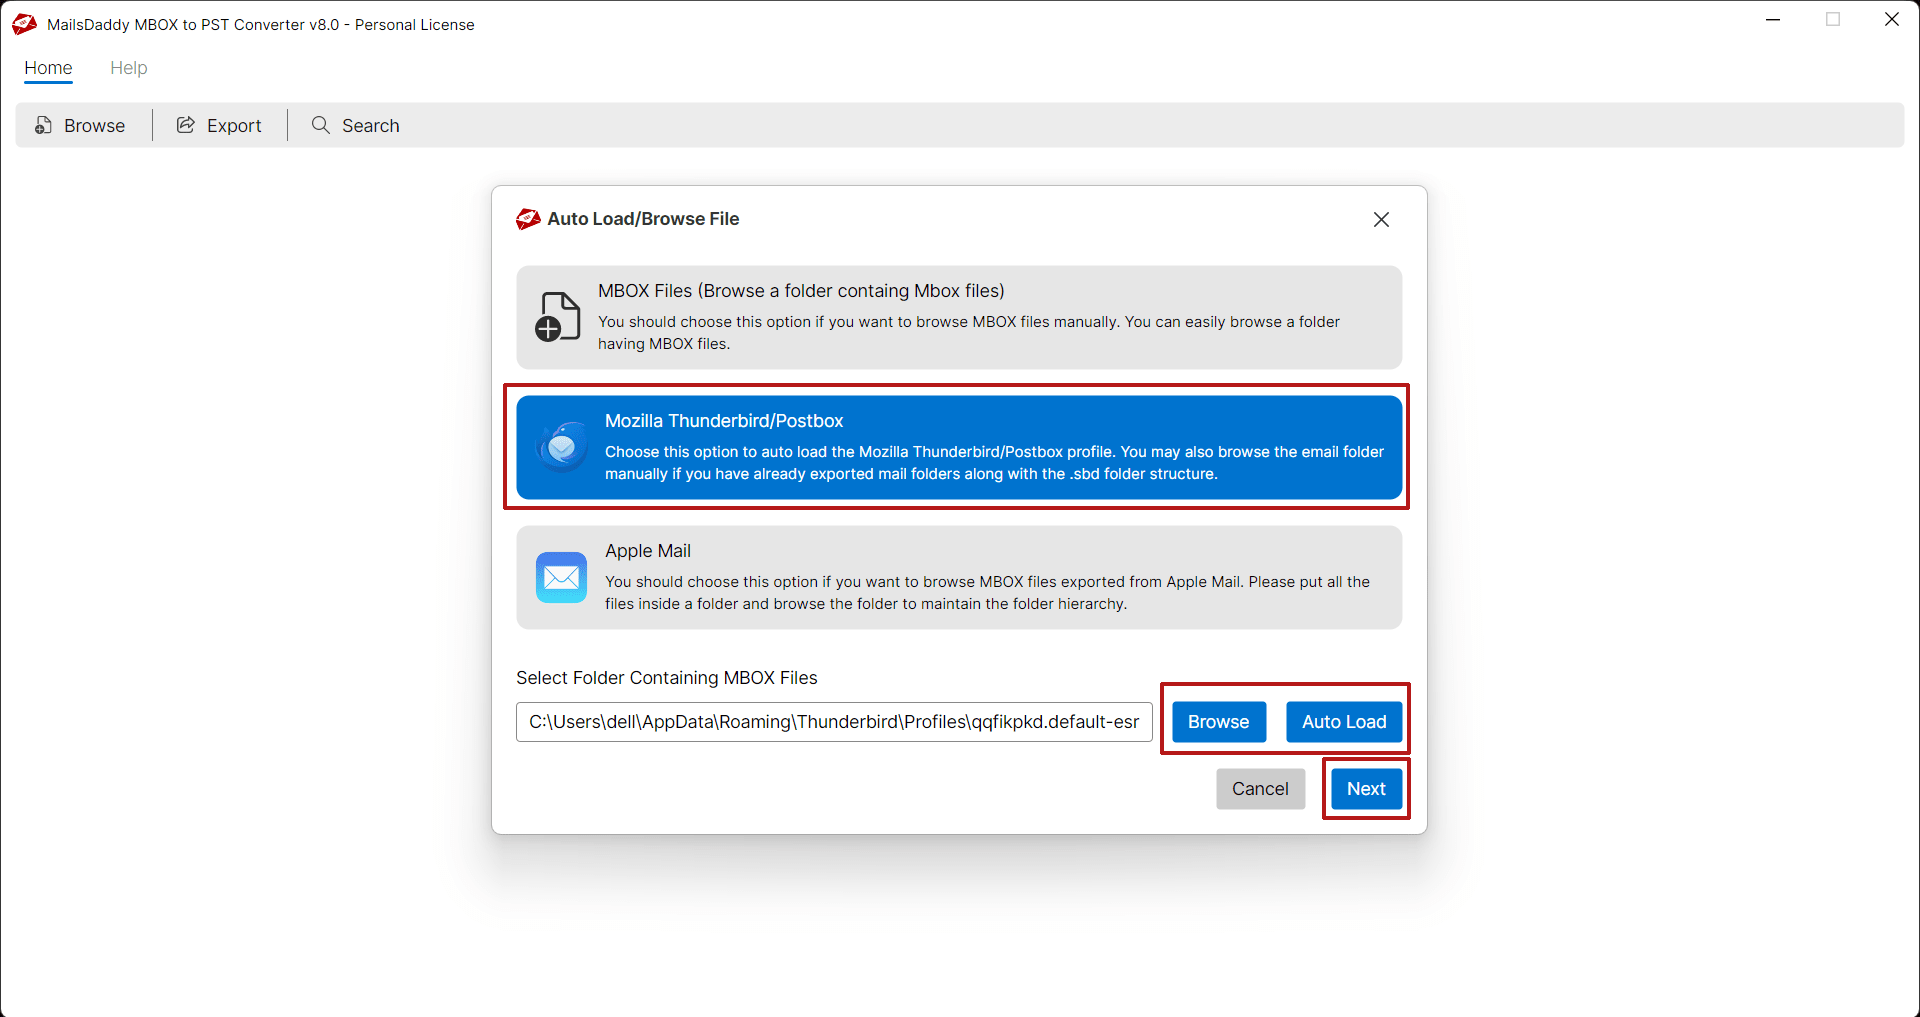
Step 1: Launch the converter and you will see 3 options to add MBOX files. Select Mozilla Thunderbird/Postbox from them and Click on Auto Load button to browse Thunderbird mail folders automatically then click on Next button
Note: You may also browse Thunderbird folder manually.
Step 2: The software will load all Thunderbird accounts and folders available in the selected profile. you may click on particular folder to load and preview emails.
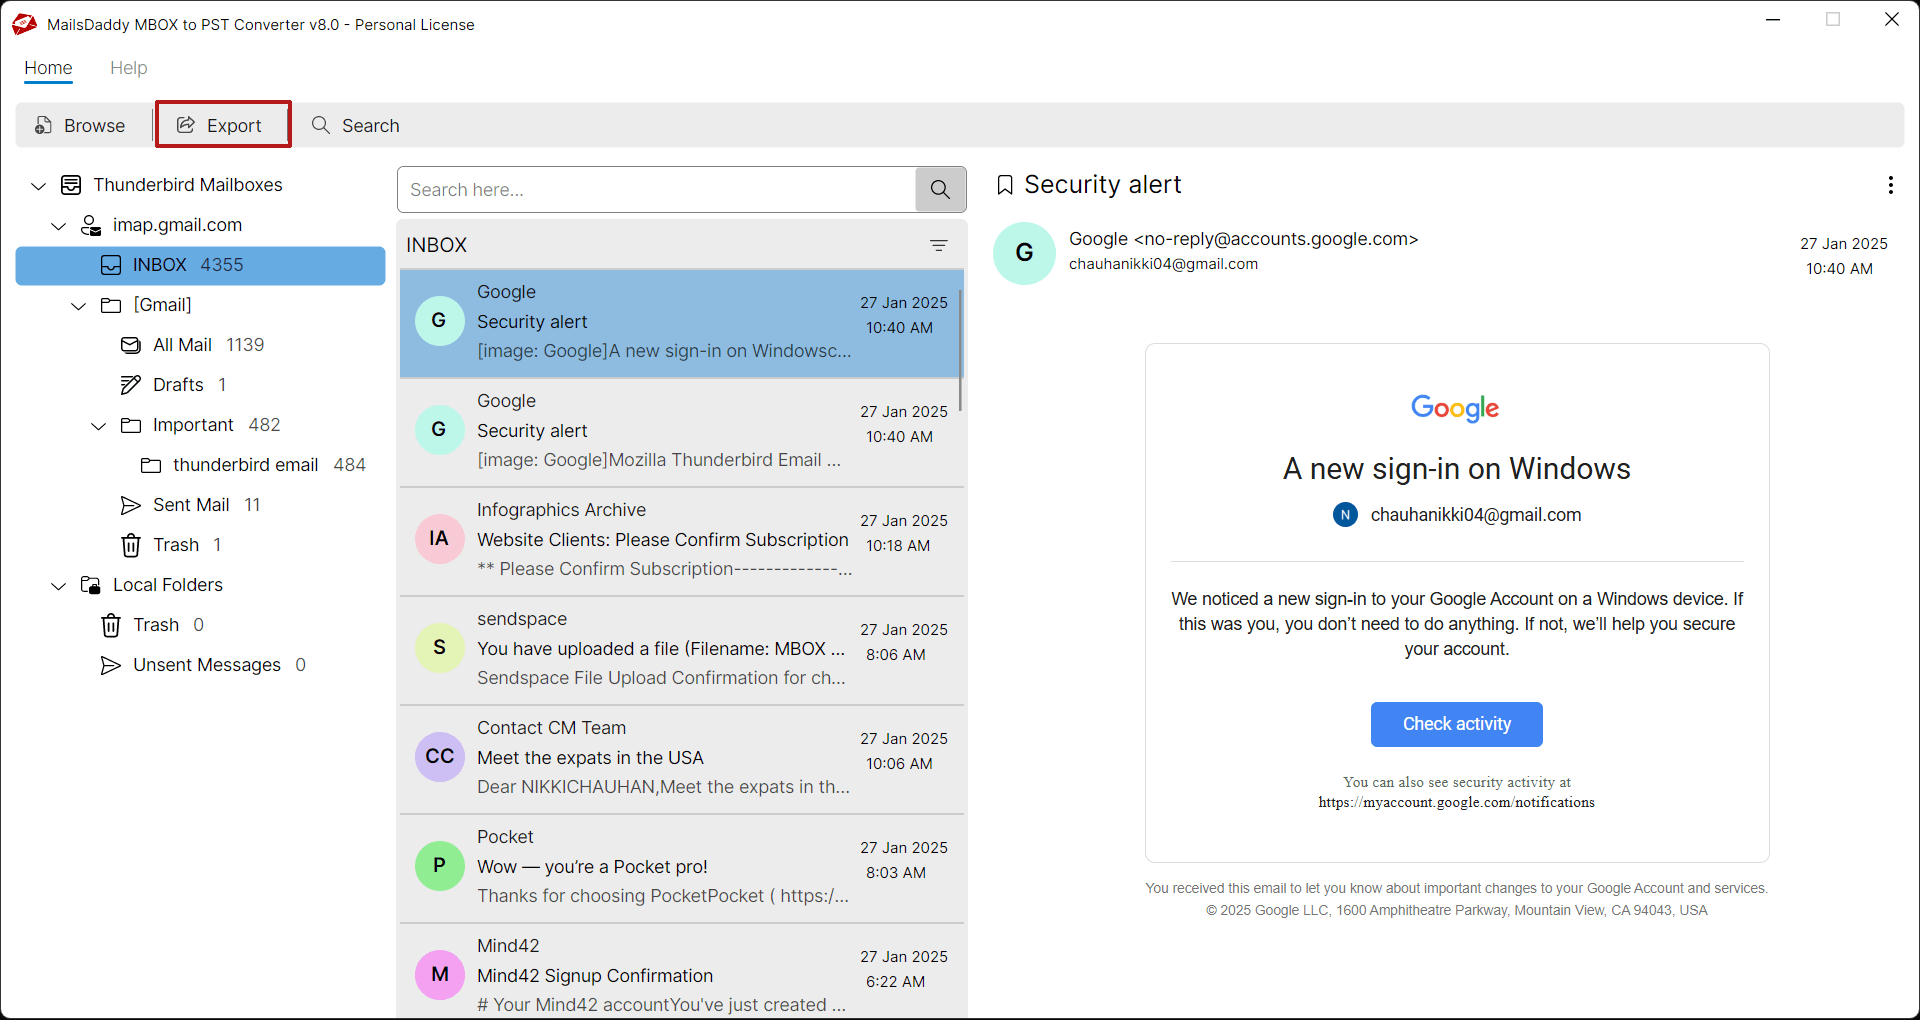
Step 3: Click the Export button to go to the conversion window.
Step 4: Now select PST from Export options >> choose a required PST conversion option: Single or Separate PST >> Set Date filter if required (optional) >> Browse destination path and finally, click on Export button.
Step 5: The software will start conversion of Thunderbird to Outlook PST format. You may track the status through progress bar. You can also abort the migration at any time.
Step 6: In a few minutes, you will get a confirmation message "You data has been exported successfully at the specified location inside the folder named MailsDaddy.". Click on the OK button

Read our blog to make sure how to open or import PST file in MS Outlook.
Step 1: Launch the converter and you will see 3 options to add MBOX files. Select Apple Mail from them and Click on Browse button to locate Apple mail mailbox you exported from MAC OSX then click on Next button

Step 2: The software will load all Apple Mail folders. you may click on particular folder to load and prebiew emails if want otherwise click on Export button.

Step 3: Now select MBOX from Export options >> choose a required PST conversion option >> Set Date filter if required (optional) >> Browse destination path and finally, click on Export button.

Step 4: The software will start conversion of Apple Mail to Outlook PST format. You may track the status through progress bar.

Step 5: You will get a confirmation message "Messages saved successfully to selected location inside the folder nameed MailsDaddy". Click on the OK button