Email authentication is the most important and essential solution for the maintaining integrity and security of emails in office 365. By setting up SPF, DKIM, and DMARC in Office 365, you can protect your emails from spoofing, phishing and ensure that your emails are verified and trustworthy.
This is a way to ensure that if someone receives an email from your domain, it is sent from your domain or not. If not, it marks that as a fraudulent email. In this blog, we will discuss each technology and step-by-step guidance to configure them in office 365 to ensure that your organization’s emails are secure and reliable.
Understand Protocols of Email authentication in Office 365:
SPF (Sender Policy Framework), DKIM (DomainKeys Identified Mail), and DMARC (Domain-based Message Authentication, Reporting & Conformance) are three essential email authentication protocols in office 365. Below we will discuss in detail one-by-one about SPF, DKIM and DMARC.
What is SPF?
Sender Policy Framework (SPF) is an email authentication method, that is specially designed to know the fraudulent senders addresses during the delivery of the email. SPF allows the domain owners to specify which mail servers are permitted to send emails on behalf of their domain. It reduces the chance of email spoofing and phishing attempts, and ensures the integrity and security of email communications, providing greater trust in the sender’s identity.
What is DKIM?
DomainKeys Identified Mail (DKIM) is an Office 365 email authentication technique. It adds a digital signature to the header of the email, that helps to verify an email message was not altered during transit and that it indeed came from the stated domain.
What is DMARC?
Domain-based Message Authentication, Reporting, and Conformance (DMARC) is an email authentication protocol designed to protect domain owners from email spoofing. It builds on SPF and DKIM by providing instructions on how to deal with emails that fail authentication attempts. DMRC tells receiving mail servers how to handle emails that fail SPF or DKIM checks.
Email Authentication: Setup SPF policy in office 365
Access your DNS Setting
To set up SPF, log into your domain registrar’s website and access the DNS management settings for your domain.
Create an SPF Record
Add a new TXT record in your DNS settings with the following value:
v=spf1 include:spf.protection.outlook.com -all
This record specifies that Office 365 Outlook’s servers are authorized to send emails on behalf of your domain. If you use additional mail services, make sure to include them in the SPF record.
Verify the SPF Record
Use an online tool like MX Toolbox to ensure that your SPF record is configured correctly. This validation helps improve your email deliverability and prevents your emails from being marked as spam. For the better email security, DKIM and DMARC records must also be implemented in addition to SPF.
Office 365 Email Authentication: Setting up DKIM
For setting up DKIM sinning in Microsoft 365, your domain must be registered within the platform. Additionally, CNAME records must be added in your DNS configuration. This process is vital for securing your emails by ensuring they are protected against unauthorized alterations.
Enable DKIM Signing
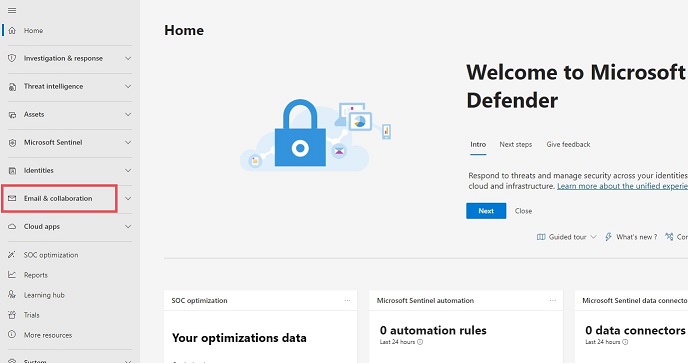
- First Open Microsoft Office 365 Defender portal and go to the “Email & collaboration”.
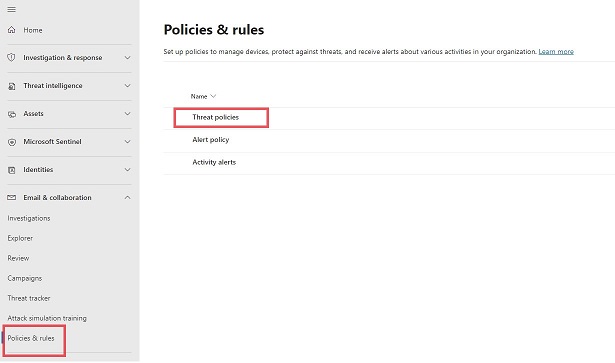
- Now click on the “Policies & rules” and select the “Theat Policies”
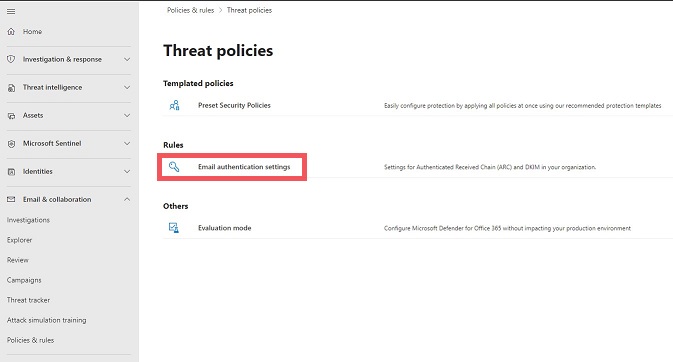
- In the threat policies go to the “Rules section” and open “Email authentication setting”.
- After that navigate the “DKIM” and tap on “Create DKIM Keys”.
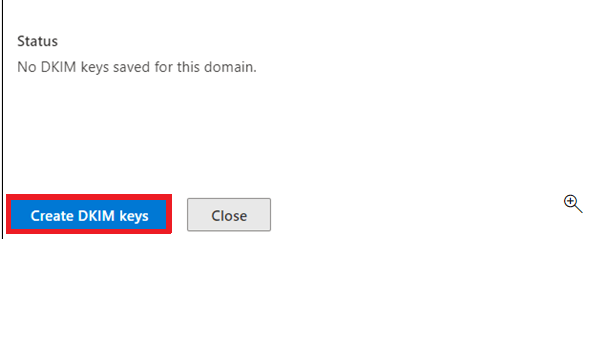
- Now copy the CNAME record values displayed on the screen and then add these values to your DNS records.
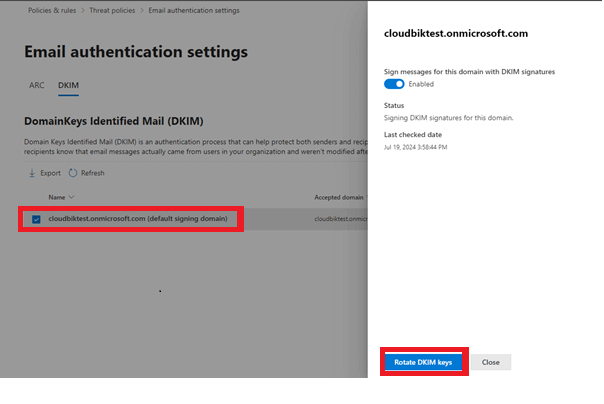
- After adding these values, return to the DKIM Settings page and turn on the DKIM Signature feature.
Set up DMARC for Office 365 Email Authentication
Create a DMARC Record
Add a new TXT record in your DNS settings with the following value:
v=DMARC1; p=none; rua=mailto:[email protected]; ruf=mailto:[email protected]; sp=none; aspf=r; adkim=r
This record instructs that no specific action should be taken on emails that fail DMARC checks but sends reports to the specified email address.
Adjust DMARC Policy
As you gather more data, you can adjust the policy (p=quarantine or p=reject) to enforce stricter controls on emails that fail DMARC checks.
Benefits of Implementing SPF, DKIM, and DMARC
Enhanced Security
By setting up of these protocols, you significantly reduce the risk of phishing and spoofing attacks, ensuring that your recipients can trust the emails they receive from your domain.
Improved Deliverability
Authenticated emails are less likely to be marked as spam, improving the deliverability rate of your legitimate emails and ensuring they reach the intended recipients.
Brand Protection
SPF, DKIM, and DMARC help protect your brand’s reputation by preventing malicious actors from impersonating your domain and sending fraudulent emails.
Visibility and Control
DMARC reports provide visibility into your email traffic, allowing you to monitor and manage the use of your domain in email communications.
Conclusion
Email authentication is an essential aspect of protecting your email communications. By properly setting up SPF, DKIM, and DMARC in Office 365, you can protect your domain from spoofing and phishing attacks and ensure the integrity of your emails. By following the above steps explained in this blog, you can set up a strong email authentication framework that enhances security, improves deliverability, and builds trust with your recipients.
Read More: Download Gmail emails in PDF
Read More: Drive Partition and Add new Drive