There are various alternatives of drive services but the most famous are OneDrive and Google Drive. Drive accessing and sharing make our work more efficient and effective. But when it comes to moving your entire items from a drive to another then it’s a bit tricky for users, especially for businesses.
Here we are going to share steps to move Google Drive data to One Drive for personal and business purposes.
Google Drive to OneDrive Migration for Personal Use
Personal can easily move, merge or share data from Google Drive to OneDrive. I have shared 3 Methods below, you can use any one way that suits you best.
Also, I would like to tell you that nowadays moving items between cloud drives is easier and safe. So you don’t need to worry about it.
Method 1: Manually Download and Upload
- Login to Google Drive using credentials and open your Drive.
- Select all files which you want to download then click on them and click the Download option.
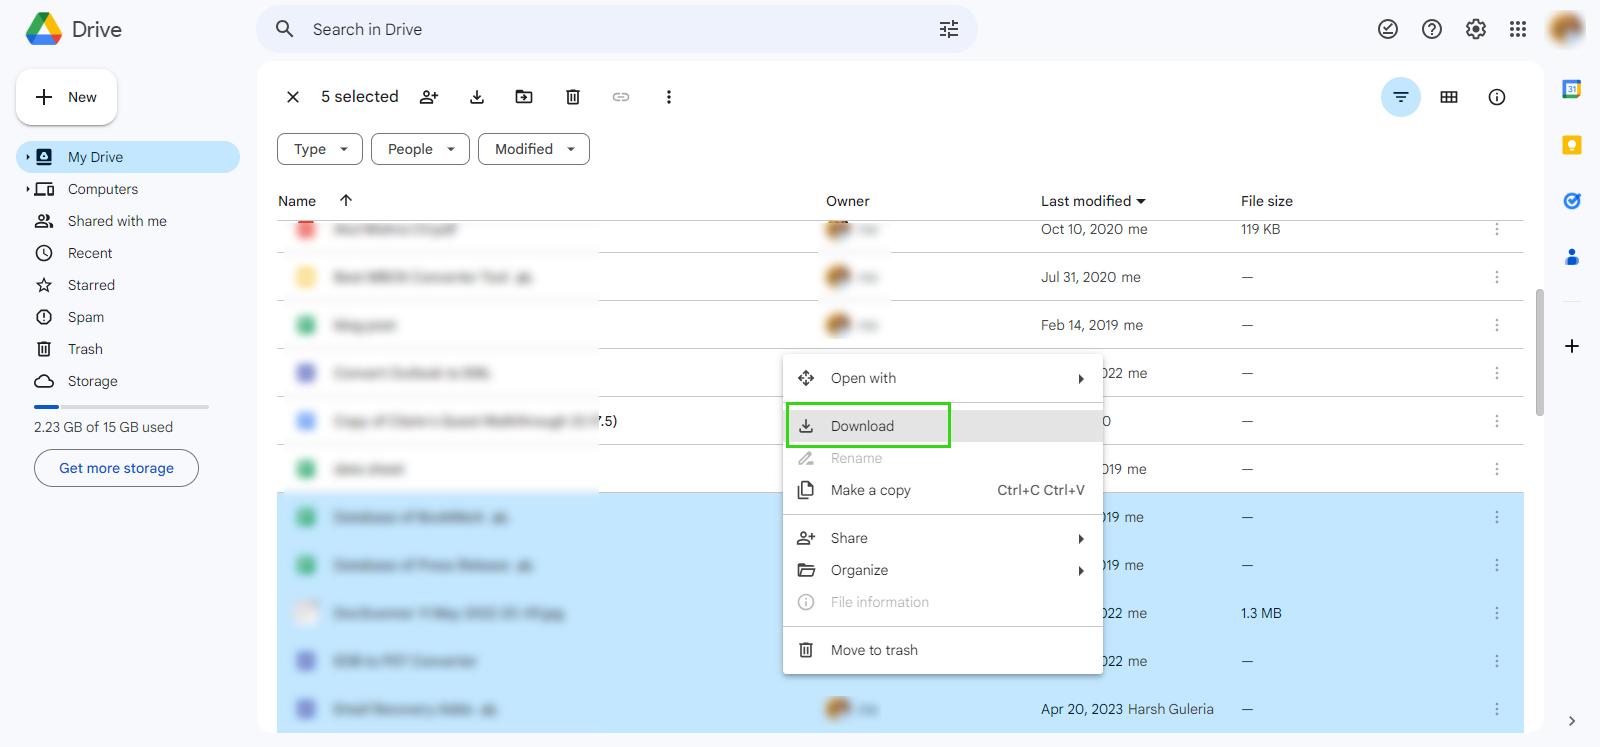
- Once it downloads all the items, check the location and ensure all items are saved in the zip file.
- Login to Office 365 in a new tab using credentials and open OneDrive.
- Go to the file tab and create a new folder (optional) for Google Drive items.
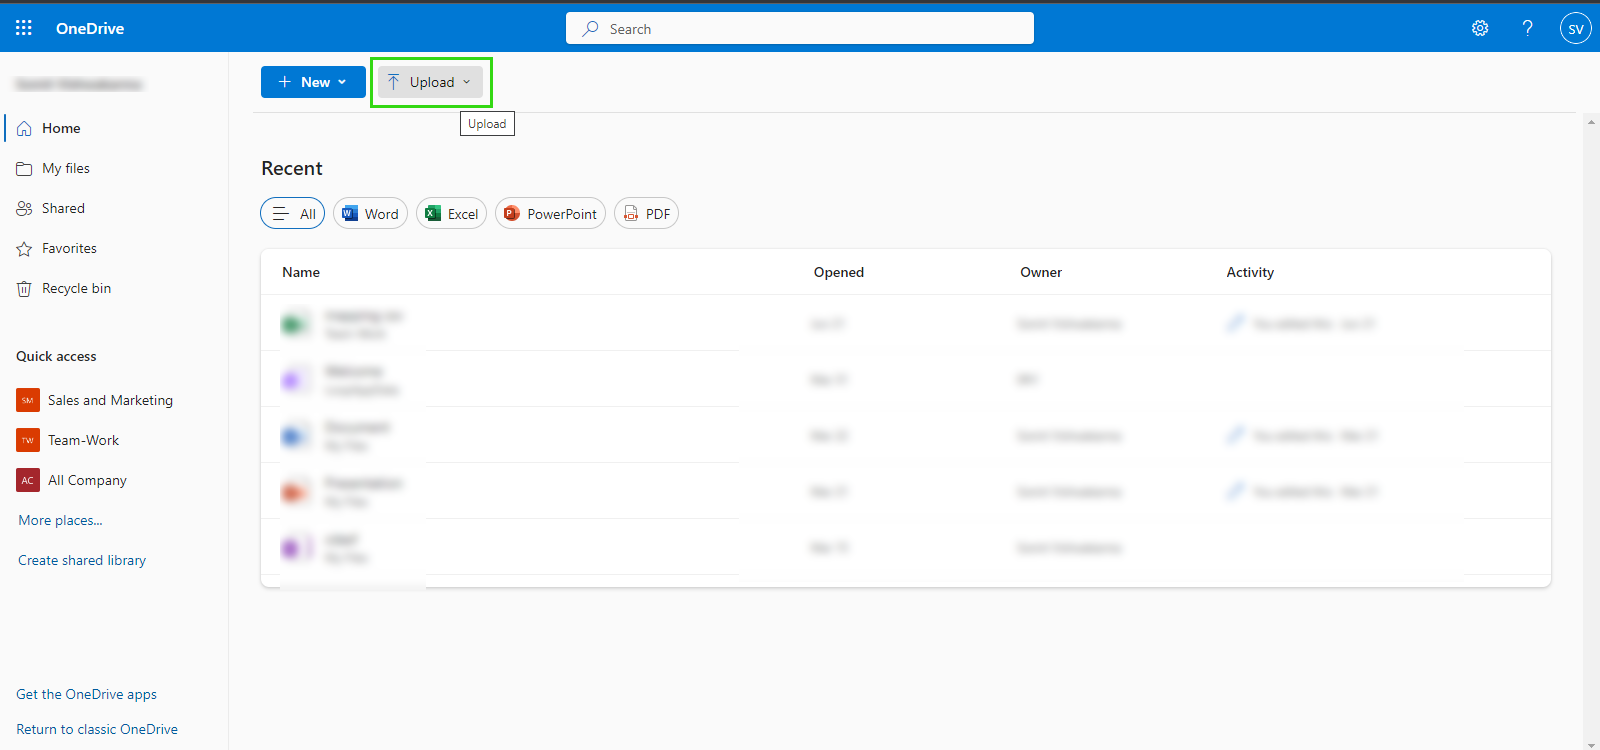
- Click on the upload button, and browse the location to add items to it.
Contact Us
Move Google Drive to OneDrive and SharePoint with all files and folders. Contact Us for the hassle-free service to move your personal and business cloud storage.
OneDrive Migration Service
Method 2: Use Google Takeout for Google Drive to OneDrive
The above method slows you down if you have a lot of data, so here you can use Google Takeout service that offers users to move Google Drive items to OneDrive. The best aspect of this method is that we do not need to save data in the local drive.
Follow the steps:
- Once you’re logged into Google Drive, open Google Takeout in a new tab.
- Deselect all the check boxes, then scroll down and select the drive, then click the “Next Step” button.
- In the new window, click on the drop-down destination and select “Add to a drive“.
- Press the “Choose account and create export” button
- If you aren’t logged in, type your credentials to access the drive and begin the moving process.
- After confirmation, click “Open in OneDrive” to confirm about export items.
Method 3: Share Google Drive items on OneDrive
Sharing is fine when you don’t want to share your drive with anyone. It also allows you to change permissions before sharing data.
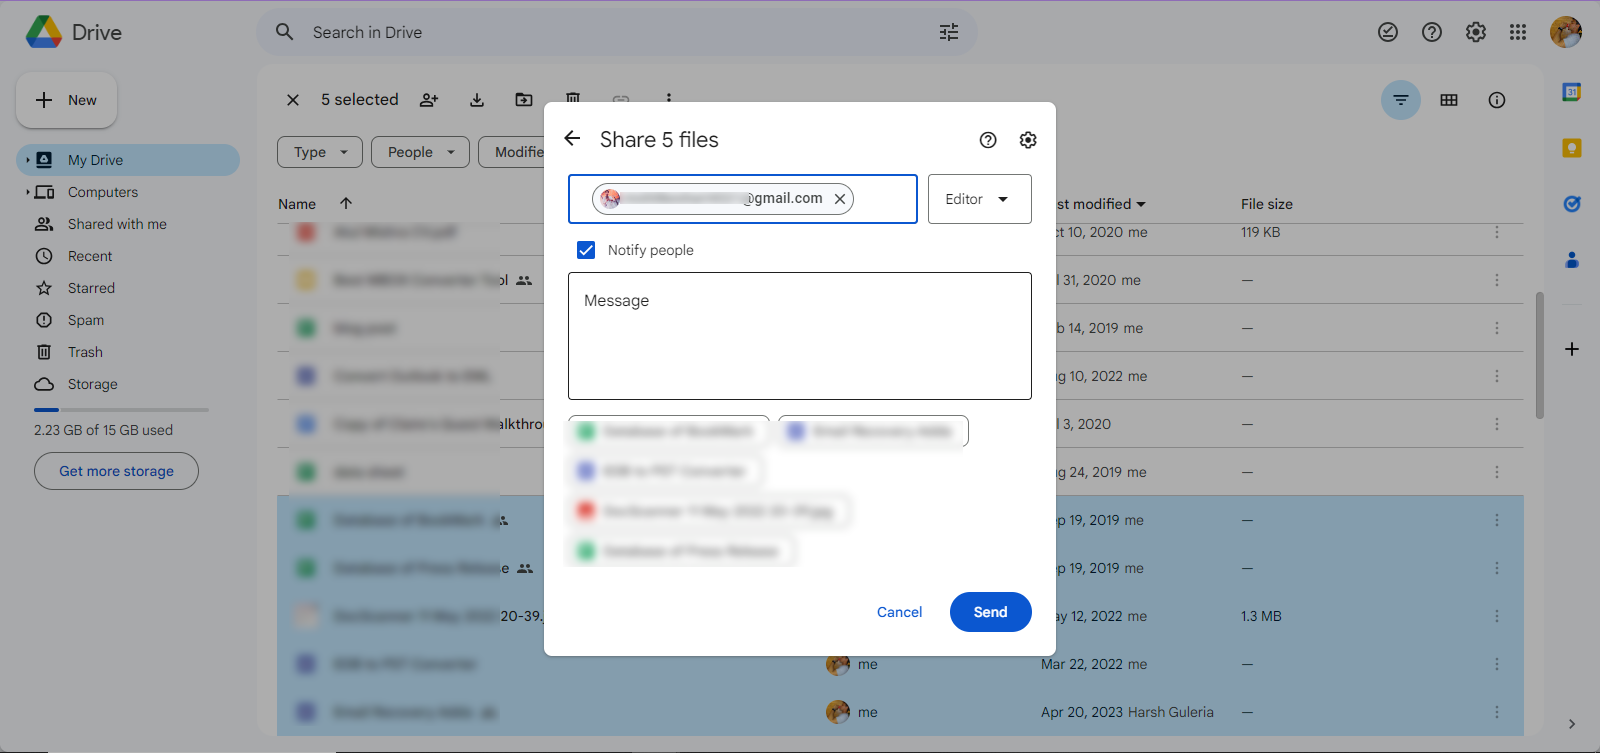
- In Google Drive, right-click on the folder or file and select the “Share” option
- Provide “Email Address” and change “Permission“, then Done.
Above tips help you to transfer Google Drive data to OneDrive for personal use. But big businesses have big databases and they are essential as well as confidential. Therefore its directions also differ from individual to individual use.
Migration Steps from Google Drive to OneDrive for Business
To follow the below steps, we need admin access to both Google Drive and OneDrive.
- First login and Open M365 Admin Center
- Click on “Show All” > Choose SharePoint
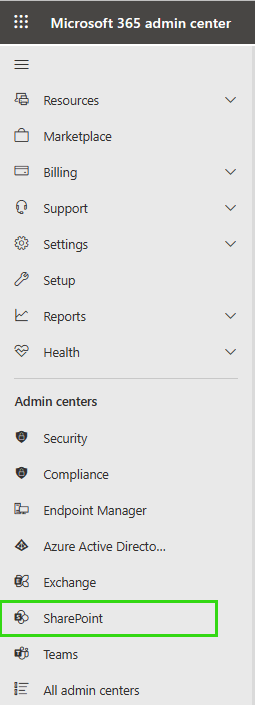
- In the SharePoint admin center window, click on Migration
- Click on “Get Started” Under Google Workspace
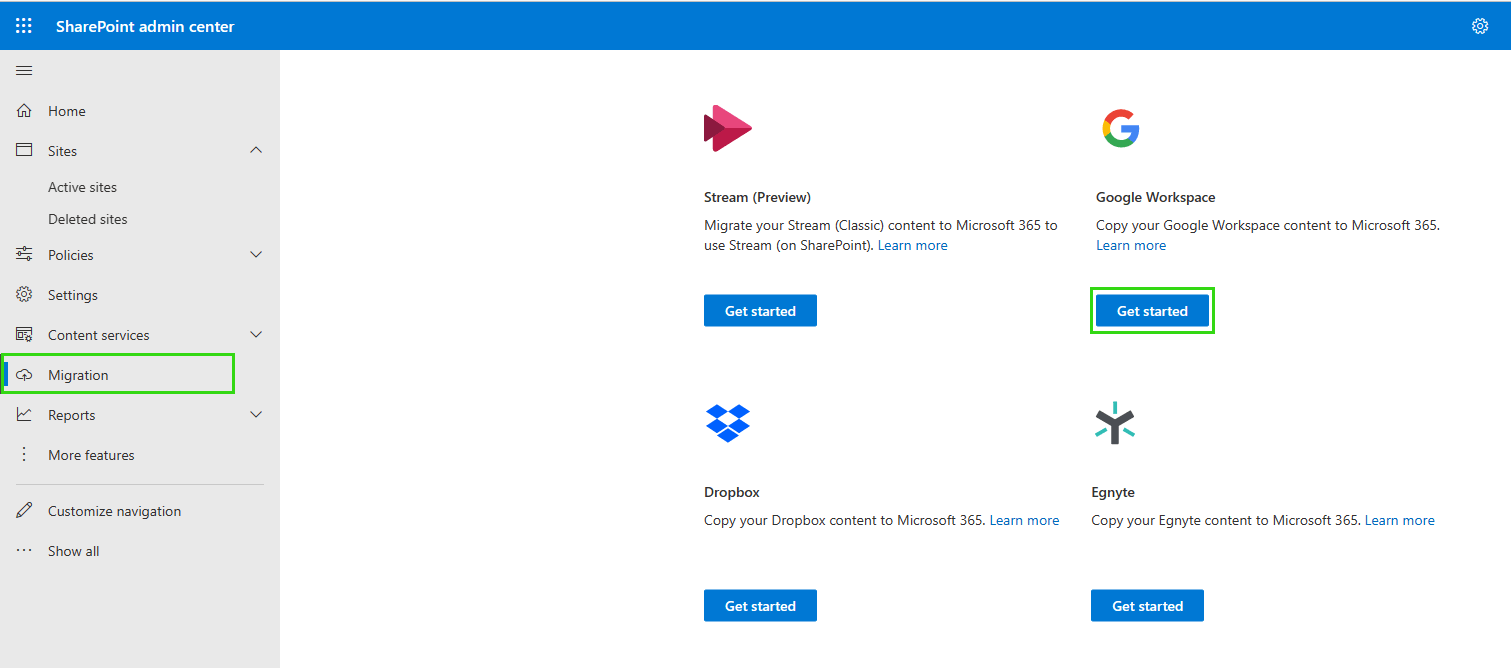
- A window will be open for Google Workspace content to Office 365 migration. Click on “Connect to Google Workspace“.
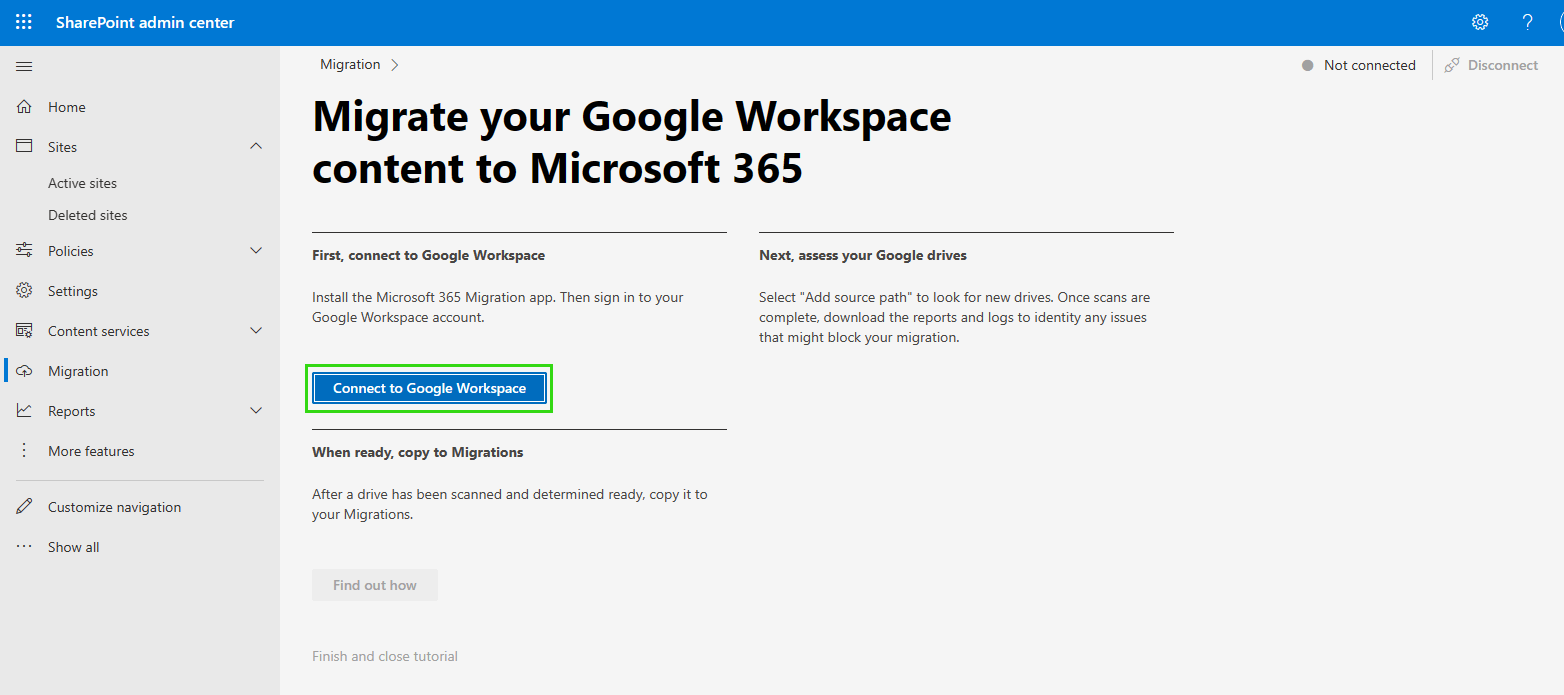
- A new window will be open to install the migration app > Click on “Install and Authorize“.
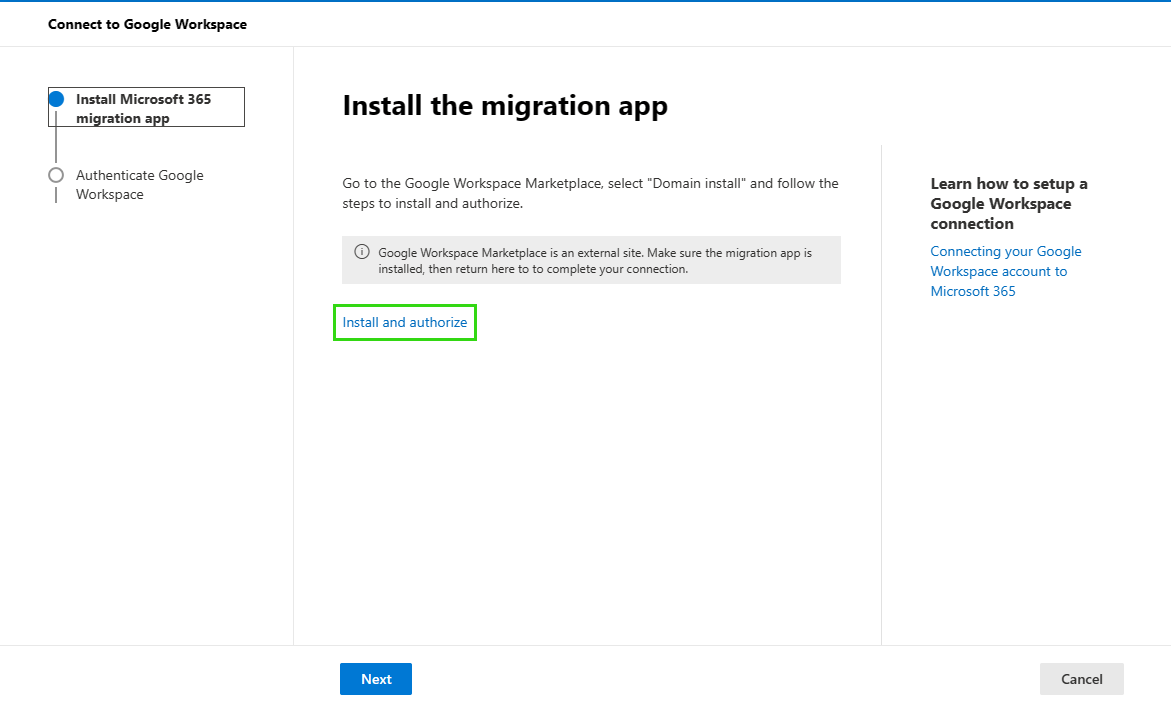
- A pop-up window opens for Admin Install > Click on “Continue“.
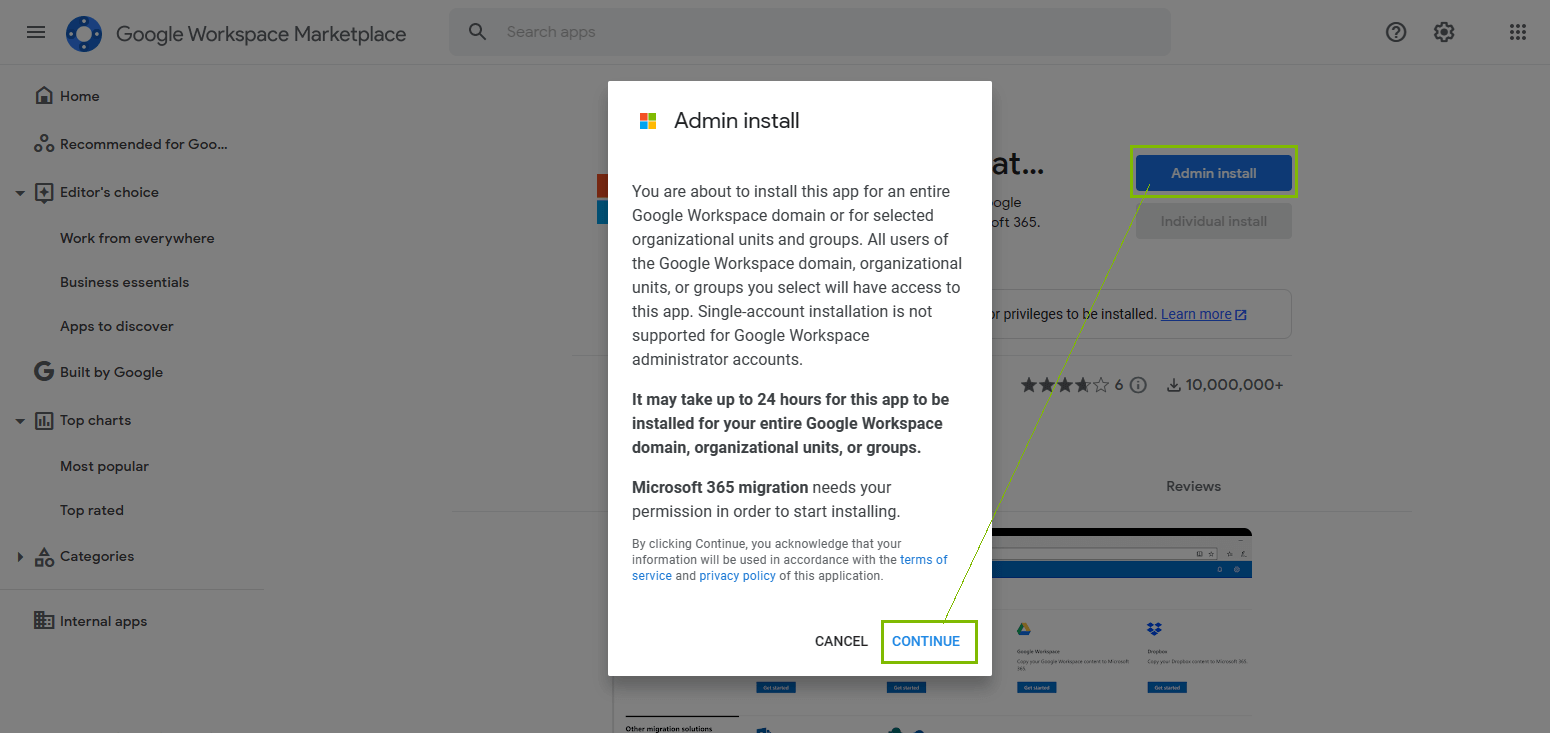
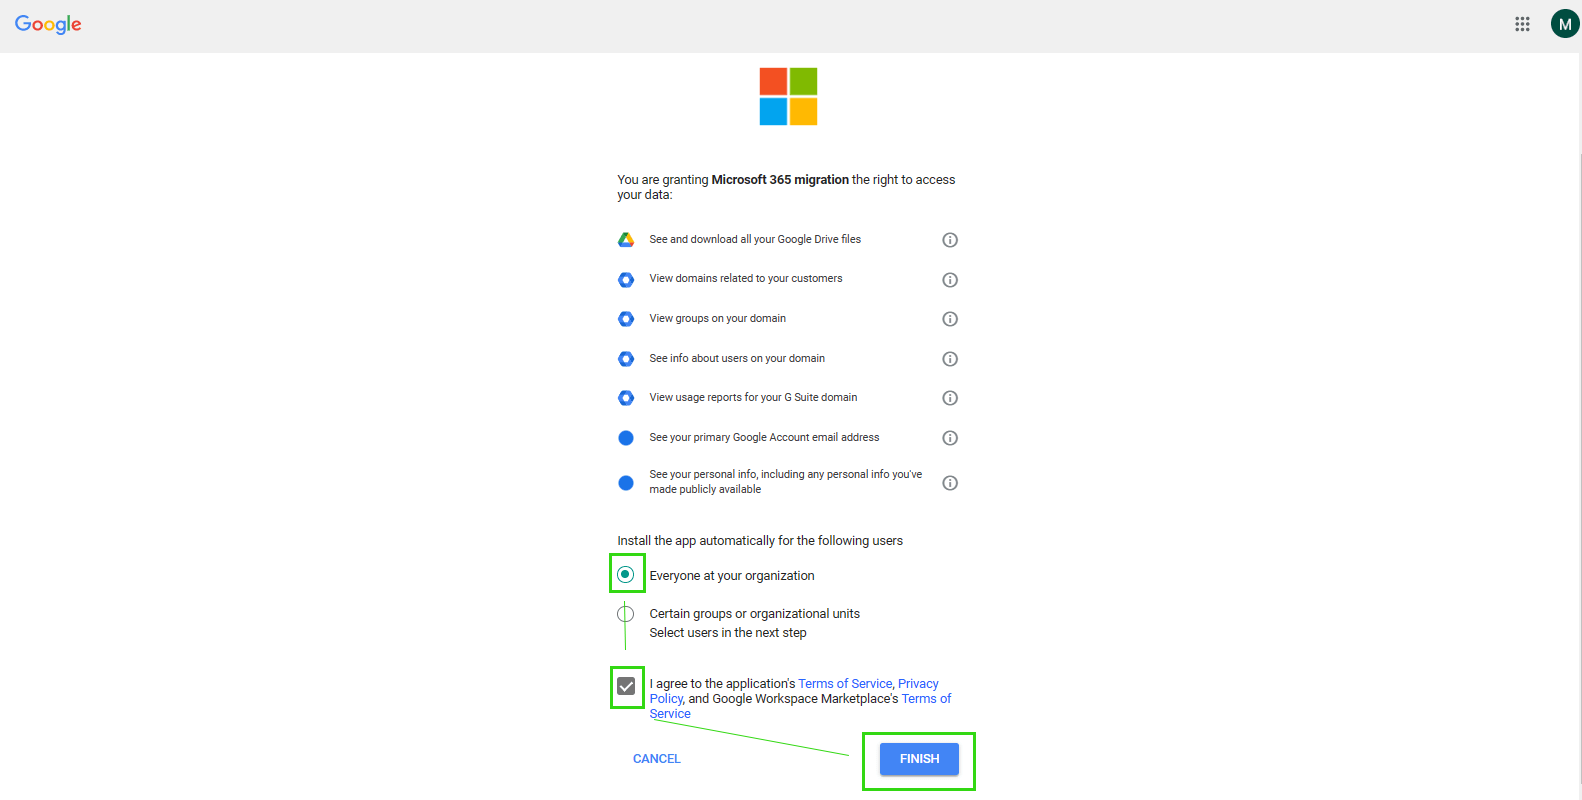
- Type your Google Workspace admin credential
- Enable “Everyone at your Organization” and check the “Term and Conditions” option then press the Finish button to complete the installation.
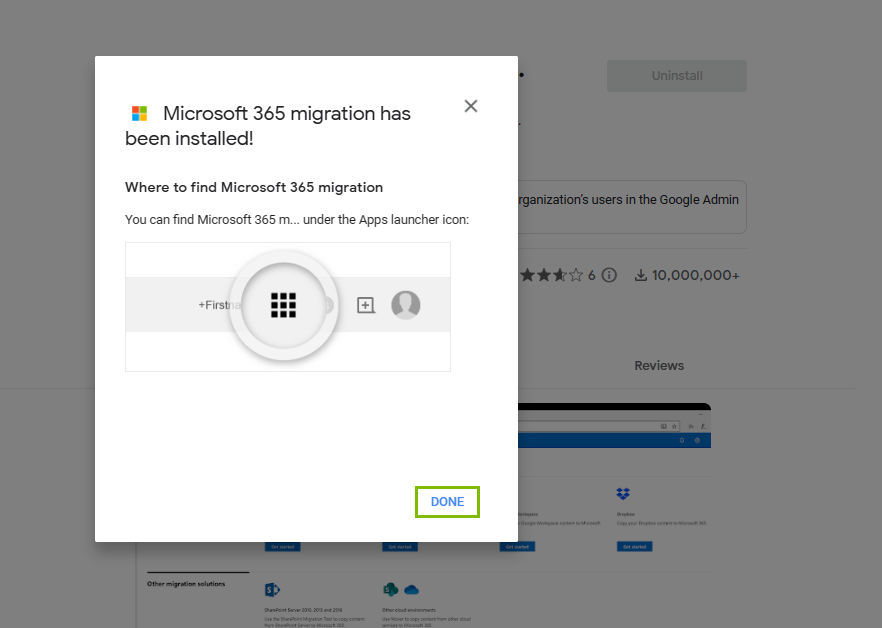
- Once the migration app is installed, you will get the confirmation message > Click on the Done button.
- Back to SharePoint Admin Panel and press the Next button to move the next step for Google Drive content to One Drive.
Connect Google Workspace for OneDrive Business
- Authenticate your GSuite (Google Workspace) account with the admin credentials.
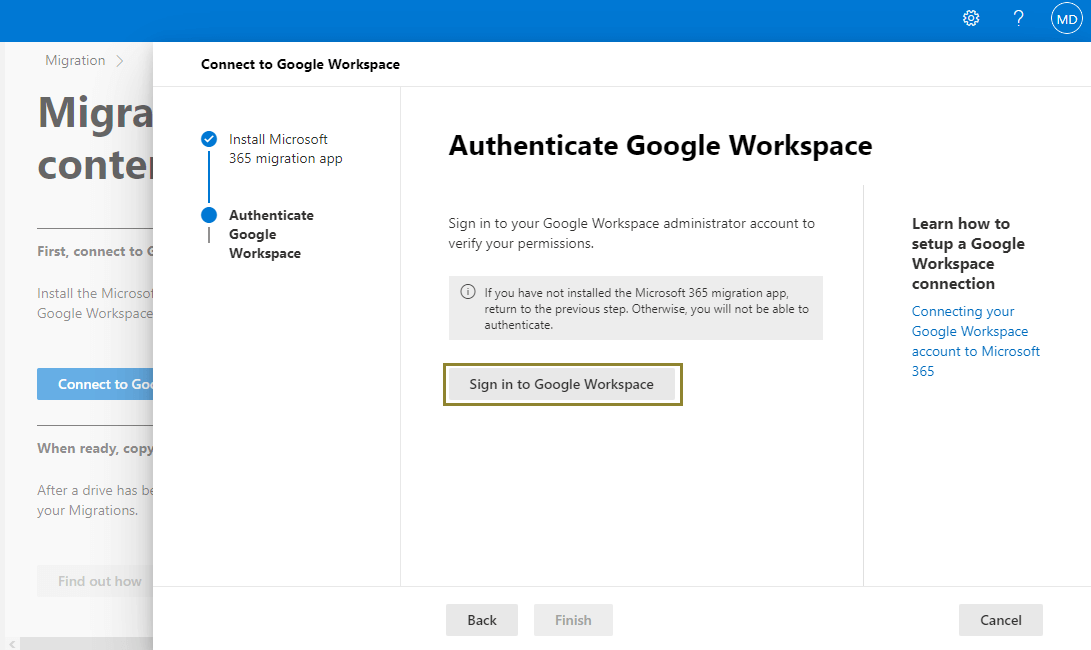
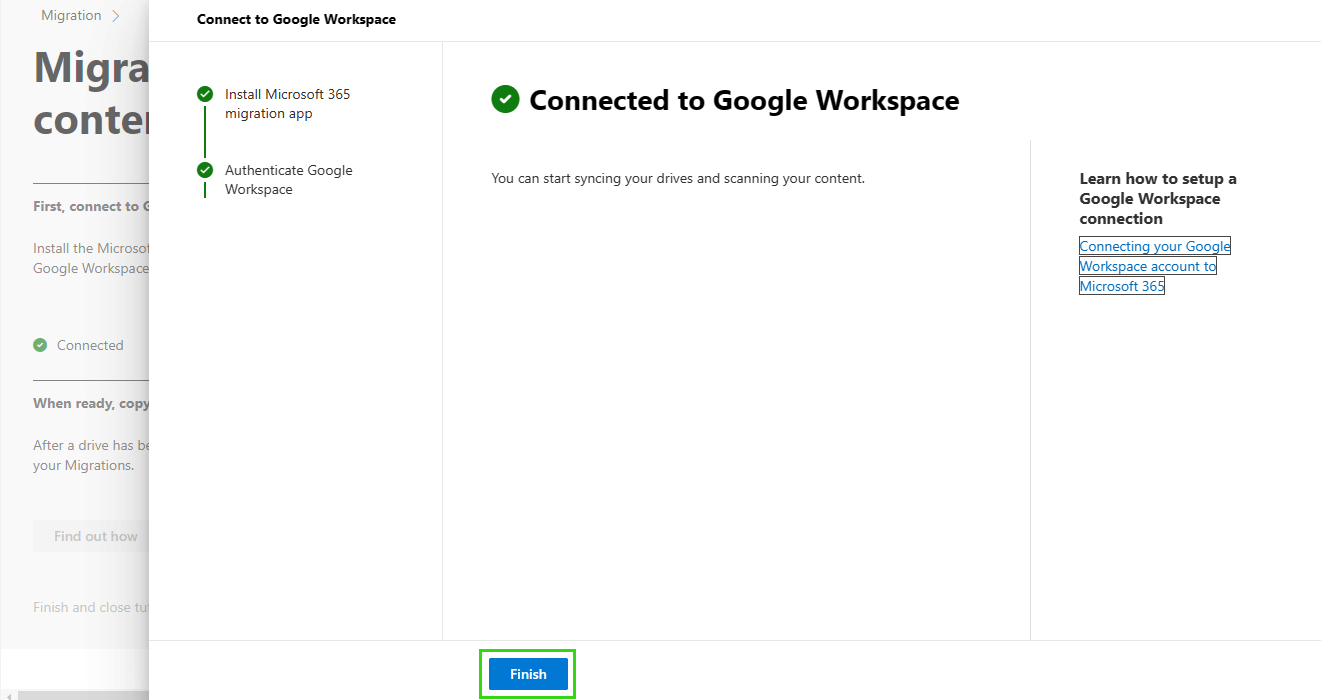
- After signing in, it is “Connected with Google Workspace” > Now press the Finish button.
Google Drive Scanning
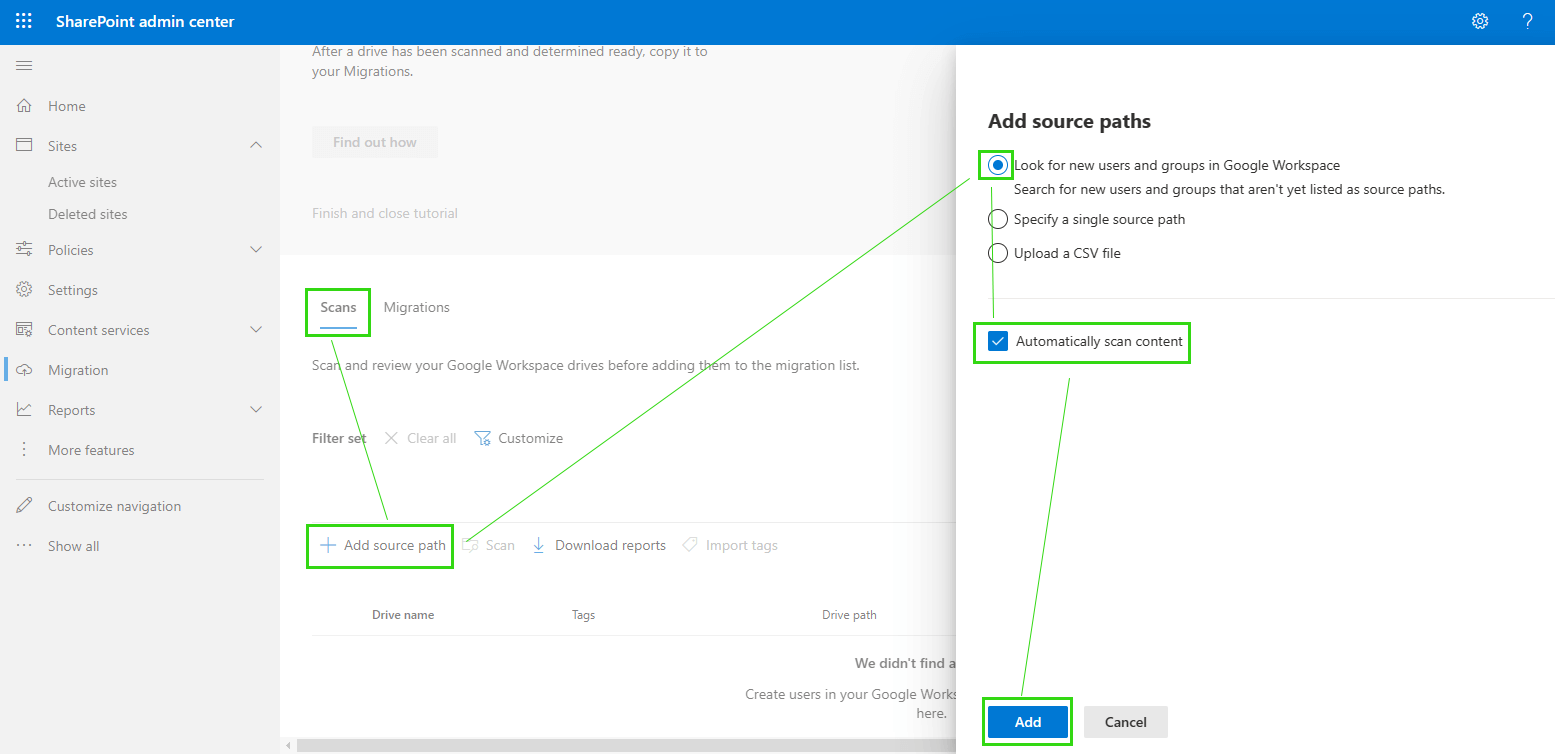
- In the SharePoint admin center, scroll down and click on Add source path option.
- A sidebar pops up with a few options:
- Enable “Discover new users and groups in Google Workspace” then check “Automatically scan content” and click the Add button.
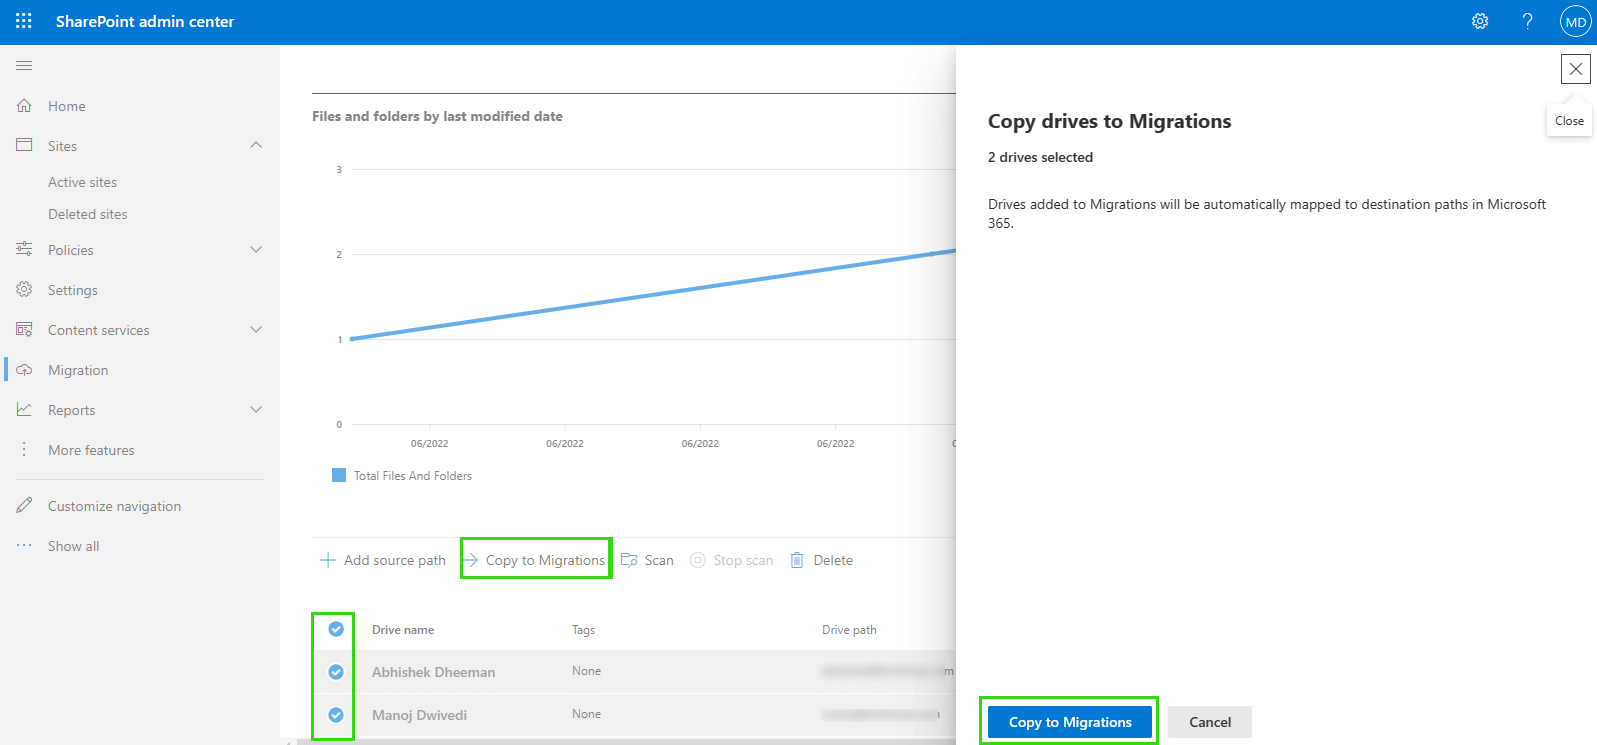
- After scanning it will show all the drives of Google Workspace.
- Select the drive name and click “Copy to Migration“.
- A sidebar will be opened with the confirmation of the drive migration.
- Click on the “Copy to Migration” button to proceed to the next step.
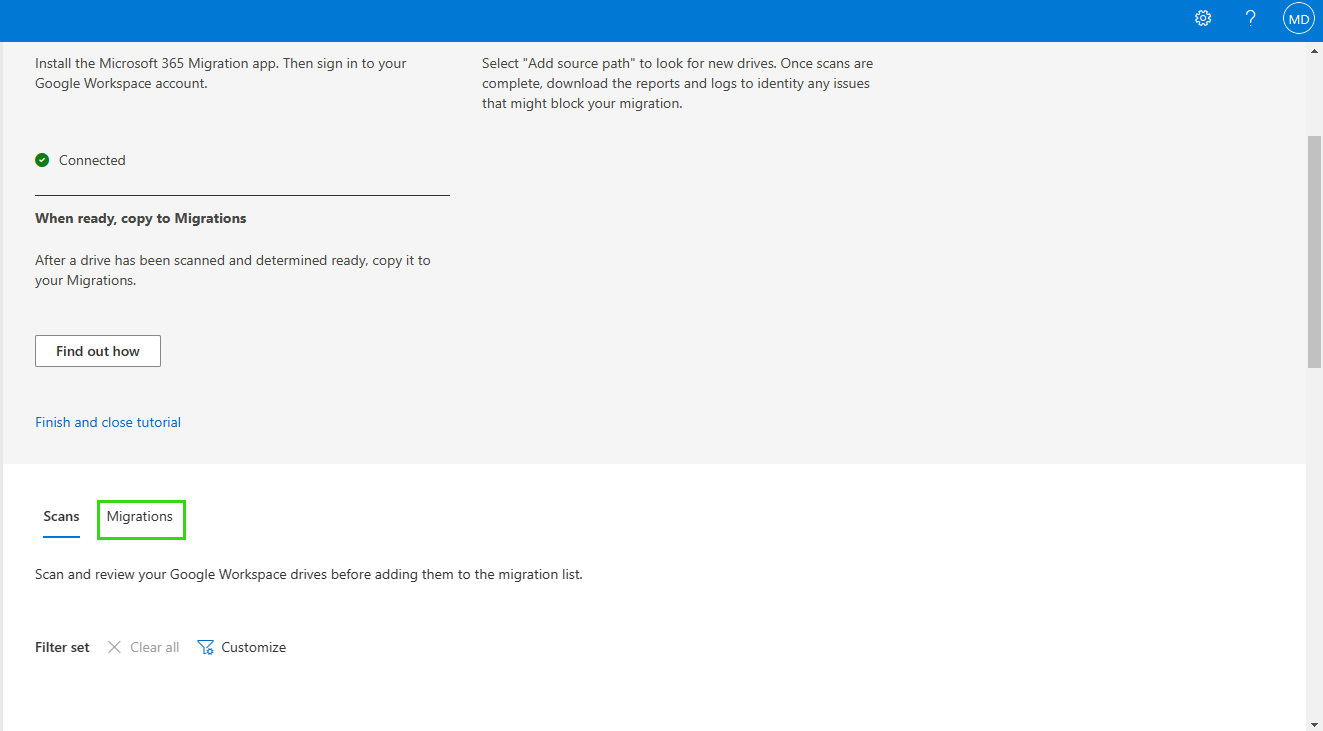
- Click on “Migration”
- Select the user task option to change the destination of Google Drive content for Office 365 OneDrive by clicking on Edit button.
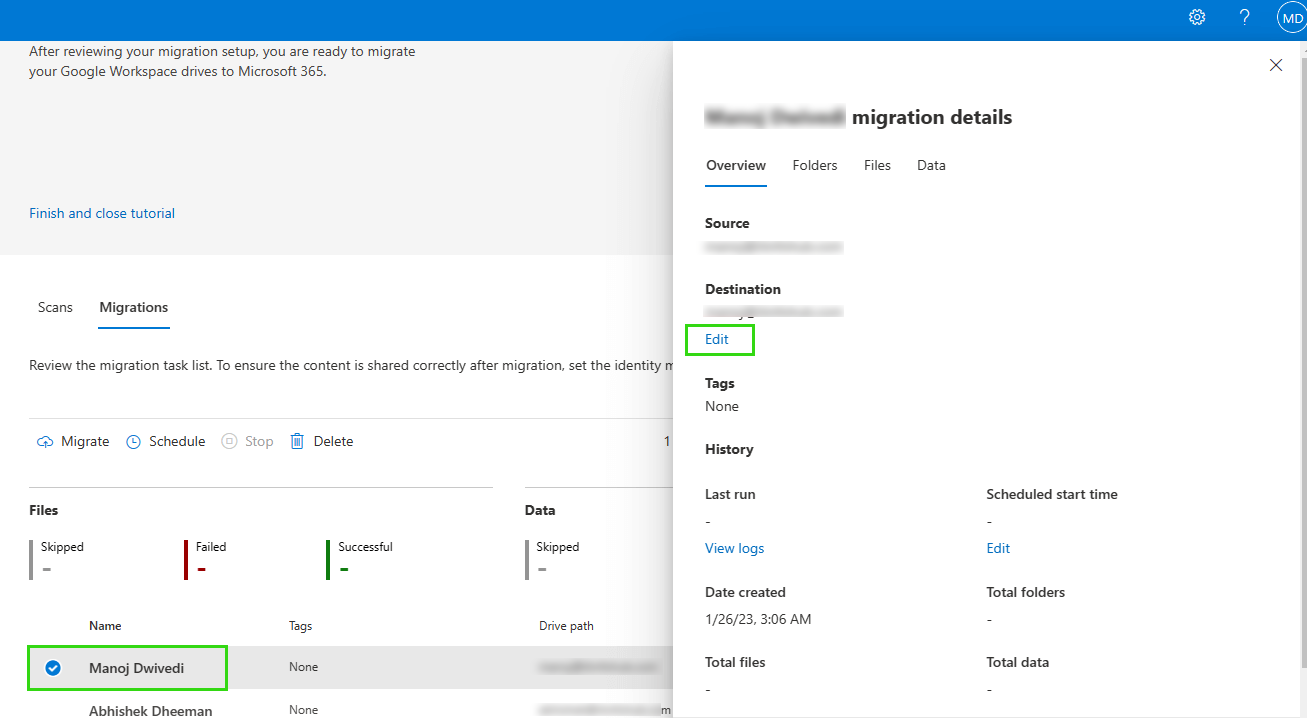
- Select OneDrive for migrating Google Workspace content in it. Creating a folder is an optional choice > press Save Path.
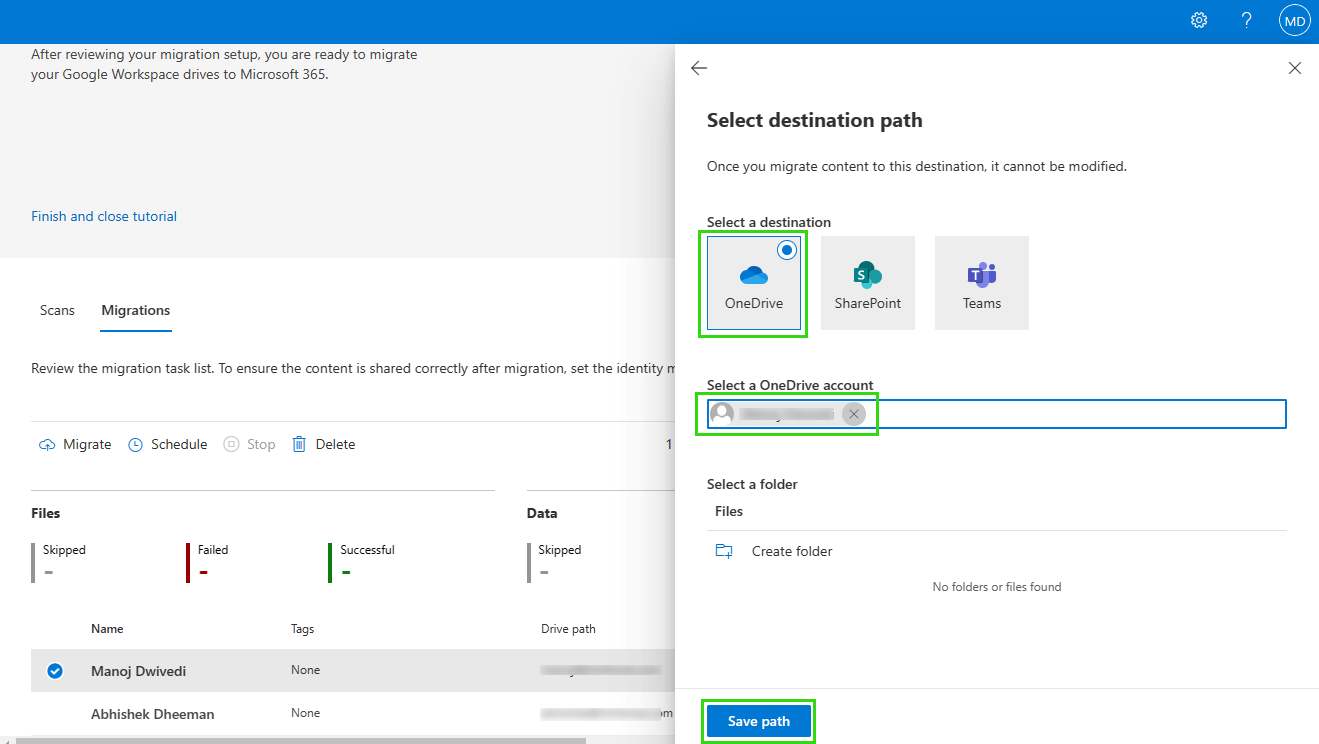
- Similarly, you can do for others also to change destination..
- Open Maps-identity window > Confirm your Office 365 domain details
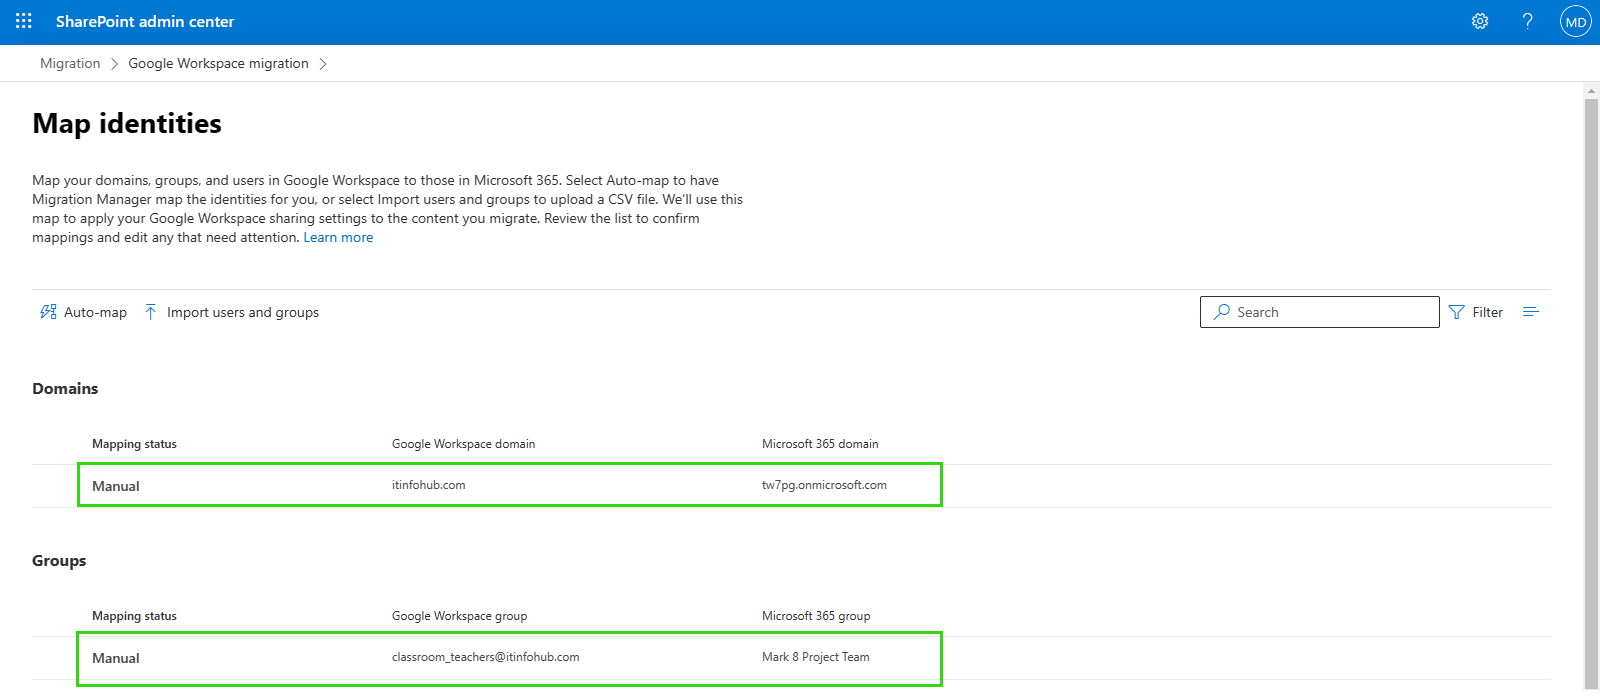
- Select Google Workspace Group, if any, in the next field.
- Select the user again, then click on “Migrate” > A sidebar option with confirmation, click on the Migrate button.
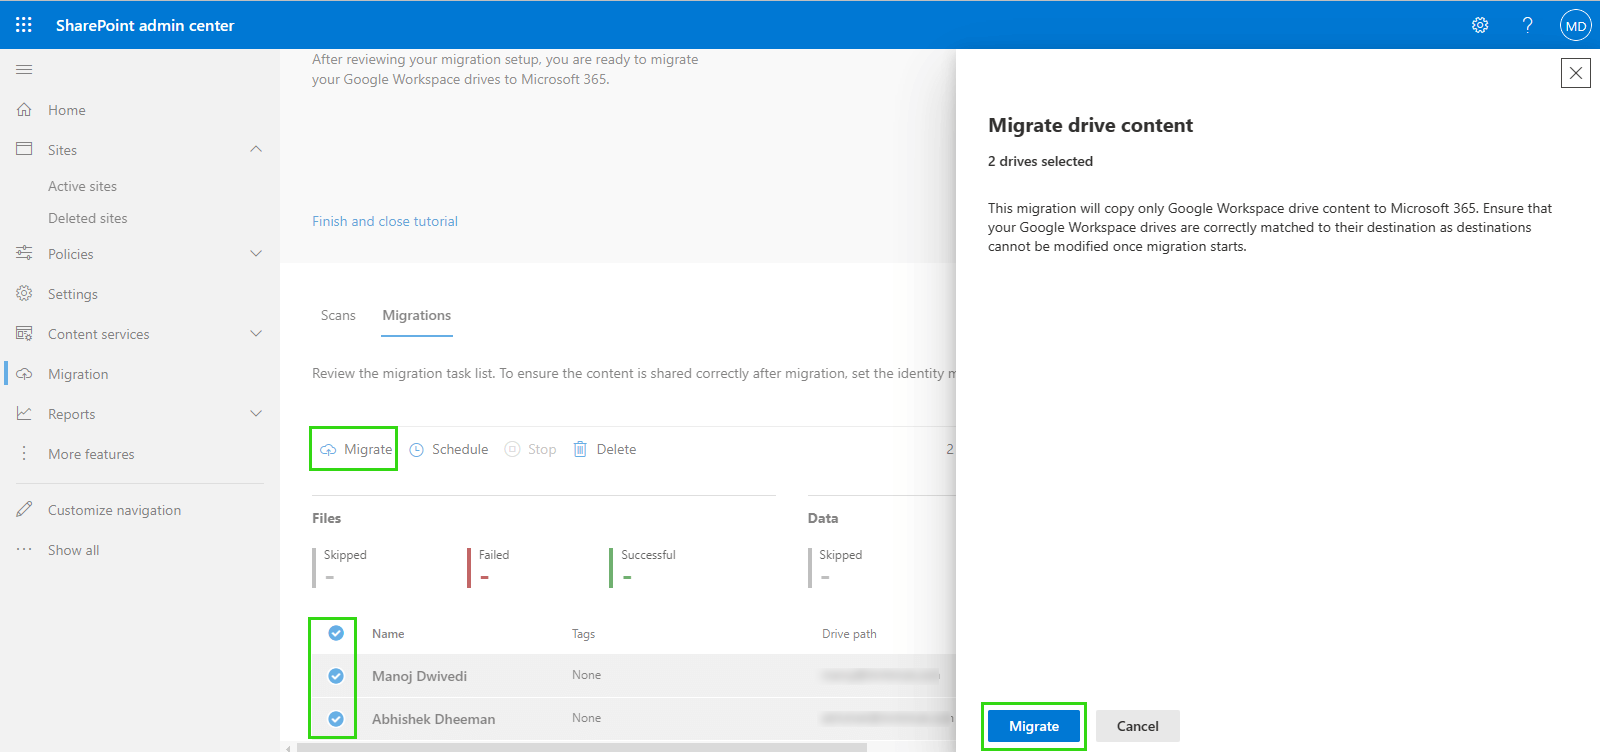
You are now started to migrate your Google Workspace content to Office 365 OneDrive. When it is done then the status changes to Completed.
That’s it. You have successfully transferred Google Drive content to OneDrive for Business.
Final statement
In this post, I have described Google Drive to OneDrive Migration for personal and business use. You can follow the above steps to successfully move content from one source to another. If you encounter any problems during the migration, I suggest double-checking all the steps. Because it is a bit difficult to move the content from Google Workspace Drive to OneDrive for Business use. You can also contact us for more details.
Read More: Migrate from Google Workspace to Office 365
Read More: Convert OST to PST – PowerShell Method

