Simple Steps to set up automatic signature in Office 365 for all users. The tutorial describes how to add html signature in Exchange Online (Office 365) account.
There are lot of Office 365 users who are unaware about how to create auto signatures centrally in office 365 exchange online. And ask can they make use of centralized auto signatures in Exchange Online in Office 365. Answer is yes, you can do it with Disclaimers. Here in this blog I am going to introduce a few simple steps which will surely help you to add email signature in Office 365.
How to Create Auto Signatures Centrally in Office 365 Exchange Online?
You can automatically add text, html or image signature in messages sent from your Office 365 OWA account with the help of Disclaimer. To make sure how? Just follow given below instructions:
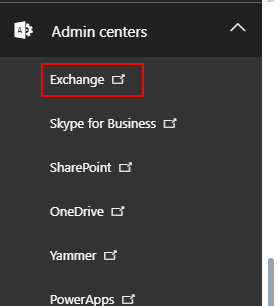
- Login to your Office 365 account, Click Admin centers from the lower-left navigation of the Office 365 admin center, and then select Exchange
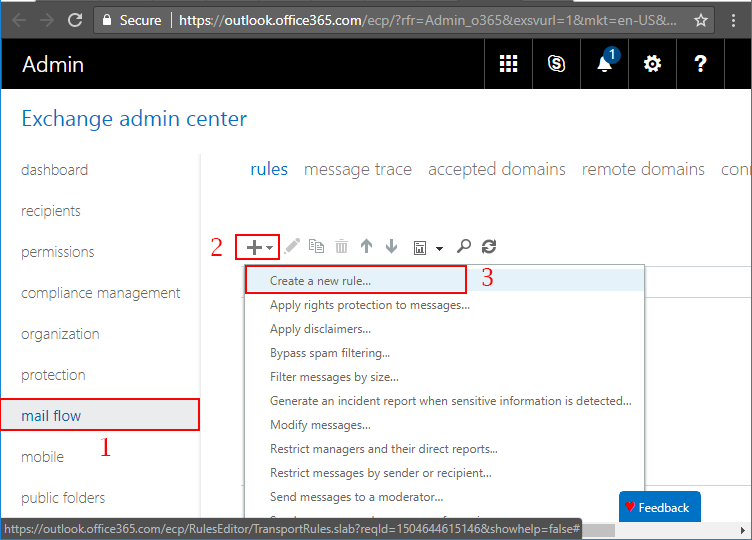
- In the EAC, go to mail flow and then click on + (New) icon >> Select Create a new rule.
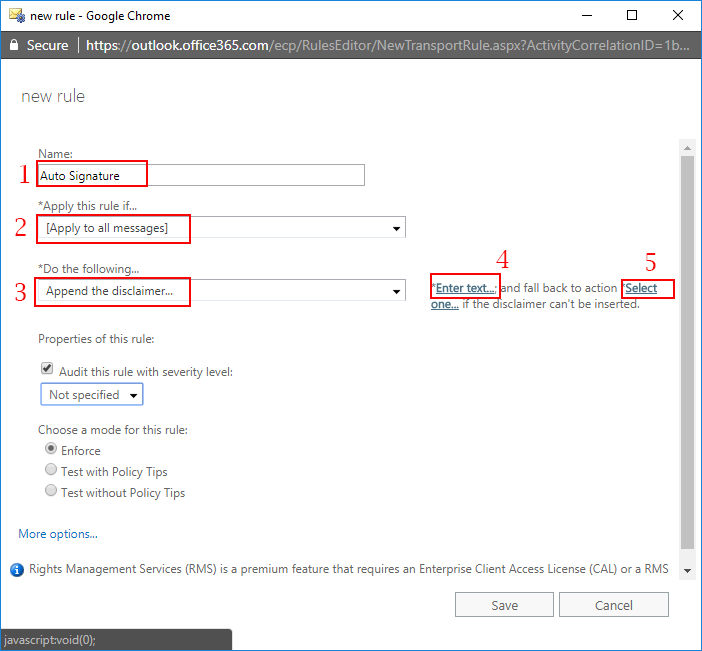
- Enter Name of Rule, Select “Apply to All Messages” from Apply this rule if option > Select Append the disclaimer > Click on Enter Text Link. Don’t forgot to select Wrap from Select One Link.
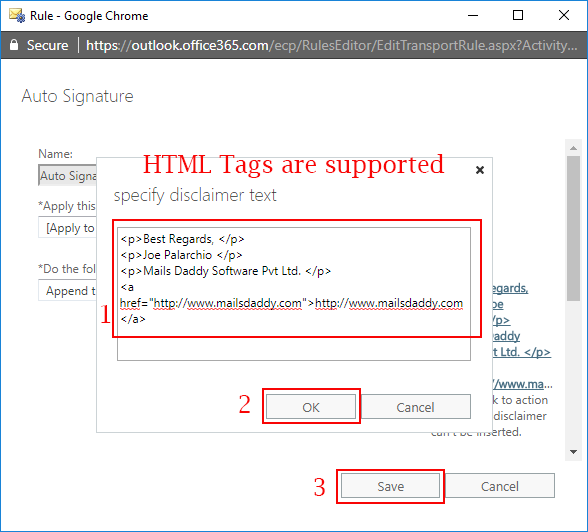
- Next up is specifying the suitable text in the disclaimer. The disclaimer text supports HTML tags. > Click OK then Save
- Now you can send a test email to any other email account without adding signature manually to make sure that auto signature has been added or not.
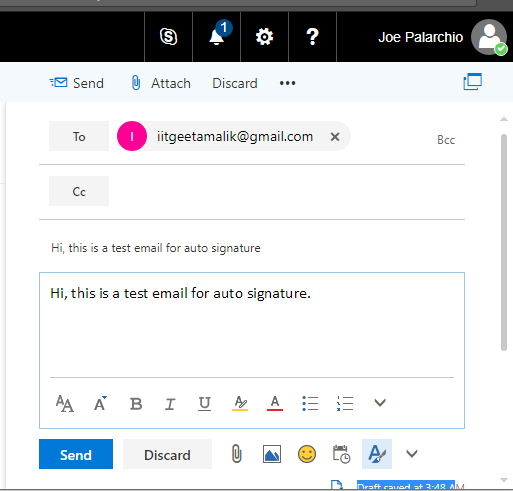
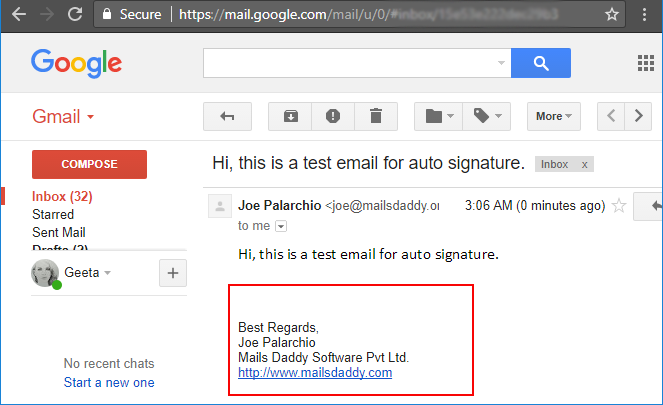
- You can see here that signature has been automatically included with email.
Conclusion:
These step by step guide will help you to understand how to set up automatic Signature in Office 365. This option is provided by itself Office 365 but many are asking, if they can add centralized auto signatures in Exchange Online or not. So the detailed answer is described in this article. To check how to enable an archive mailbox in Office 365 you can read this recently published article.
