
Have you read any articles on delegating a user’s mailbox? Yes! – but still didn’t understand. No worries! At MailsDaddy, we provide a genuine reply to your technical questions.
Like, what is mailbox delegation?
Mailbox delegation is the process of giving someone else access to a user’s mailbox. It allows a delegated user to open, read, send, and manage mailbox items.
Purpose of delegation
Its main purpose in organizations is to manage a user’s mailbox in his absence or when he is not around. Also, you can say that it enables assistance for another user’s mailbox.
When delegation is done, the delegator can send, receive, and respond to meetings on behalf of the owner’s mailbox. The administrator can also activate different capabilities to only open and read, or manage all items.
It is established only within the current organization.
How many types of delegation are there in Microsoft 365?
A Microsoft 365 administrator or admin has three types of delegation that impact the user’s mailbox. Each has different permissions. Let’s know –
Full Access
If a user mailbox is assigned “Full Access” permission, then the delegate can send, read, and edit the content, but cannot send messages.
Send As
The “Send as” permission enables the delegate to access and send messages directly from the mailbox. The recipient cannot see the delegate’s name.
Send On Behalf
The only minor difference between “Send as” and “Send on Behalf” is seeing the delegate’s name. In simple words, when the delegate sends the message, his/her name appears as sent on behalf of the mailbox.
The administrator can activate one, two or all three permissions simultaneously. There is no strict policy for this. But if a person wants to access and send the message, then “Full access” permission is given along with “Send as” or “Send on Behalf”. Also, if all three are activated, “Send as” gets preference.
Migration Service for Microsoft 365
Want to migrate your tenant account to another tenant platform? Contact us – We have a dedicated team to handle your Office 365 tenant migration at minimal cost.
Tenant Migration Service
How to delegate a mailbox using Exchange Admin Center?
The Exchange Admin Center is a centralized management system that enables administrators to manage roles, permissions, and organize company data, as well as add or remove users.
Follow the steps below to delegate a mailbox in Office 365
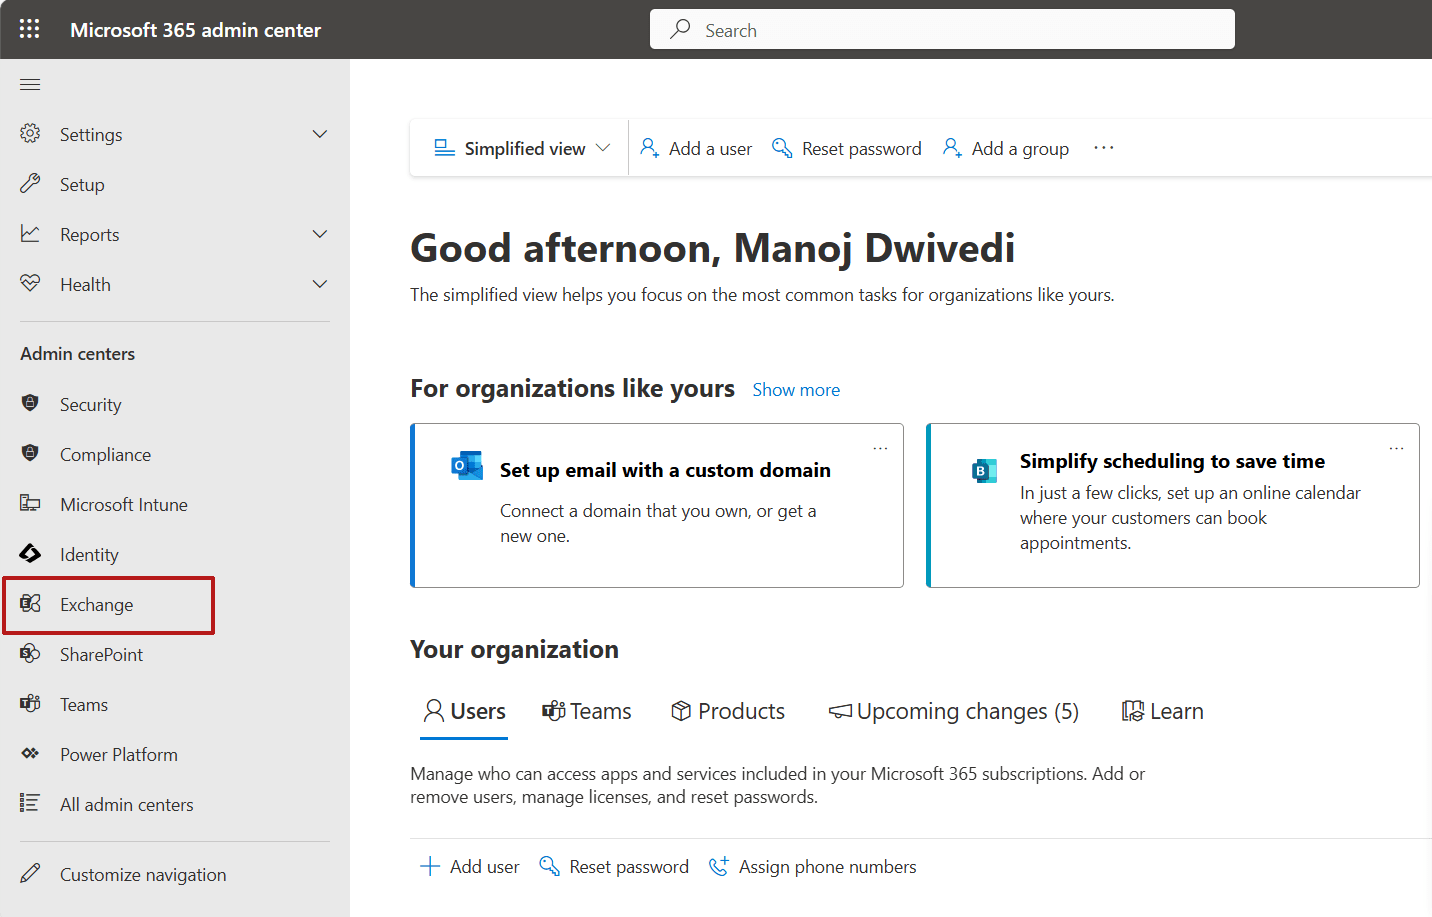
- Open a browser and log in to Microsoft 365 using admin credentials.
- Go to Microsoft admin center > Scroll down and choose Exchange admin center.
- Go to the recipient drop-down and select mailboxes
- Select the user whose mailbox you want to give to someone.
- Click on the “Mailbox delegation” option
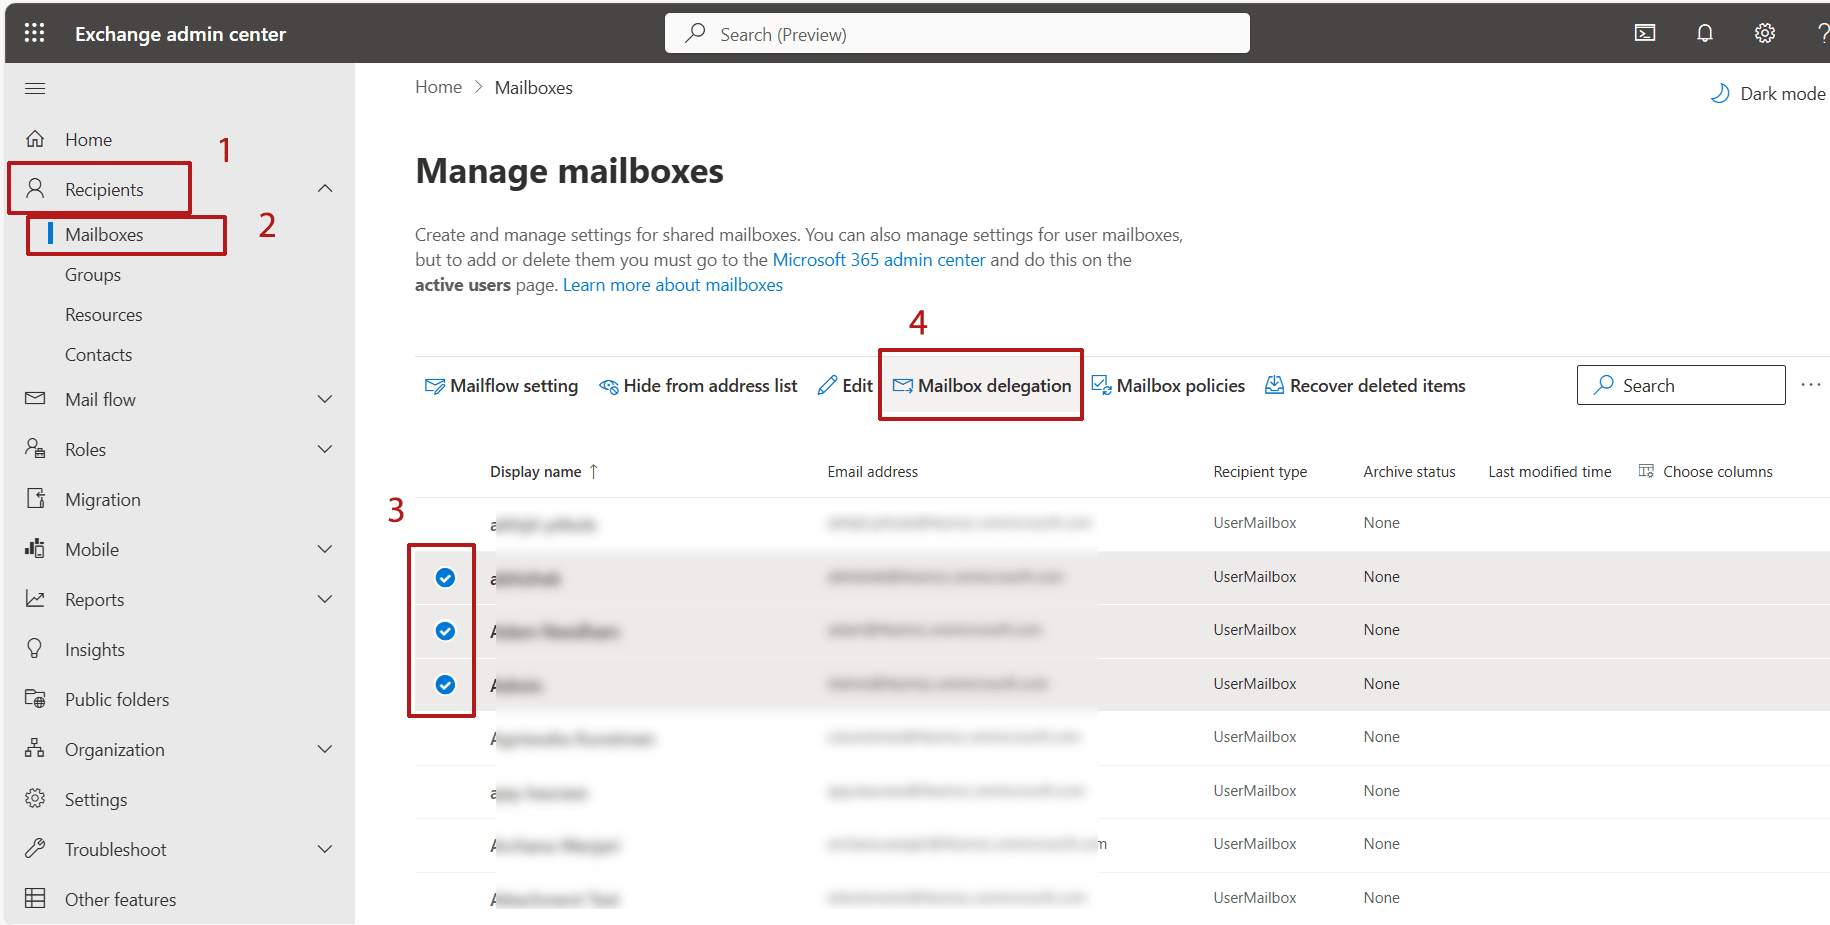
- You will see a pop-up open on the right side of the window.
- Now search the delegate’s name and choose the permission that you want to provide.
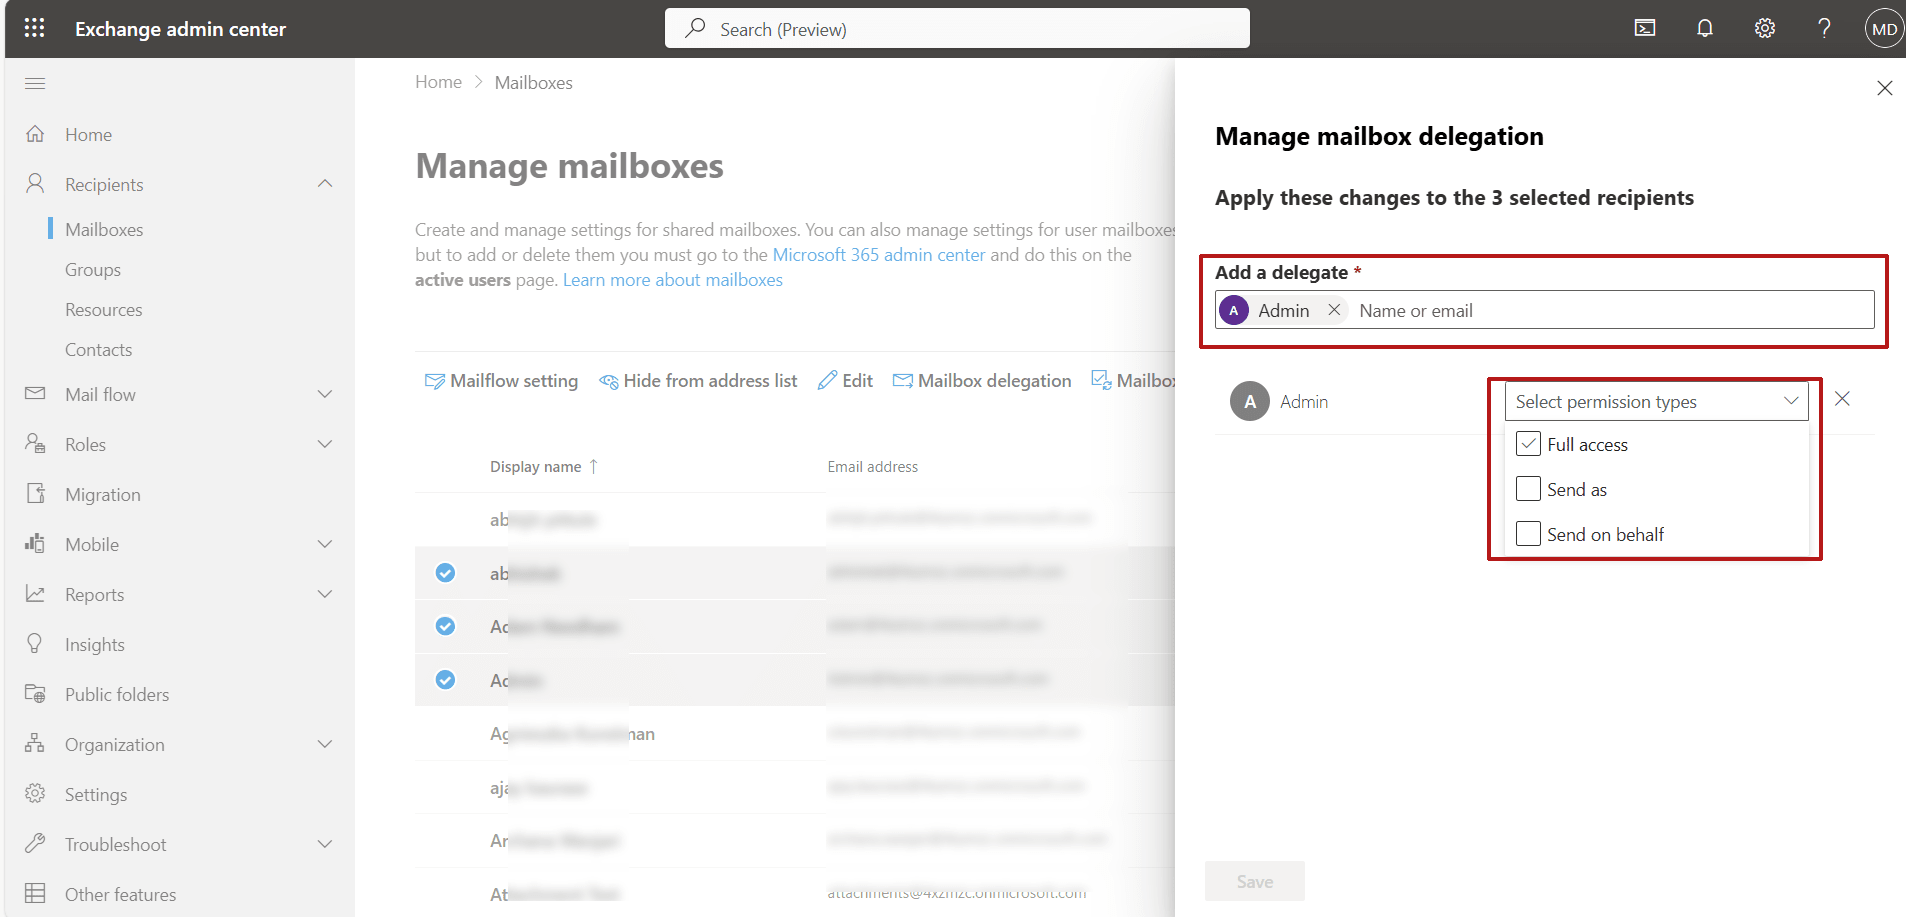
Click on the Save button.
It will show the successful message in a few minutes.
Now, if you have a lot of users, like 50, 100, then this method becomes a bit difficult or lengthy. Here, you can use PowerShell commands to delegate mailboxes to multiple users at once.
Mailbox delegation using PowerShell Cmdlets
Technically, it is a very fastest method to assign roles, manage permissions, users, etc.
For delegation, follow the command below
As a beginner, first install the Exchange Online PowerShell module in Windows PowerShell. If you have already installed it, then you can skip this step.
Run PowerShell as an administrator and execute this command to install a module
Install-Module -Name ExchangeOnlineManagement
Connect to Exchange Online with your admin credentials.
Connect-ExchangeOnline
Delegate a single user mailbox
For full access
Add-MailboxPermission –identity [email protected] -User [email protected] -AccessRights FullAccess
Send As
Add-RecipientPermission -Identity [email protected] -Trustee [email protected] -AccessRights SendAs
Send on Behalf
Set-Mailbox -Identity [email protected] -GrantSendOnBehalfTo [email protected]
Before executing the above command, make sure to replace [email protected] and [email protected] with the original addresses.
Bulk user delegation for the mailbox
First, we need to prepare and save a CSV file. After that, we can follow the below command.
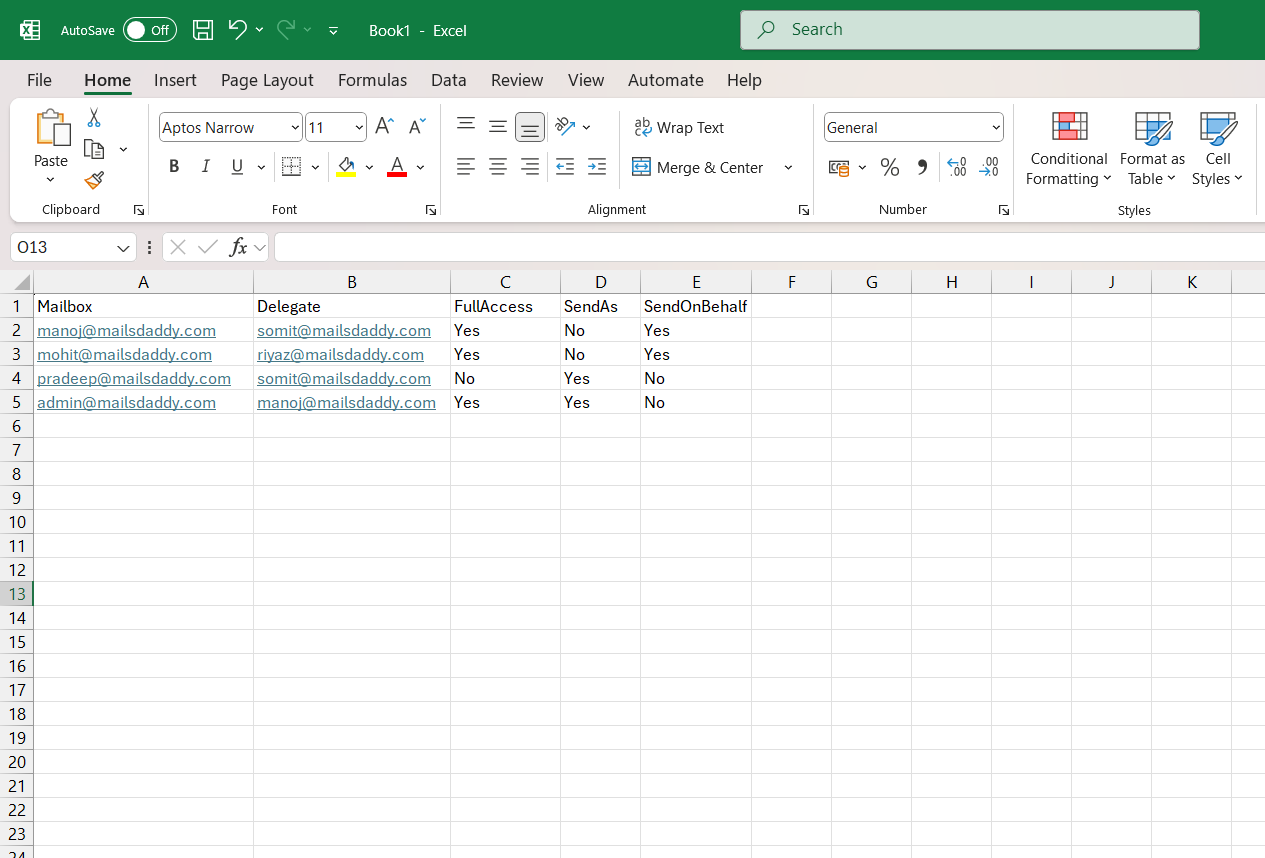
Now run the command
# Load the CSV file
$delegations = Import-Csv -Path "C:\Somit\Desktop\user-delegate.csv"
 foreach ($entry in $delegations) {
 $mailbox = $entry.Mailbox
 $delegate = $entry.Delegate

# Grant Full Access
if ($entry.FullAccess -eq "Yes") {
Add-MailboxPermission -Identity $mailbox -User $delegate -AccessRights FullAccess -InheritanceType All -AutoMapping $false -ErrorAction SilentlyContinue
}

# Grant Send As
if ($entry.SendAs -eq "Yes") {
Add-RecipientPermission -Identity $mailbox -Trustee $delegate -AccessRights SendAs -Confirm:$false -ErrorAction SilentlyContinue
}

# Grant Send on Behalf
if ($entry.SendOnBehalf -eq "Yes") {

# Get existing delegates
$existing = (Get-Mailbox $mailbox).GrantSendOnBehalfTo

# Add new delegate to the list
$updated = $existing + $delegate

# Apply updated list
Set-Mailbox -Identity $mailbox -GrantSendOnBehalfTo $updated -ErrorAction SilentlyContinue
}
}
If you want to give “Full Access” permission to all mailboxes, then run the below command.
Get-Mailbox –ResultSize Unlimited | Add-MailboxPermission –User [email protected] -AccessRights FullAccess
Contact Us
Contact us to migrate Google Workspace to Office 365 or vice versa. We provide expert data migration and ongoing support to ensure minimal disruption.
Google Workspace to Office 365 Migration Service
Conclusion
Mailbox delegation is a priority task in organizations because it can be very difficult to handle multiple requests simultaneously. Adding one or two assistants can make your job much easier.
I have shared the steps for delegating a mailbox in Office 365 using the Exchange Admin Center and PowerShell commands. Now, it depends on the organization how they want to implement it.
PowerShell commands can be a bit tricky for new users, but for experts, it is a simple and quick process. For more information and solutions, follow MailsDaddy on social media or keep visiting our website.
More Aritcles