Migrating from Zoho Mail to Google Workspace can be done using IMAP, but it may not be straightforward for everyone without proper guidance. In this guide, I’ve detailed every aspect of the migration process from Zoho Mail to Google Workspace (formerly G Suite or Gmail). You can follow these steps to transition smoothly to your work environment or cloud platform.
Please note that this method does not support migrating contacts and calendars. If you need to transfer your contacts and calendar data to Google Workspace, you must migrate them separately.
Step-by-Step Migrating Zoho Mail to Google Workspace
Each migration has some pre-requisites that the user needs to fulfill before going to the main part.
Pre-requisites
- Admin Console access: Google Workspace and Zoho Mail
- Set up your Domain in Google Workspace and verify it.
Contact Us
Contact us to migrate Zoho to Google Workspace or vice versa. We have already migrated over 1000 business accounts on various platforms.
Zoho Mail to Google Workspace Migration Service
Part 1: Zoho Mail Setup for Google Workspace
The IMAP server enables users to sync data across platforms. Enabling IMAP for all users in Zoho Mail is essential to facilitate the migration of emails to Google Workspace.
Enable IMAP for single-user
- Open your mail account and click on the settings icon.
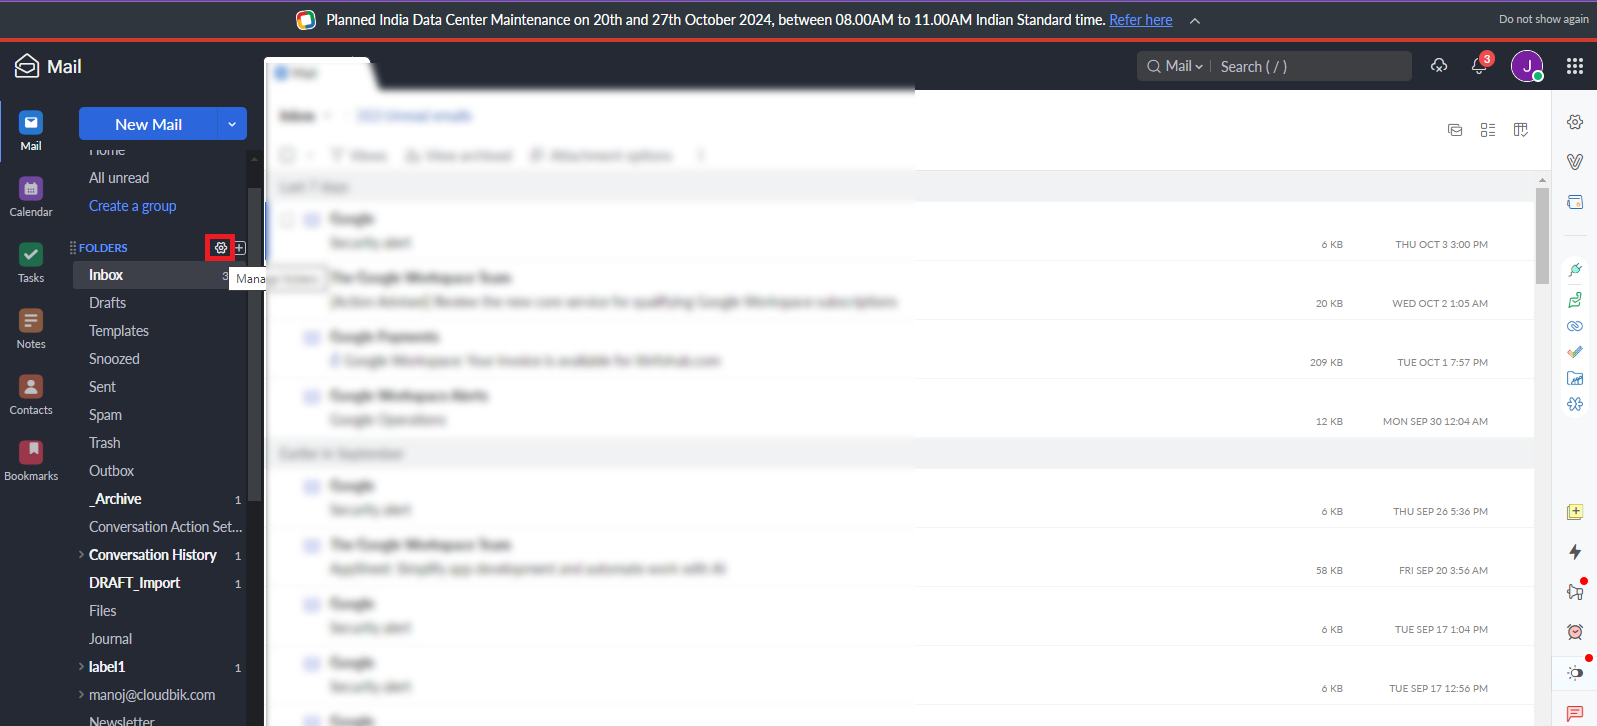
- Scroll down and click on “Mail Accounts”
- Go to the IMAP section and enable IMAP then save it.
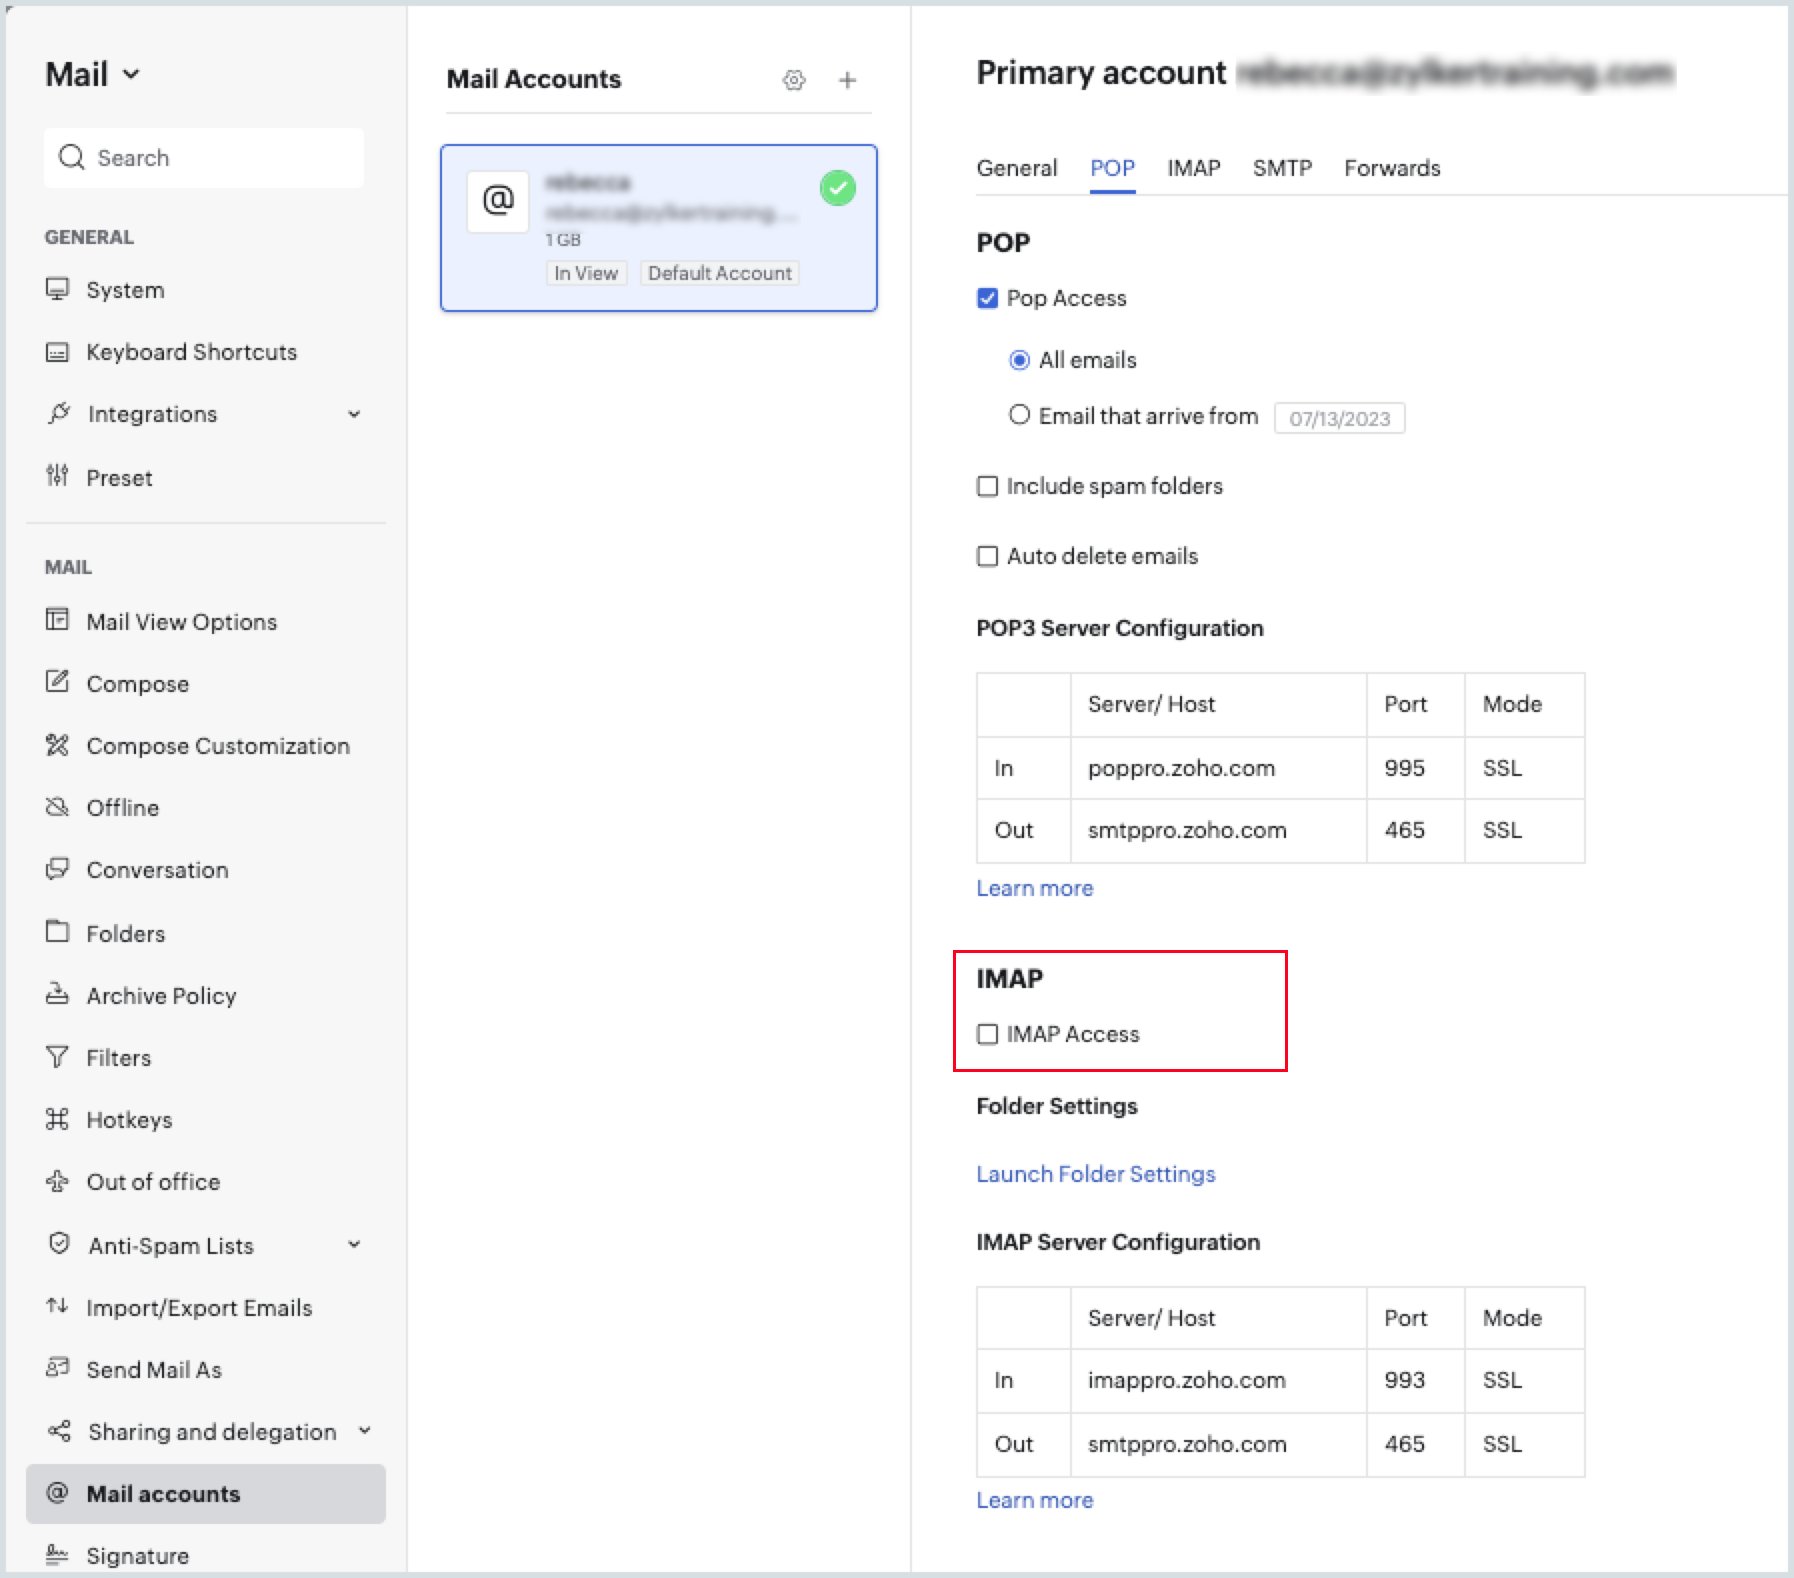
You can follow the above steps to enable IMAP access one by one.
Enabling IMAP for each user manually can be tedious, especially if you have more than 50 or 100 accounts to manage. Fortunately, there’s a more efficient way to enable IMAP for all users at once, streamlining the process significantly.
Enable IMAP for Bulk User
- Log in to Zoho mail with Admin Console detail
- In the Admin console, Go to Mail Setting >> Email Policy
- Click on Create Policy > Type any name for the policy and press on the Create button.

- Go to Restrictions > Click on New Restrictions > Type a name and create it.
- You will see IMAP access and another configuration is already enabled under this restriction. You can also disable it as well.
- Go to policies > Click on Associated Users under the policy.
- Click on the Add button and add all users then press on Proceed button.
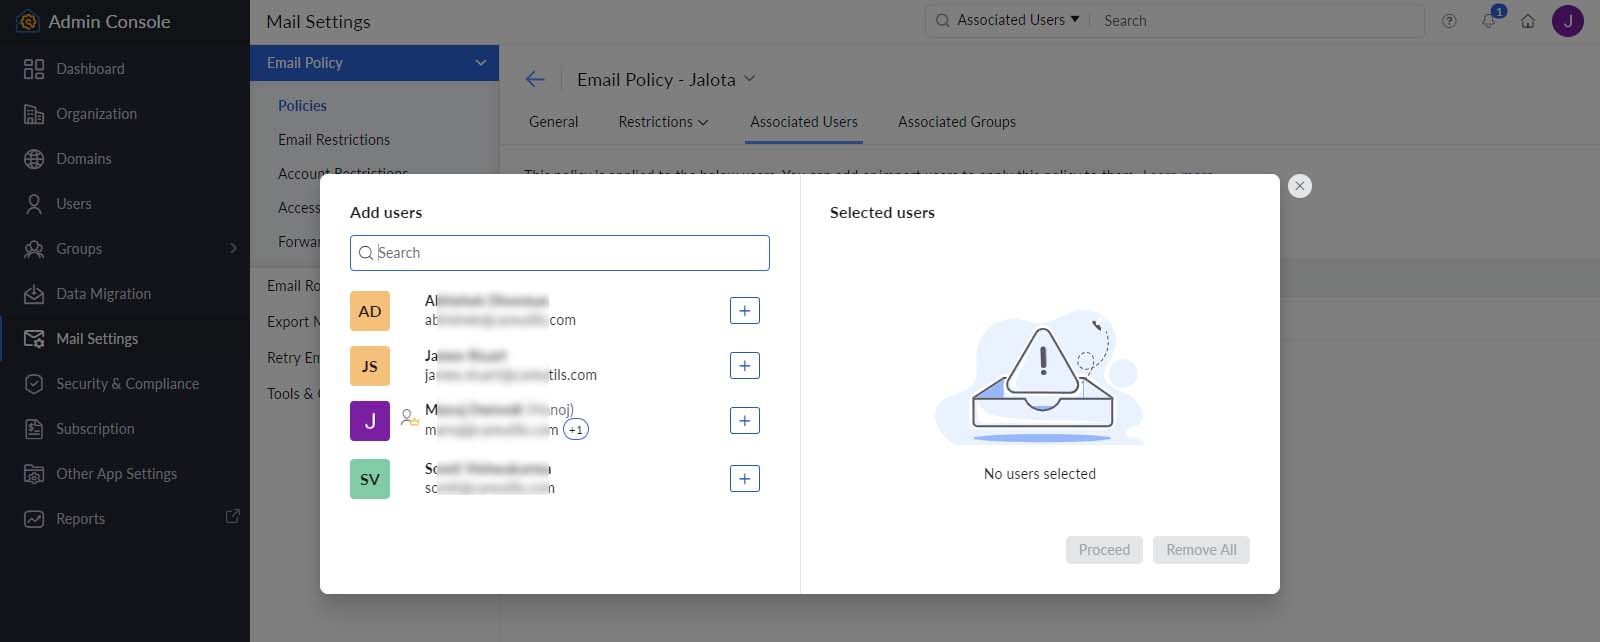
Now your IMAP access has been enabled for all users under the policy.
Part 2: Migration step from Zoho to Google Workspace
- Go to the Google Workspace admin console
- Go to users and create a user.
- Type the details of the user and create the user email address as Zoho or create a different one. Create a password and click on Add then press the Done button.
- You can also import the user details in Bulk using a CSV file.
- Click on Data option > Data import and export then choose Data Migration
You can select a New data migration server or Set up a classic method for Data migration.
New Panel: Data Migration from Zoho Mail to Google Workspace
Click on the Migration option under the IMAP section
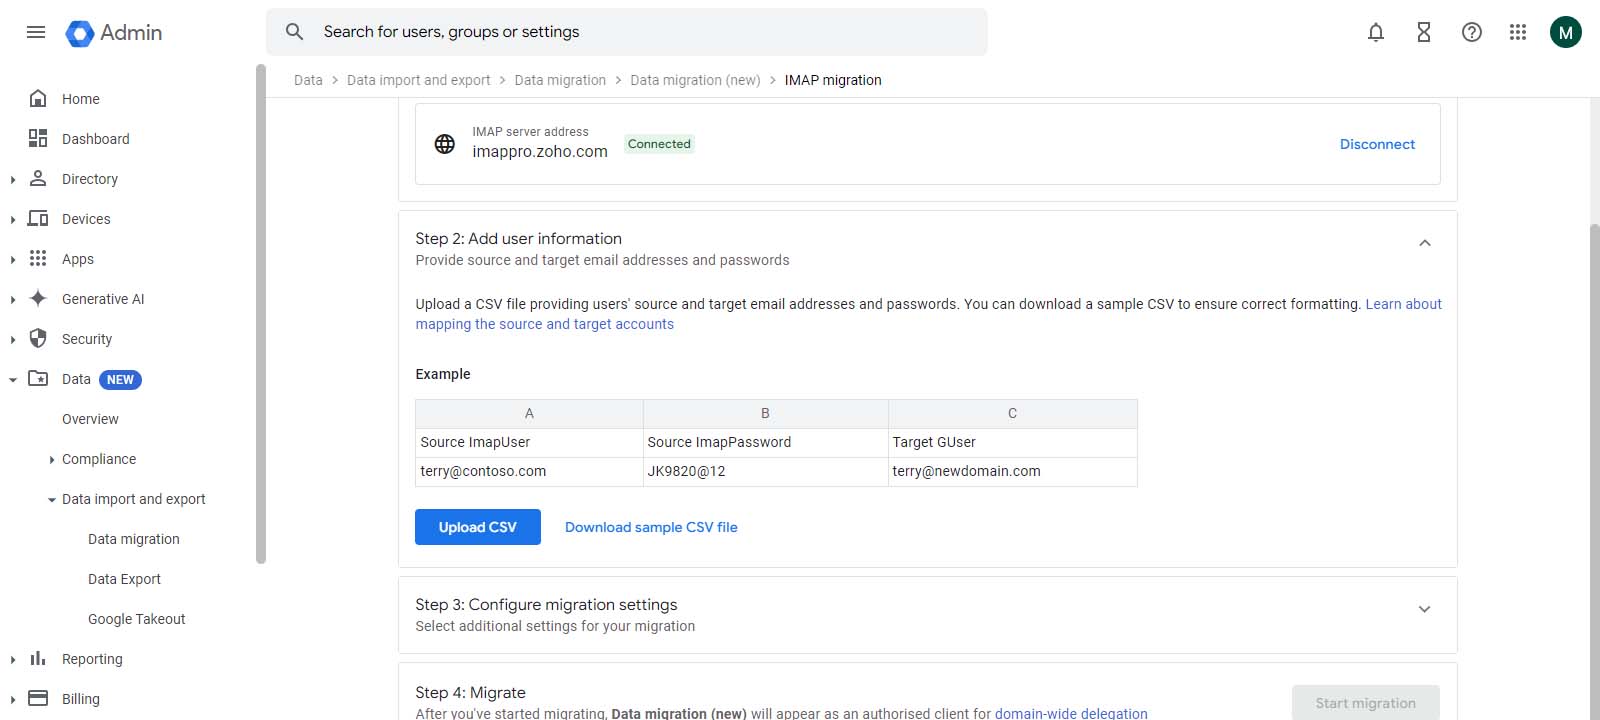
- Type Zoho IMAP server address: imappro.zoho.com > Click on the Test connection button.
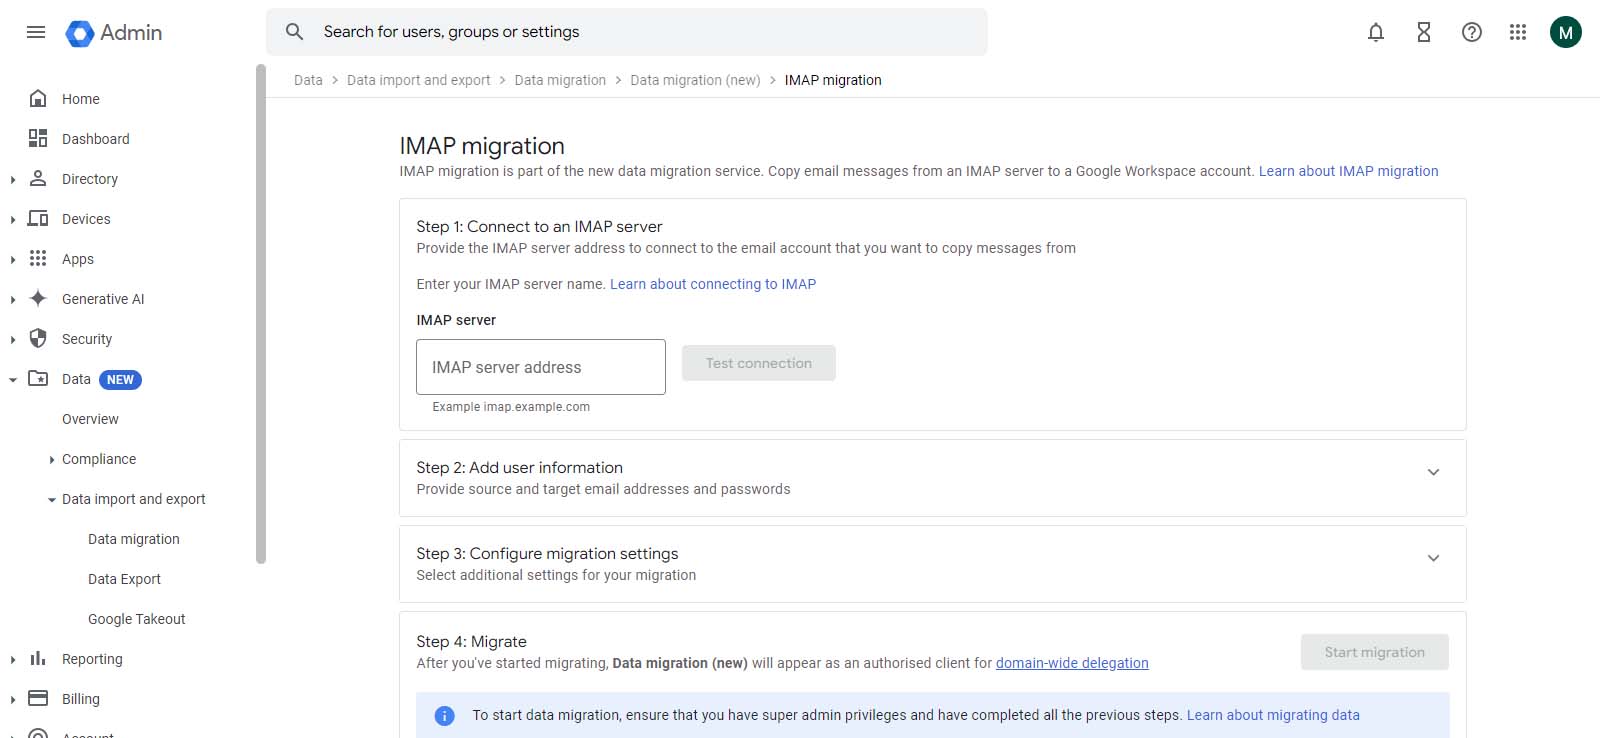
- Add user information: Use a CSV file to map the user from Zoho to Google Workspace.
- Configure migration settings: Set the Email start date from where you want to transfer to the target account.
Also, you can choose message options to include and exclude the migration folder:
Migrate deleted emails, migrate junk emails, and exclude specific folders> click on the Save button, once you have done.
- Migrate: Provide the details of the source user and password to authorize the server detail and get the report as well then click the start migration button.
Classic Panel: Data Migration from Zoho to Gmail
- Click on Set up data migration
- Migration Source: Choose “other IMAP server” in the drop-down.
- Select item: Email
- Connection protocol: IMAP and Type server address: imappro.zoho.com
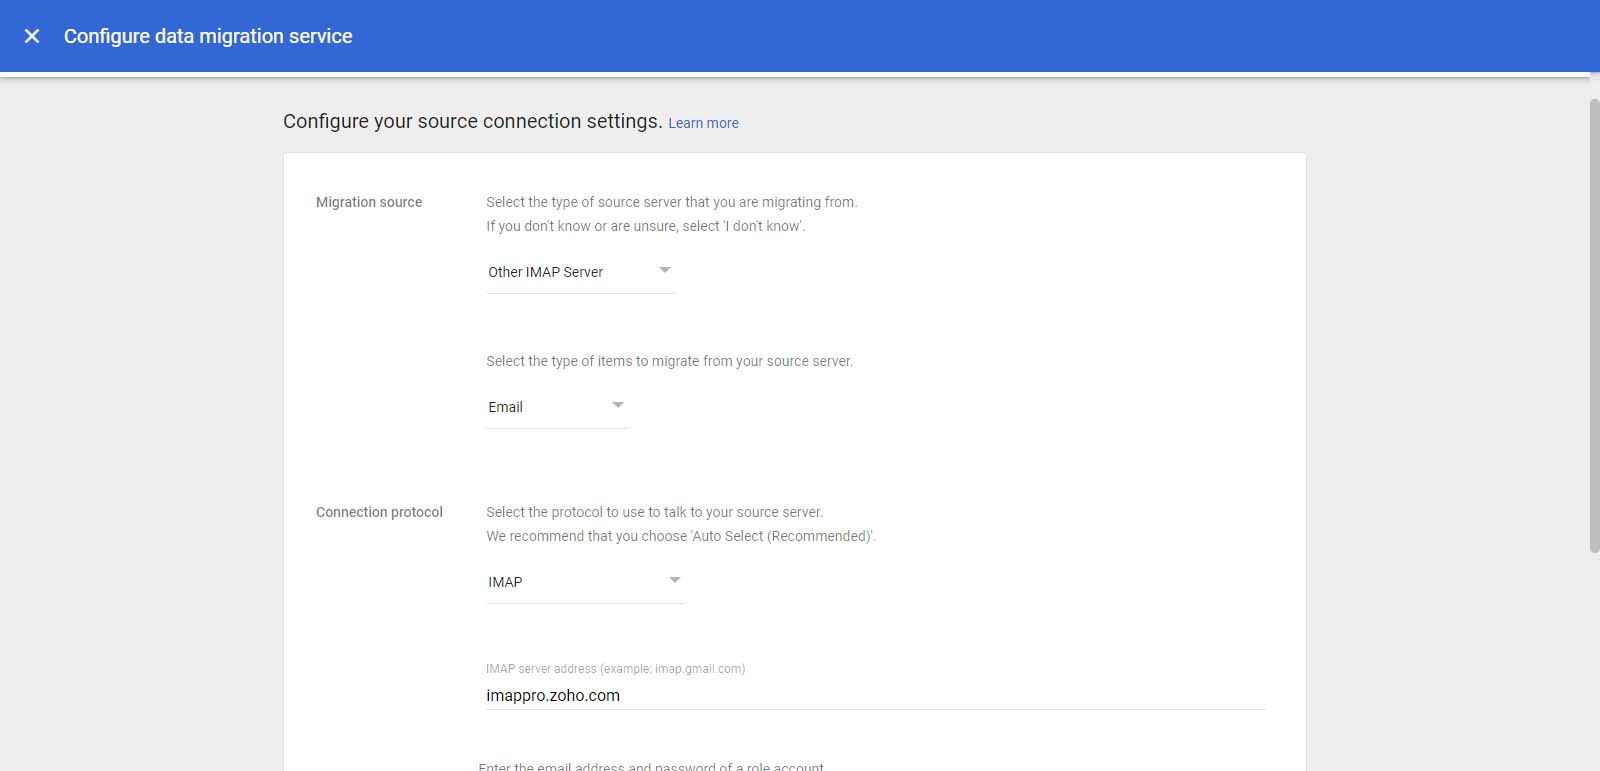
- Role Account: type any source user detail that is used to authorize the migration and receive the reports as well. Admin detail is the most preferred to connect the server.
- Now click on the start button.
- Configure additional setting
- Migration Start date: Click on the drop-down button and select one option or type custom date.
- Migration options: Choose the migration option that you want to include or exclude.
- Press select users
- It will authorize and verify the user to start the migration process.
- Once the server connection has been established. Click on the Add user button and add users one by one or upload a CSV file to upload all at once.
- Press on upload and start migration.
You will the status is initializing. Once it is synced all the emails then the status will be changed to complete.
Now you can log into your Gmail account and verify that emails are successfully imported into it.
Part 3: Update the MX record of Google Workspace
Visit your domain hosting website and log in with your credentials. Navigate to the DNS records section, where you can modify or add the MX record details to update your mail routing. Additionally, you may remove any old records as necessary.
Conclusion
I have stated all the essential steps to migrate your Zoho Mail to a Google Workspace account, including emails and attachments. For migrating contacts and calendars, you can manually export them from Zoho Mail and import them into Google Workspace.
If you found this article helpful, please share it with others. For additional assistance or to have the MailsDaddy team manage your migration for you, contact us today. We have successfully migrated over 1,000 business accounts across various cloud platforms.
Read More: Migrate IMAP Emails to Office 365
Read More: Copy SharePoint Site